
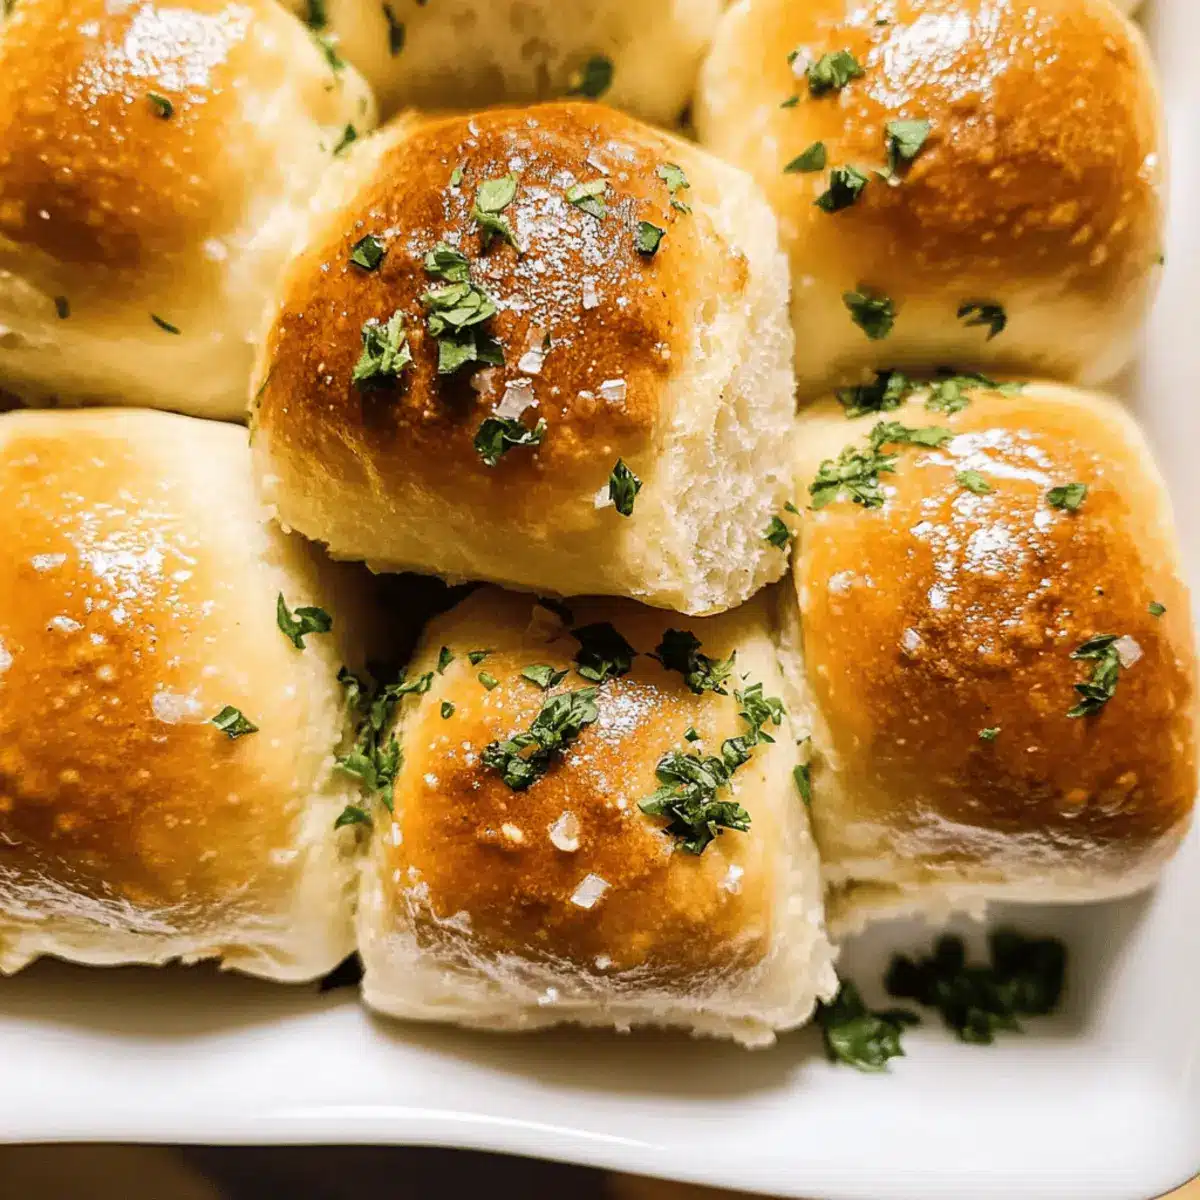
As the scent of freshly baked bread fills my kitchen, I can’t help but feel a wave of nostalgia wash over me. The warmth from those fluffy garlic bread rolls brings back memories of family gatherings around the table, laughter echoing through the air. These homemade delights are not only a comforting addition to any meal but also a fantastic way to impress your guests. With just a few simple ingredients, you can create something soft, fluffy, and bursting with aromatic garlic goodness. Perfect as a side dish for festive occasions like Thanksgiving or Christmas, these rolls fit right into any culinary celebration. Plus, they store beautifully and are freezer-friendly, making meal prep a breeze. Are you ready to treat yourself and your loved ones to this delectable recipe? Let’s dive in!
Why Are These Rolls So Irresistible?
Homemade Comfort: There’s nothing like the cozy warmth of freshly baked garlic bread rolls! They elevate any meal with their rich flavor and fluffy texture.
Easy Preparation: The straightforward recipe means you don’t have to be a master baker to achieve bakery-quality rolls. With just a few basic ingredients, you can create magic!
Versatile Serving Options: Whether paired with a rich pasta like Garlic Chicken Gnocchi or a comforting soup, these rolls are the perfect companion.
Impressive Crowd-Pleaser: Make them for your next gathering, and watch as they disappear in a blink!
Make-Ahead Convenience: Shape the rolls the night before, refrigerate, and bake fresh rolls right before your meal for ultimate ease.
Garlic Bread Rolls Ingredients
For the Dough
• Unsalted Butter – Adds richness and moisture; opt for high-fat European butter for the best flavor.
• Minced Garlic – The key flavor component; always use fresh garlic for a robust taste.
• All-Purpose Flour – Provides the essential structure; accurate measurement is crucial to avoid dense rolls.
• Chopped Fresh Parsley – Adds a pop of herbal freshness; you can substitute it with fresh thyme or oregano if desired.
• Granulated Sugar – Balances the overall flavors; natural alternatives like honey or maple syrup work great too.
• Instant Yeast – Helps the dough rise without prior activation; if using active dry yeast, make sure to activate it in warm milk first.
• Fine Sea Salt – Enhances flavor; it’s important for achieving the perfect taste.
• Whole or 2% Milk – Contributes moisture and richness; warm it up to help activate the yeast.
• Large Egg – Binds the ingredients together and assists in browning; use at room temperature for best results.
For the Topping
• Flaky Sea Salt – An optional finishing touch; adds an extra burst of flavor right before serving.
These Garlic Bread Rolls will become a comforting staple in your home and are perfect for enhancing your holiday meals!
Step‑by‑Step Instructions for Garlic Bread Rolls
Step 1: Prepare Garlic Butter
In a small saucepan, melt 4 tablespoons of unsalted butter with 4 cloves of minced garlic over medium heat, stirring until fragrant, about 2-3 minutes. Remove from heat and allow the mixture to cool slightly before using. This garlic butter will infuse our garlic bread rolls with irresistible flavor, so be sure to let it rest.
Step 2: Mix Dry Ingredients
In the bowl of a stand mixer, combine 3 cups of all-purpose flour, ¼ cup fresh chopped parsley, 2 tablespoons granulated sugar, 2 teaspoons instant yeast, and 1 teaspoon fine sea salt. Use the paddle attachment on low speed to mix these dry ingredients thoroughly, ensuring even distribution of flavors and a solid base for your garlic bread rolls.
Step 3: Knead Dough
Add 1 cup of warmed milk (around 110°F), 1 large egg, and the cooled garlic butter to the dry mixture. Using the dough hook attachment, knead on low speed for 10-12 minutes, or until the dough is smooth and slightly tacky. The dough should pull away from the sides of the bowl easily, indicating it is ready for the next step.
Step 4: Shape Rolls
Once your dough is ready, transfer it to a lightly floured surface and divide it into 12 equal pieces, approximately 67 grams each. Shape each piece into a smooth ball, tucking the edges underneath. Place the rolls into a greased 9×13 baking pan, ensuring they are close together to allow for beautiful rising.
Step 5: First Rise
Cover the pan with a clean kitchen towel and let the rolls rise in a warm, draft-free place until doubled in size, approximately 1-2 hours. Look for the dough to rise visibly; this step is crucial for achieving the light, fluffy texture of the garlic bread rolls that everyone loves.
Step 6: Bake
Preheat your oven to 350°F (175°C). Carefully brush the tops of the risen rolls with an egg wash (beaten egg), giving them a golden color as they bake. Place the pan in the oven and bake for 20-30 minutes, or until the rolls are golden brown and sound hollow when tapped. This is when the mouthwatering aroma fills the air!
Step 7: Final Brush
Once the garlic bread rolls are done baking, remove them from the oven and immediately brush the tops with more melted garlic butter, allowing it to soak into each fluffy roll. For an extra touch, sprinkle with flaky sea salt, if desired, before serving warm. Your homemade garlic bread rolls are now ready to wow your family and guests!
What to Serve with Fluffy Garlic Bread Rolls
Experience the joyous union of flavors as these soft, fluffy delights accompany your favorite meals, transforming any gathering into a feast.
-
Creamy Tomato Soup: The rich, velvety texture of tomato soup is a perfect match for the lightness of garlic bread rolls, offering a delightful contrast. Dipping these warm rolls into hearty soup is a comforting experience that warms the soul.
-
Rich Pasta Dishes: Whether paired with a creamy fettuccine alfredo or a zesty marinara, these rolls balance the flavors with a soft and fluffy touch, making every bite of pasta even more enjoyable.
-
Grilled Chicken Salad: The freshness of a grilled chicken salad brings a crunchy element that harmonizes beautifully with the savory rolls, making for a delicious and satisfying meal. The garlic flavor enhances the salad, bringing everything together.
-
Savory Spinach Artichoke Dip: The warm, cheesy dip is made even more inviting when complemented by these garlic bread rolls. Their fluffy texture soaks up the dip, ensuring every taste is full of flavor.
-
Roasted Vegetables: The caramelized sweetness from roasted carrots, zucchini, and bell peppers pairs beautifully with the garlic bread rolls. Their light crunch and sweetness contrast wonderfully with the soft, fluffy texture of the rolls.
-
Classic Caesar Salad: A Caesar salad’s crisp romaine and tangy dressing perfectly balance the richness of garlic bread rolls. Together, they create an unforgettable dining experience that’s simply irresistible.
-
Craft Beer: Complement these rolls with a refreshing craft beer; the slight bitterness and carbonation enhance the garlicky flavors, making it an ideal pairing. Enjoy the delightful contrast as you sip and savor each bite.
-
Chocolate Lava Cake: For a sweet ending, serve the rolls with a side of molten chocolate lava cake. The rolls can be a fun way to scoop up the rich chocolate, creating a unique dessert experience.
These fluffy garlic bread rolls shine as they enhance meals and create heartwarming moments at your table.
Garlic Bread Rolls Variations & Substitutions
Feel free to get creative and personalize these rolls to suit your taste and dietary needs!
-
Cheesy Twist: Mix in 1/4 cup of shredded parmesan cheese to the dough for an irresistible cheesy flavor. It’s like a flavor-packed hug for your rolls!
-
Herb Blend: Swap fresh parsley for a mix of rosemary and thyme for a more aromatic experience. These fragrant herbs will elevate your rolls, making them a true culinary delight.
-
Spicy Kick: Add a pinch of crushed red pepper flakes to the garlic butter for a gentle heat. This small adjustment can make your garlic bread rolls excitingly bold and flavor-packed!
-
Vegan Option: Substitute unsalted butter with vegan butter and replace the egg with a flaxseed egg (1 tablespoon ground flaxseed + 2.5 tablespoons water). You won’t miss the animal products, and your friends will love them!
-
Mini Rolls: Shape the dough into smaller, bite-sized pieces for delightful garlic bread bites. They’re perfect for parties and pair beautifully with a dipping sauce.
-
Garlic Herb Oil: Instead of garlic butter, brush the rolls with garlic-infused olive oil before baking. This gives each roll a light and aromatic taste that’s delectable and dairy-free.
-
Sweet & Savory: Add a tablespoon of honey to the dough to give a slightly sweet undertone. These rolls become an exciting contrast alongside savory dishes like Garlic Butter Steak or hearty soups.
-
Stuffed Version: Take your garlic bread rolls to the next level by stuffing them with a dollop of herbed cream cheese or mozzarella before baking. The gooey surprise inside will make these rolls an instant favorite!
By incorporating these variations, you’ll discover new dimensions to your garlic bread rolls, making them even more irresistible for any gathering or weeknight meal. For serving ideas, consider pairing them with something comforting like Garlic Butter Shrimp or alongside a vibrant salad!
How to Store and Freeze Garlic Bread Rolls
Room Temperature: Store leftover garlic bread rolls in an airtight container at room temperature for up to 3 days to maintain their soft and fluffy texture.
Fridge: If you prefer chilling them, you can keep the rolls in the fridge for about a week. To prevent them from drying, wrap them tightly in plastic wrap or place them in a sealed container.
Freezer: For longer storage, freeze the garlic bread rolls in a single layer on a baking sheet. Once frozen, transfer them to a freezer bag or airtight container. They will keep well for up to 3 months.
Reheating: To reheat, simply let them thaw in the fridge overnight, then warm in a preheated oven at 350°F (175°C) for about 5-10 minutes, or until heated through, retaining their delicious flavor and texture.
Make Ahead Options
These Garlic Bread Rolls are perfect for busy home cooks who want to save time without sacrificing flavor! You can shape the rolls up to 24 hours in advance and refrigerate them until you’re ready to bake. Simply follow the steps to prepare the dough and place the shaped rolls in a greased pan, then cover with plastic wrap to prevent drying out. When you’re ready to serve, take them out of the fridge to rise at room temperature for about 30-45 minutes before brushing with an egg wash and baking. This prep-ahead method ensures that your rolls are just as fluffy and delicious, making mealtime effortless and enjoyable!
Expert Tips for Garlic Bread Rolls
-
Precision Matters: Use a kitchen scale to ensure your flour measurements are accurate. This will prevent overly dense garlic bread rolls and guarantee the perfect texture.
-
Don’t Rush Rising: Allow your dough to rise fully until it has doubled in size. Rushing this process can lead to flat rolls and a disappointed family.
-
Keep an Eye on Proofing: Avoid over-proofing the dough. If it rises too much, the yeast can exhaust itself and cause your rolls to collapse during baking.
-
Fresh Ingredients: Always opt for fresh minced garlic and chopped herbs to infuse a robust flavor into your garlic bread rolls, making them truly irresistible.
-
Use Room Temperature Egg: For a better mix and rise, ensure your egg is at room temperature before adding it to the dough. This helps create that fluffy texture we all adore.
Garlic Bread Rolls Recipe FAQs
What kind of garlic should I use for the rolls?
Absolutely, using fresh minced garlic is key for the most robust flavor! Avoid garlic powder or jarred garlic if possible, as they won’t deliver the same aromatic kick that fresh garlic provides.
How should I store leftover garlic bread rolls?
To keep your garlic bread rolls at their best, store them in an airtight container at room temperature for up to 3 days. If you have extras beyond that, wrap them tightly in plastic wrap before refrigerating to maintain moisture and freshness for about a week.
Can I freeze the garlic bread rolls for later use?
Of course! To freeze, first place the rolls in a single layer on a baking sheet and freeze until solid (about 1-2 hours). Then, transfer them to a freezer bag or airtight container, where they’ll stay fresh for up to 3 months. When you’re ready to enjoy them, thaw them in the fridge overnight and reheat in the oven for a delightful treat.
What can I do if my dough doesn’t rise properly?
If your dough isn’t rising, check the yeast for freshness. Instant yeast typically lasts a long time, but if it’s been sitting in your cupboard for too long, it may not activate. Make sure your milk is warm (about 110°F) but not hot, as too much heat can kill the yeast. Allow the dough to rise in a warm, draft-free place for the best results.
Are these rolls suitable for individuals with allergies?
These garlic bread rolls contain common allergens like gluten (in flour) and dairy (in butter and milk). If you’re making them for someone with dietary restrictions, consider using gluten-free flour or dairy-free substitutes, such as almond milk and coconut oil, though the texture may vary slightly.
How long do these rolls last? Can I make them ahead?
For top-notch freshness, keep them in an airtight container for up to 3 days at room temperature. If you want to prepare ahead, shape the rolls, place them in the pan, cover with plastic wrap, and refrigerate overnight. Then, allow them to rise at room temperature before baking in the morning for warm, fluffy goodness!
Irresistibly Fluffy Garlic Bread Rolls for Every Occasion
Ingredients
Equipment
Method
- In a small saucepan, melt the unsalted butter with minced garlic over medium heat, stirring until fragrant, about 2-3 minutes. Allow to cool slightly.
- In a stand mixer bowl, combine flour, parsley, granulated sugar, yeast, and salt. Use the paddle attachment on low speed to mix.
- Add warmed milk, egg, and cooled garlic butter to the dry mixture. Knead on low speed for 10-12 minutes until smooth and slightly tacky.
- Transfer the dough to a floured surface, divide into 12 equal pieces, and shape into balls. Place in a greased baking pan.
- Cover the pan and let the rolls rise in a warm place until doubled in size, about 1-2 hours.
- Preheat the oven to 350°F. Brush the tops of the risen rolls with an egg wash and bake for 20-30 minutes until golden brown.
- Immediately brush tops with melted garlic butter after baking and sprinkle with flaky sea salt if desired.
Leave a Reply