
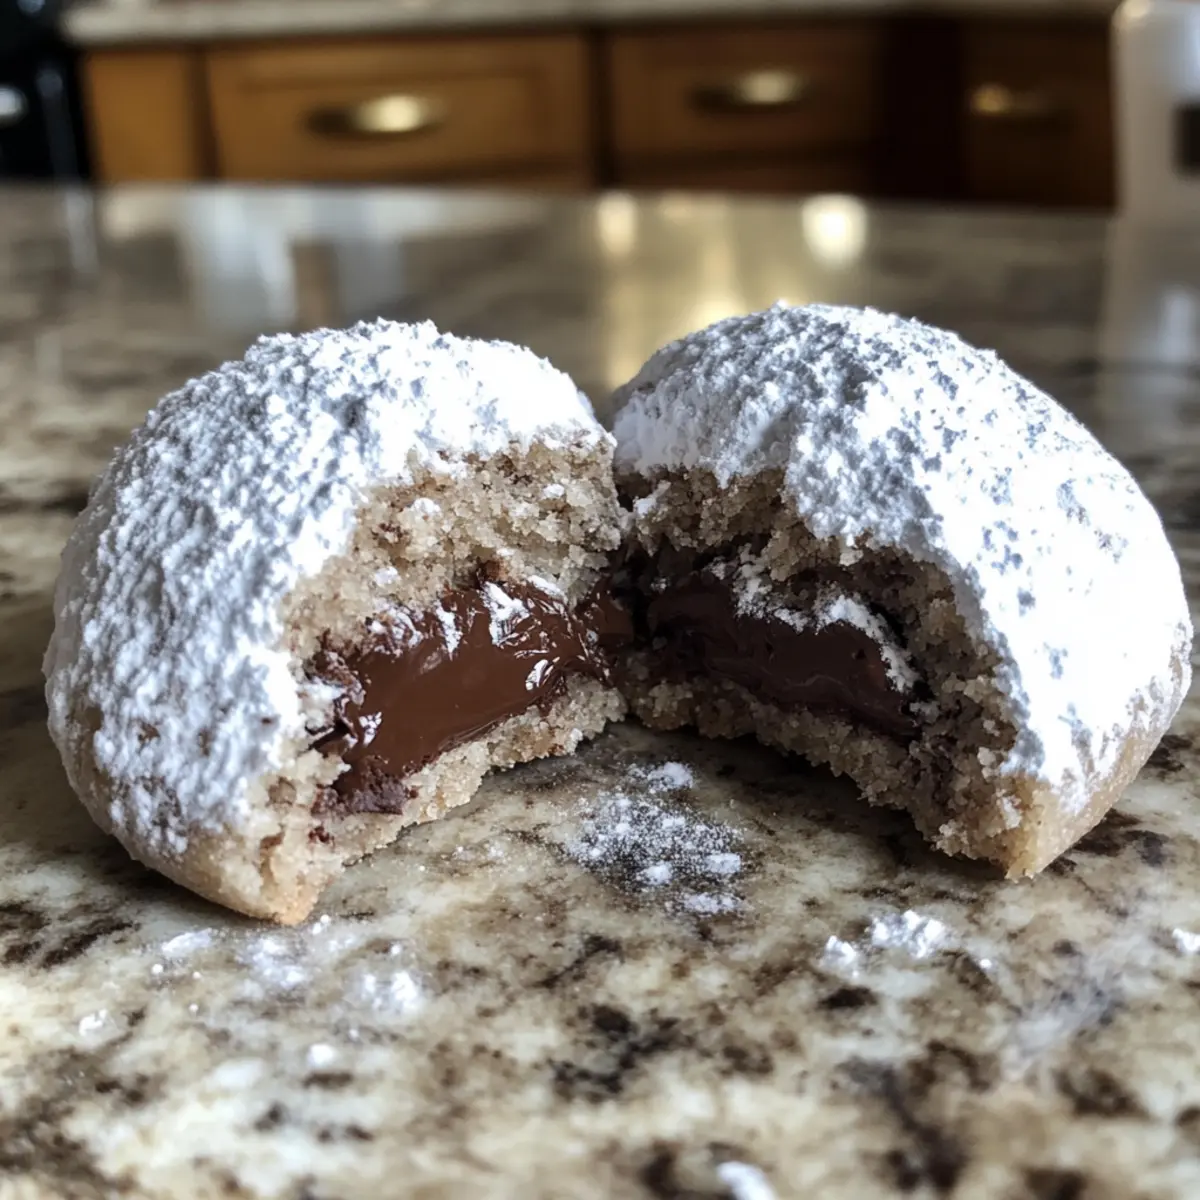
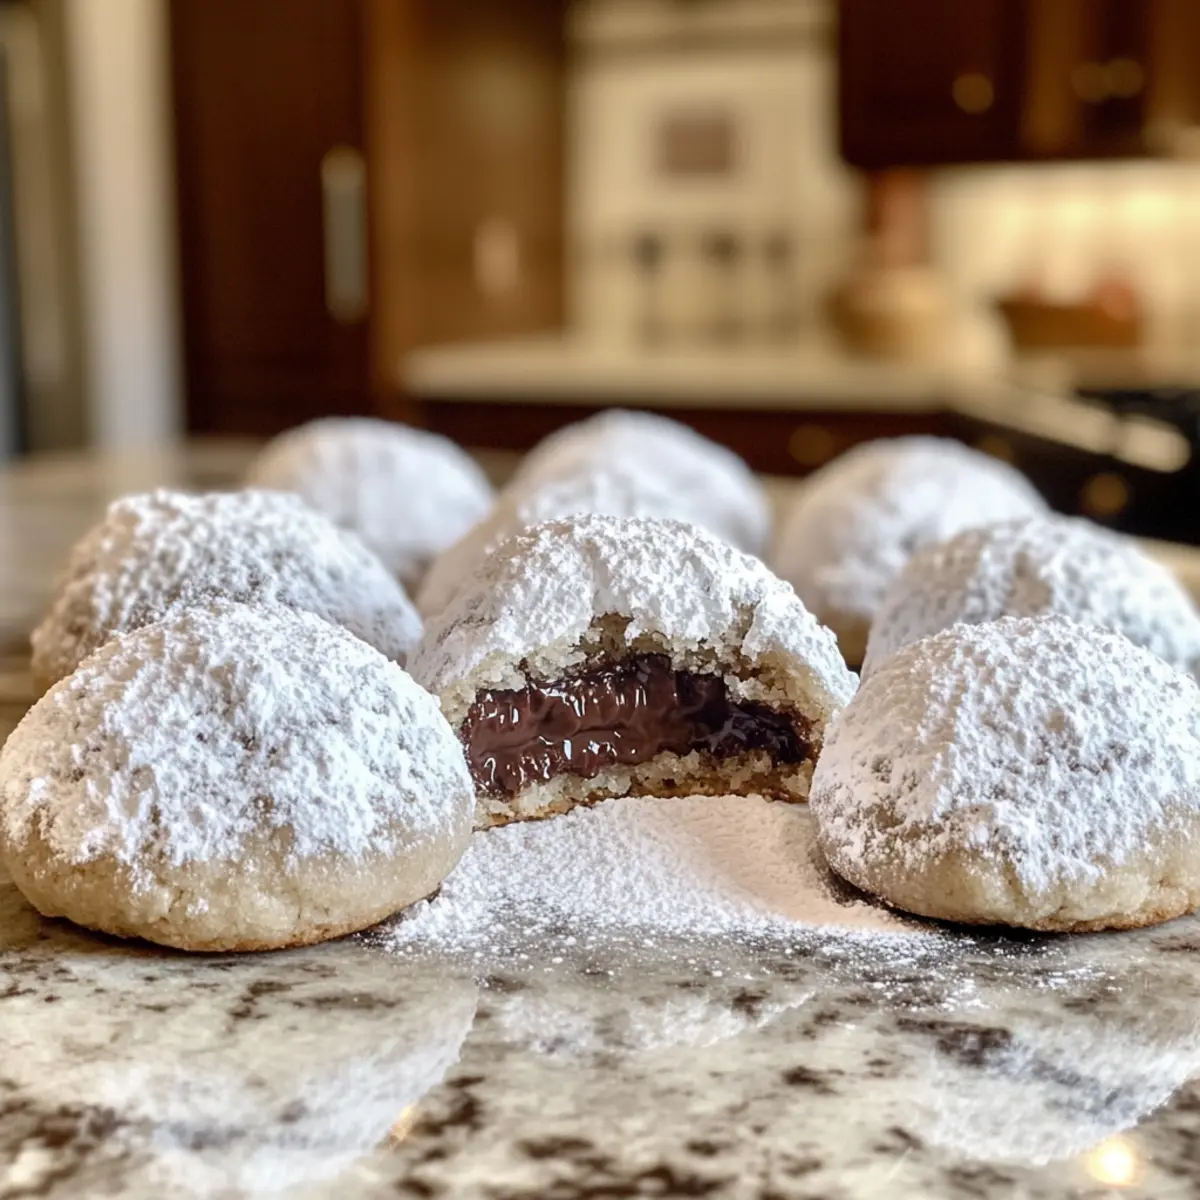
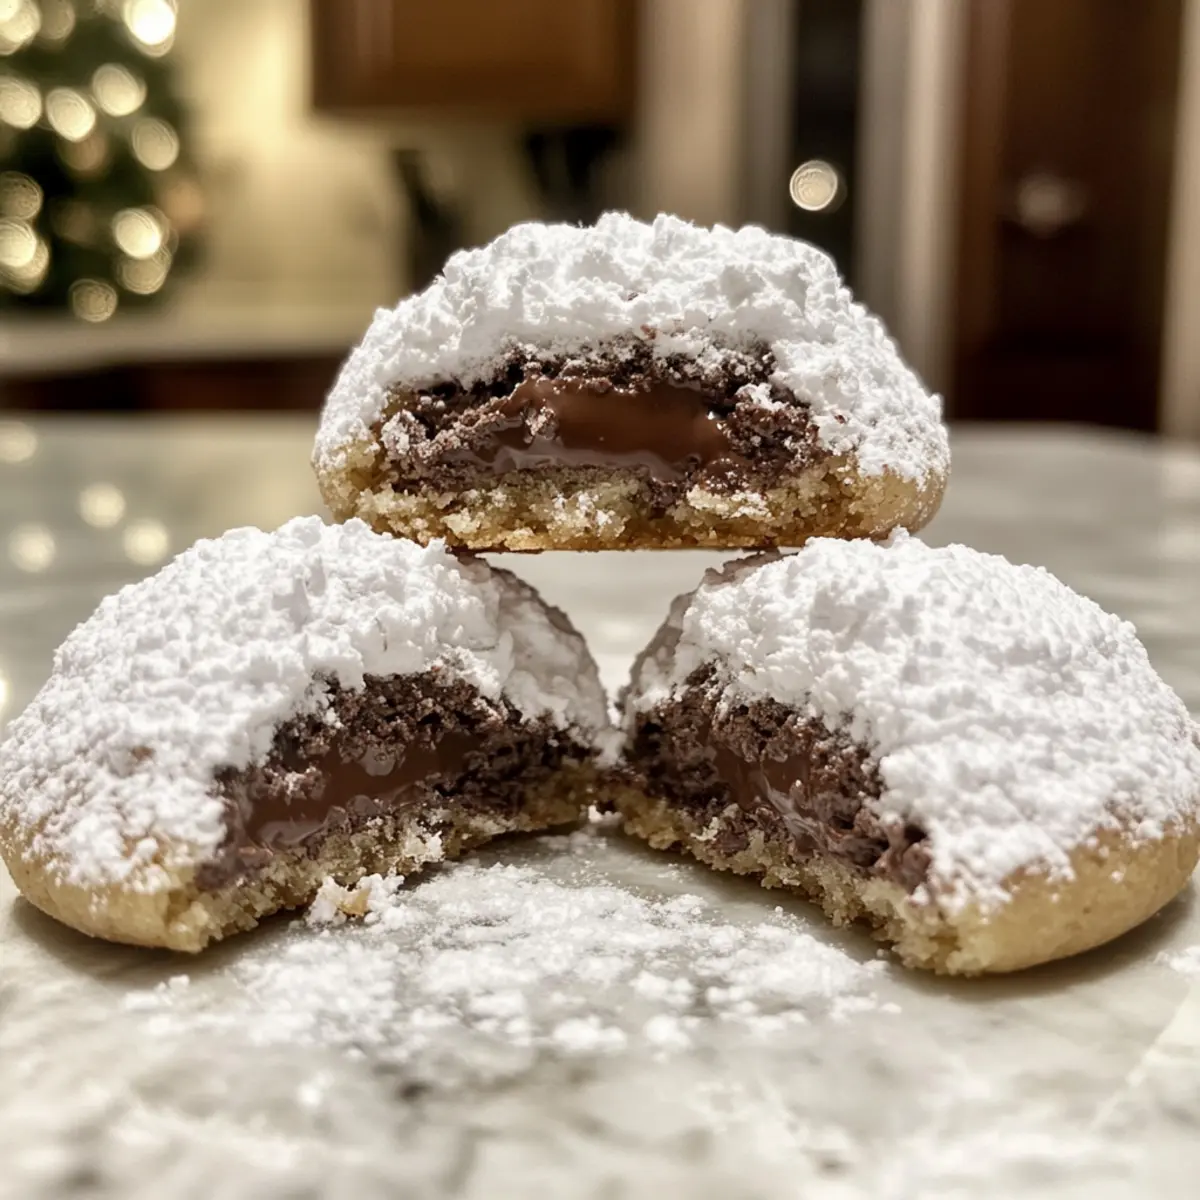
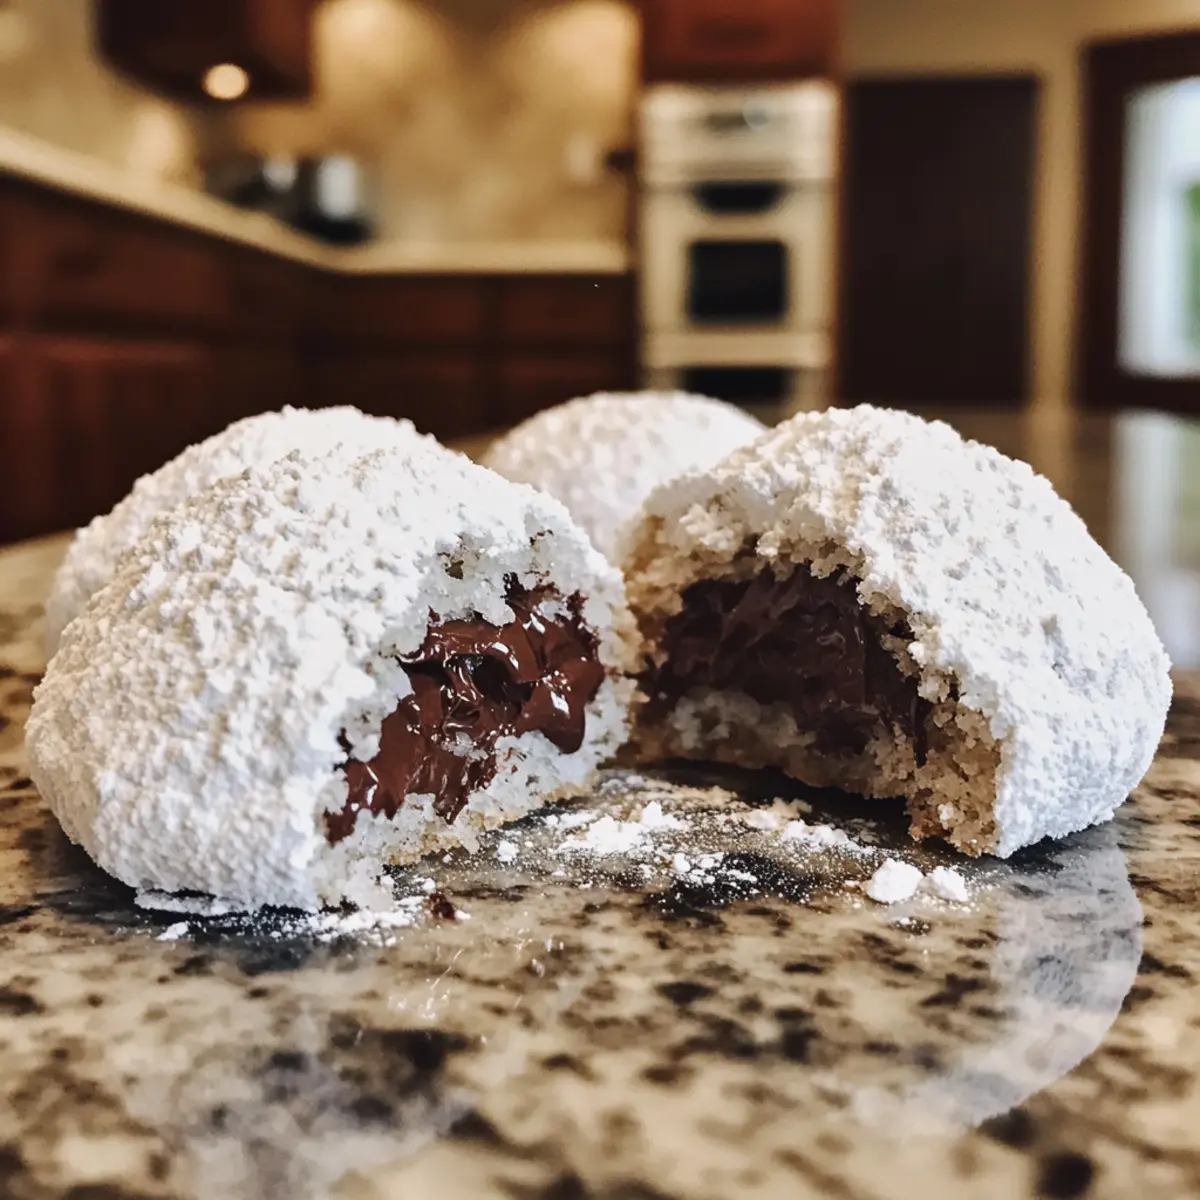
The moment I pulled those freshly baked Chocolate Snowball Cookies from the oven, a wave of joy washed over me. Imagine cracking through a delicate, powdery exterior to discover a gooey chocolate center that beckons you for just one more bite. These delightful cookies are a staple in my kitchen, especially during the holiday season, thanks to their effortless prep and inviting charm. Not only do they look enchanting dusted in powdered sugar, but they serve as a heartwarming treat to share with loved ones, making them a true crowd-pleaser. Whether you’re a seasoned baker or just experimenting, these Chocolate Snowball Cookies with Melted Chocolate Centers are bound to warm your heart and fill your home with sweet aromas. Are you ready to get baking and create your very own cozy memories?
Why Are These Cookies Irresistible?
Decadent Chocolate Center: The hidden gooey chocolate within each cookie offers a rich surprise that will have everyone coming back for seconds.
Adaptable Recipe: With the option to swap ingredients like different chocolate types or nuts, you can easily personalize these cookies to your taste, just like those delightful Chocolate Oat Cookies.
Festive Appeal: Perfectly dusted with powdered sugar, they are not only delicious but also visually stunning, making them an ideal holiday treat to impress your guests.
Quick and Easy: You’ll love how straightforward the recipe is—whip up a batch in no time, perfect for when unexpected guests pop by!
Memorable Moments: Engage friends and family in the baking process, creating lasting memories over these charming delights.
Chocolate Snowball Cookies Ingredients
For the Cookie Dough
• Unsalted Butter – Adds richness and moisture; margarine can be used as a substitute if needed.
• Granulated Sugar – Provides sweetness and aids in browning; no substitutions are suggested.
• Pure Vanilla Extract – Adds depth of flavor; imitation vanilla extract can be used if necessary.
• All-Purpose Flour – Provides the cookie structure; a 1:1 gluten-free flour blend can work as an alternative, although texture may vary.
• Cocoa Powder – Contributes to the chocolate flavor and color; no substitutions are recommended.
• Salt – Enhances flavor balance; it’s essential for taste.
• Baking Powder – Helps cookies rise; no substitutions needed.
For the Chocolate Center
• Chocolate Chunks – Creates that gooey center that makes these cookies special; consider using miniature Dove chocolates or Hershey’s Kisses for variation.
For the Finish
• Powdered Sugar – For rolling the cookies, it gives a classic snowy appearance; it’s essential for presentation.
• Chopped Pecans or Walnuts (optional) – Adds a delightful crunch and nutty flavor; shredded coconut can be used for a different texture if desired.
Step‑by‑Step Instructions for Chocolate Snowball Cookies with Melted Chocolate Centers
Step 1: Prep the Dough
Begin by creaming together ½ cup of softened unsalted butter with ¼ cup granulated sugar and ½ cup powdered sugar in a large mixing bowl. Use an electric mixer on medium speed until the mixture is light and fluffy, approximately 2-3 minutes. Once fluffy, add in 1 teaspoon of pure vanilla extract and mix until just incorporated, creating a rich and creamy base for your Chocolate Snowball Cookies.
Step 2: Combine Dry Ingredients
In a separate bowl, whisk together 1 cup all-purpose flour, ⅓ cup cocoa powder, ¼ teaspoon salt, and ½ teaspoon baking powder. Mix the dry ingredients thoroughly to avoid clumps, ensuring your Chocolate Snowball Cookies will have a smooth texture. Gradually add the dry mixture to the creamy butter mixture, stirring gently until just combined. Avoid overmixing to keep the cookies light and tender.
Step 3: Optional Nut Addition
If you decide to enhance your Chocolate Snowball Cookies with a bit of crunch, fold in ½ cup of chopped pecans or walnuts now. The nuts will add a delightful contrast to the gooey chocolate center. Make sure they are evenly distributed throughout the dough for a consistent texture in each bite, adding a rich flavor component that complements the chocolate beautifully.
Step 4: Chill Dough
Once your dough is ready, wrap it in plastic wrap and refrigerate for at least 30 minutes. Chilling the dough is crucial, as it firms up the mixture, making it easier to shape the cookies and ensuring they maintain their form while baking. You’ll know it’s ready when it’s firm to the touch but still slightly pliable, a crucial step for achieving perfect Chocolate Snowball Cookies.
Step 5: Shape Cookies
Preheat your oven to 350°F (175°C) while the dough chills. After chilling, scoop tablespoon-sized portions of dough and roll them into balls between your hands. Press a chocolate chunk or a piece of your choice into the center of each ball, ensuring it is fully enclosed within the dough to create that divine melted chocolate center that defines these Chocolate Snowball Cookies.
Step 6: Bake
Place the shaped cookies on a baking sheet lined with parchment paper, spacing them about 2 inches apart. Bake them in the preheated oven for 10-12 minutes. They will look slightly set around the edges but remain soft in the center. This visual cue indicates they are perfectly baked while still allowing that gooey center to develop as they cool.
Step 7: Cooling and Coating
After baking, remove the cookies from the oven and let them cool on the baking sheet for 5 minutes. This brief cooling period allows the cookies to firm up slightly. Once they’re cool enough to handle, roll each one in a generous coating of powdered sugar while still warm to give them a beautiful snowball appearance. These Chocolate Snowball Cookies with Melted Chocolate Centers are best enjoyed warm for that delightful gooeyness!
Chocolate Snowball Cookies Variations
Feel free to delight in the endless ways you can personalize these enchanting cookies to suit your taste and mood.
-
Dairy-Free: Use coconut oil and dairy-free chocolate for a deliciously indulgent treat everyone can enjoy.
-
Nut-Free: Swap chopped nuts for sunflower seeds or leave them out entirely for a safe, nut-free version that still crunches beautifully.
-
Spicy Twist: Add a pinch of cayenne pepper or cinnamon to the dough for a surprising warmth and festive flair. These subtle spices can awaken the senses!
-
Herbal Notes: Infuse the dough with a teaspoon of rosemary or lavender for a fragrant twist that elevates the cookie experience. You might just find a new favorite flavor combination!
-
Flavored Chocolate Centers: Try filling the cookies with caramel or raspberry chocolate for a fruity surprise in each bite, or experiment with different chocolate types like dark, milk, or white chocolate.
-
Add Zest: Incorporate a touch of orange or lemon zest into the dough to brighten the flavors and give a refreshing contrast to the rich chocolate.
-
Gluten-Free: Swap regular flour for a 1:1 gluten-free flour blend to create a delightful version that suits gluten-sensitive friends without sacrificing flavor. Baking should be fun for everyone!
Each variation invites creativity, just like my beloved Chocolate Chip Banana Bread or those delightful High Protein Chocolate Puddings. Enjoy experimenting!
Expert Tips for Chocolate Snowball Cookies
• Chill for Best Results: Ensure your dough is well-chilled for easier shaping and to prevent spreading during baking—this is crucial for achieving those delightful Chocolate Snowball Cookies.
• Monitor Baking Time: Keep an eye on the baking time; slightly underbaking will help maintain that gooey center, while overbaking can lead to dry cookies.
• Choose Quality Chocolate: Use high-quality chocolate chunks for the center; it makes a significant difference in flavor and gooeyness, enhancing your Chocolate Snowball Cookies experience.
• Don’t Skip the Powdered Sugar: Rolling the cookies in powdered sugar while warm is essential—not just for appearance, but for that sweet, signature melt-in-your-mouth texture.
• Experiment with Flavors: Feel free to get creative by adding spices or extracts to enhance the flavor; peppermint extract would give a festive twist to your Chocolate Snowball Cookies.
Make Ahead Options
These Chocolate Snowball Cookies with Melted Chocolate Centers are perfect for meal prep, making your holiday baking a breeze! You can prepare the cookie dough and refrigerate it for up to 24 hours, ensuring that it’s flavorful and easy to shape. Simply wrap the dough tightly in plastic wrap to prevent any drying out before chilling. If you prefer to get even more ahead, form the dough balls and freeze them for up to 3 months. When you’re ready to enjoy these cookies, bake them straight from the freezer, adding an extra minute or two to the baking time. This way, you’ll have freshly baked, gooey chocolate-filled delights with minimal effort!
What to Serve with Chocolate Snowball Cookies with Melted Chocolate Centers?
Indulge in a wonderful assortment of treats that beautifully complement the exquisite flavors of these delightful cookies.
- Spiced Tea: The warm, aromatic spices in a cup of spiced tea enhance the chocolate, creating a cozy pairing for chilly evenings.
- Mulled Wine: This rich, fruity beverage brings a festive spirit to your gathering, balancing the sweetness of the cookies with its spiced warmth.
- Fresh Berries: Juicy raspberries or strawberries not only add a pop of color but also a refreshing tartness that cuts through the richness of the cookies.
- Vanilla Ice Cream: A scoop of creamy vanilla ice cream offers a luscious contrast, providing a cool and soothing texture alongside the warm cookies.
- Chocoholic Milkshake: Blend up a chocolate milkshake for those who can’t get enough cocoa; its creaminess pairs perfectly with the melted chocolate center.
- Nutty Fruit Salad: A mix of your favorite fruits with a sprinkle of chopped nuts adds a refreshing crunch, balancing the cookies’ fudgy softness.
- Coffee: A rich espresso or cup of coffee perfectly contrasts the sweet chocolate cookies, enhancing their flavor while providing a caffeine boost.
- Caramel Sauce: Drizzling warm caramel over the cookies creates an indulgent experience, adding another layer of sweetness that’s hard to resist.
- Whipped Cream: A dollop of freshly whipped cream on the side offers a light, airy element to the rich chocolate delight.
How to Store and Freeze Chocolate Snowball Cookies
Room Temperature: Store uncoated cookies in an airtight container for up to 1 week to maintain freshness; keep them out of direct sunlight.
Fridge: For cookies that may not be eaten quickly, refrigerate them in an airtight container for up to 10 days; reheat to restore gooeyness.
Freezer: Freeze formed dough balls for up to 3 months; wrap tightly in plastic wrap and place in a freezer-safe bag. Thaw overnight in the fridge before baking.
Reheating: To revive the cookies’ gooey chocolate center, microwave baked cookies for 5-10 seconds if they’ve cooled down. Enjoy your Chocolate Snowball Cookies warm!
Chocolate Snowball Cookies with Melted Chocolate Centers Recipe FAQs
How do I select the right chocolate for the centers?
Absolutely! When choosing chocolate for the gooey centers of your Chocolate Snowball Cookies, opt for high-quality chocolate chunks or bars. Look for chocolate with a cocoa content of around 60-70% for a rich flavor. You can also try using semi-sweet chips or even alternative chocolates like milk or dark chocolate, depending on your preference!
What are the best storage methods for these cookies?
To keep your Chocolate Snowball Cookies fresh, store them in an airtight container at room temperature for up to 1 week. If you’d like to extend their life, refrigerate them for up to 10 days, but remember to reheat them in the microwave for 5–10 seconds to restore their gooey center.
Can I freeze the cookie dough?
Absolutely! Freezing the dough is a fantastic way to have these delectable treats on hand. After forming the dough balls, wrap them tightly in plastic wrap and place them in a freezer-safe bag. They can be stored in the freezer for up to 3 months. When you’re ready to bake, simply thaw them in the refrigerator overnight and then follow the normal baking instructions.
What can I do if my cookies spread too much during baking?
Very! If your Chocolate Snowball Cookies spread too much, it could be due to the dough being too warm or not chilled properly. Here’s a step-by-step for troubleshooting: First, make sure your butter is softened but not melted. Chill the dough for at least 30 minutes before baking, and avoid overmixing when combining the wet and dry ingredients. If they’re already baked and you’ve ended up with spread cookies, you can still enjoy them as “cookie bars,” but note that the gooiness might be less defined!
Can I make these cookies gluten-free?
Of course! To make your Chocolate Snowball Cookies gluten-free, simply substitute the all-purpose flour with a 1:1 gluten-free flour blend. This will work well in maintaining a similar texture, though the cookies might have a slightly different mouthfeel. Just make sure the other ingredients, especially the baking powder and chocolate, are also gluten-free!
Are there any dietary considerations to keep in mind?
Yes! If you’re baking for someone with allergies, be mindful of the ingredients used. The Chocolate Snowball Cookies contain common allergens like gluten and nuts, especially if you’ve included optional pecans or walnuts. For nut-free options, you can replace the nuts with shredded coconut or simply omit them altogether. Also, always double-check labels on your chocolate and baking ingredients to ensure they are allergy-friendly!
These Chocolate Snowball Cookies with Melted Chocolate Centers Recipe FAQs will help you navigate any uncertainties, so you can bake with confidence and delight!
Chocolate Snowball Cookies with Melted Chocolate Centers Bliss
Ingredients
Equipment
Method
- Cream together the butter, granulated sugar, and powdered sugar until light and fluffy.
- Whisk together the flour, cocoa powder, salt, and baking powder in a separate bowl.
- Fold in nuts if desired, ensuring even distribution throughout the dough.
- Chill the dough in plastic wrap for at least 30 minutes.
- Scoop and roll tablespoon-sized portions into balls, adding a chocolate chunk to the center.
- Bake in a preheated oven at 350°F (175°C) for 10-12 minutes.
- Cool on the baking sheet briefly, then roll in powdered sugar while warm.
Leave a Reply