
As a child, I can vividly recall the thrill of summer afternoons spent with an ice cream scoop in hand, pushing through the soft, creamy goodness of chocolate ice cream. Just the thought of it today brings a smile to my face! If you’re like me, craving that indulgent, rich chocolate flavor that instantly transports you to those blissful days, this Rich and Creamy Homemade Chocolate Ice Cream recipe is just what you need. Not only is it surprisingly easy to whip up, but it also allows you to customize it to your liking—whether you prefer a classic egg-based version or a lighter, egg-free twist. Perfect for impressing friends and family or treating yourself, this recipe is bound to become a staple in your kitchen. Are you ready to recreate those delightful memories in a bowl?
What Makes This Ice Cream So Special?
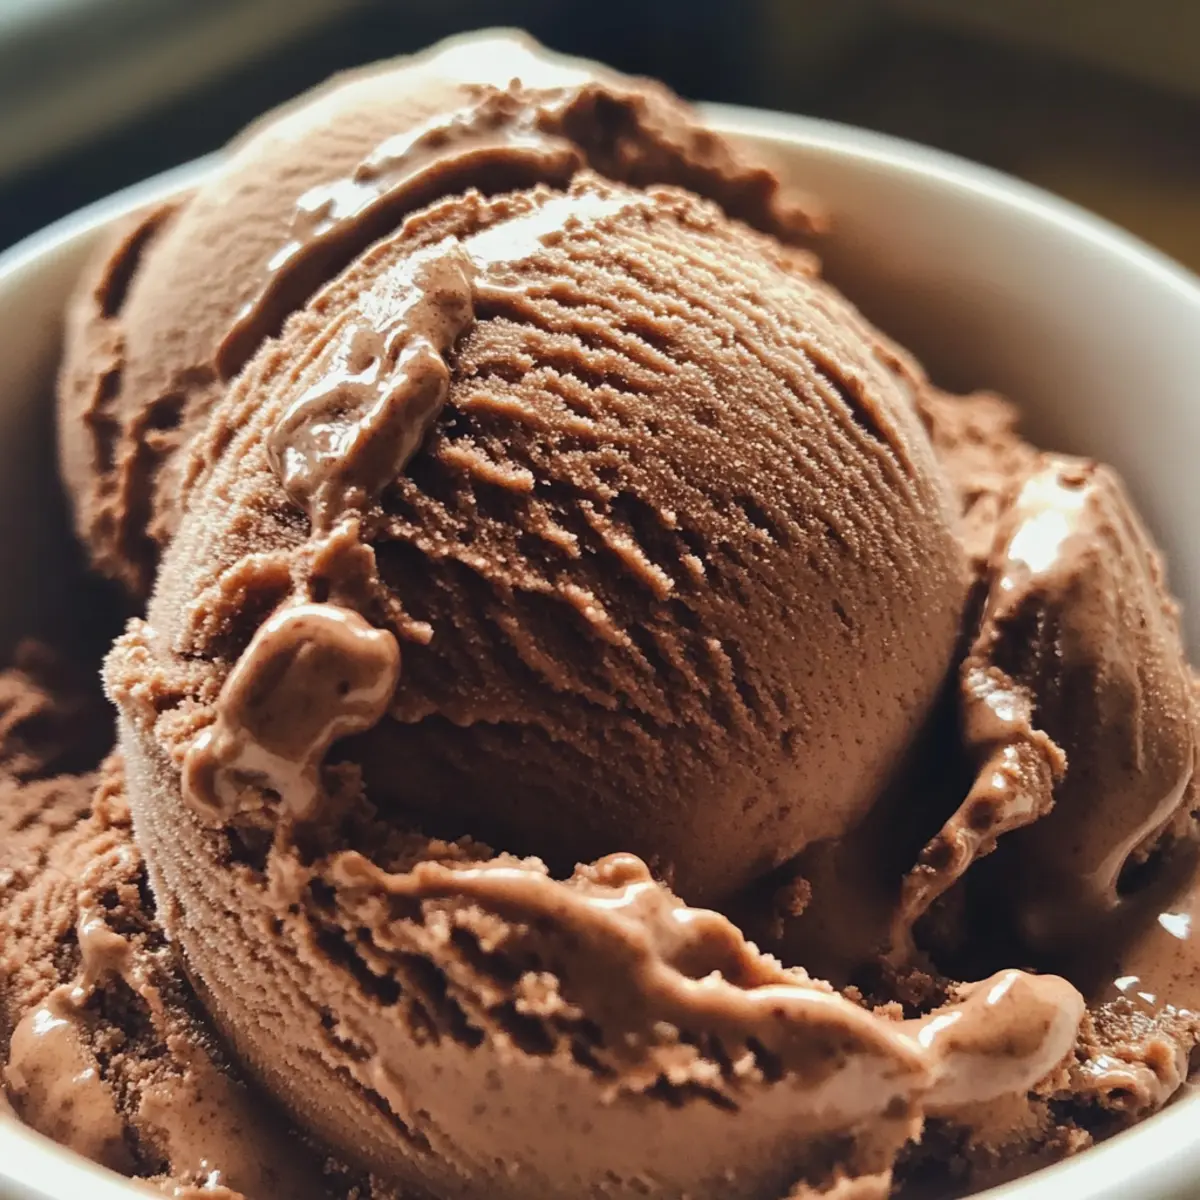
Creamy Texture: This homemade chocolate ice cream features a velvety texture that’s hard to resist, making every scoop a delight.
Rich Flavor: The deep cocoa and chopped chocolate blend create a rich, indulgent flavor that will impress chocolate lovers.
Customization: Whether you love traditional egg-based ice cream or prefer a lighter egg-free option, you can easily adjust this recipe to match your cravings.
Easy to Make: Perfect for both beginners and seasoned chefs, the straightforward steps ensure you’ll achieve that ice cream shop quality at home.
Crowd-Pleaser: Serve it at gatherings, and watch it disappear—everyone will want seconds! Pair it with fresh berries or whip up a batch of Bacon Cream Cheese for an unforgettable dessert experience.
Chocolate Ice Cream Ingredients
For the Base
• Heavy Cream – Provides creaminess and richness; additional whole milk can be used for a lighter version.
• Cocoa Powder – Adds deep chocolate flavor; opt for Dutch-process cocoa for enhanced richness.
• Chopped Chocolate – Enhances flavor and provides a velvety texture; dark chocolate is recommended for a bolder experience.
• Milk – Dilutes the rich base for desired consistency; whole milk is preferred for best results.
• Sugar – Sweetens the mixture and balances flavors; reduce the amount for a less sweet treat.
• Sea Salt – Enhances sweetness and balances flavors beautifully.
• Egg Yolks – Create a custard-like base for creaminess; can be omitted for an egg-free version (simply replace with extra cream).
• Vanilla Extract – Adds depth to the flavor profile; use pure vanilla for an authentic taste.
For Creamy Texture
• Ice Cream Maker – Provides that perfect consistency; using an ice cream maker yields the best results.
• Parchment Paper – To prevent ice crystals, press it onto the surface of the ice cream before sealing the container.
This homemade Chocolate Ice Cream is not only a nostalgic treat but a versatile recipe that you can tweak to satisfy any sweet tooth!
Step‑by‑Step Instructions for Rich and Creamy Homemade Chocolate Ice Cream
Step 1: Combine Cream and Cocoa
In a medium saucepan, combine 1 cup of heavy cream with cocoa powder, whisking until smooth. Heat the mixture gently over medium-low heat, stirring continuously until it comes to a gentle boil. Allow it to simmer for about 30 seconds while continuing to stir, then remove from heat. Visualize a rich, glossy mixture that’s free of lumps; this is your chocolate base.
Step 2: Melt the Chocolate
Add the chopped dark chocolate to the warm cocoa mixture and stir until fully melted and combined. Once the chocolate has melted, pour in the remaining cup of heavy cream and whisk together until the mixture is uniform. To ensure a silky texture, strain the mixture into a bowl using a fine-mesh strainer to remove any solids or gritty bits, while the smooth base cools to room temperature.
Step 3: Prepare the Milk Mixture
In a separate saucepan, combine the milk, sugar, and sea salt. Warm this mixture over medium heat, stirring gently until the sugar is dissolved, being careful not to let it boil. You’re looking for a gentle warmth, around 150°F, which will help to blend with the chocolate base later. The mixture should be just steaming, indicating it’s ready for the next step.
Step 4: Temper the Egg Yolks
In a small bowl, whisk the egg yolks until smooth. Gradually pour in about ½ cup of the warm milk mixture while whisking continuously to temper the yolks. This process prevents the eggs from scrambling by gradually increasing their temperature. Once combined, return this egg mixture to the saucepan with the remaining warm milk, ensuring a smooth integration.
Step 5: Cook the Custard
Place the saucepan over medium heat and cook the custard while stirring constantly. You’re aiming for the mixture to thicken until it coats the back of a spoon, reaching approximately 170°F. This step should take around 5 to 7 minutes. As it cooks, you will notice a slight thickening, indicating the custard is ready for straining into the chocolate mixture.
Step 6: Combine and Chill
Strain the custard through the fine-mesh strainer into the bowl containing the chocolate mixture, ensuring a velvety texture without any cooked egg bits. Gently stir in the vanilla extract for an added depth of flavor. Cover the mixture and refrigerate for at least 6 hours or overnight; this chilling step is crucial to developing the rich flavor and creamy texture of your homemade chocolate ice cream.
Step 7: Churn the Ice Cream
Once the mixture is chilled thoroughly, pour it into an ice cream maker. Churn according to the manufacturer’s instructions for about 30 to 40 minutes, or until it reaches a thick, soft-serve consistency. If you don’t have an ice cream maker, pour the mixture into a shallow freezer-safe container and stir vigorously with a fork every 30 minutes until the ice cream becomes creamy.
Step 8: Freeze to Firm Up
Transfer the churned ice cream into a sturdy container and smooth the top. For the best texture, freeze for at least 6 hours until firm. To avoid ice crystals, press a piece of parchment paper directly onto the surface of the ice cream before sealing the container. Allow the ice cream to sit at room temperature for about 5 minutes before scooping, making it easier to serve.
What to Serve with Rich and Creamy Homemade Chocolate Ice Cream
Transform your delightful homemade treat into an irresistible dessert experience by pairing it with these delicious companions.
- Chocolate Shavings: Add a sprinkle of chocolate shavings on top for a decadent finishing touch that elevates every scoop.
- Fresh Berries: The tartness of strawberries or raspberries beautifully contrasts the rich chocolate, adding a refreshing note to your dessert.
- Whipped Cream: Light and airy, whipped cream complements the dense texture of the ice cream, making each bite a heavenly flavor balance.
- Peanut Butter Sauce: Drizzle warm peanut butter sauce over your chocolate ice cream for a nutty twist that enhances the overall experience.
- Caramel Swirl: Create a heavenly combination by swirly rich caramel sauce through your chocolate ice cream, adding depth and sweetness.
- Espresso or Coffee: Serve your ice cream alongside a cup of bold espresso, as the coffee notes amplify the chocolate’s richness while cleansing the palate.
- Chocolate Croissant: A flaky, warm chocolate croissant on the side creates a delightful contrast in texture that chocolate lovers will adore!
- Mint Chocolate Chip Cookie: The combo of mint cookies and chocolate ice cream offers a refreshing bite that’s both playful and satisfying.
- Fudgy Brownies: For a truly indulgent experience, serve with rich, fudgy brownies—this duo will surely satisfy the strongest chocolate cravings!
- Milkshake: Blend the chocolate ice cream with milk for a creamy milkshake—an irresistible way to chill out on a hot day!
Make Ahead Options
These homemade chocolate ice cream opportunities are perfect for busy cooks looking to save time! You can prepare the chocolate mixture up to 24 hours in advance and refrigerate it until you’re ready to churn. Simply follow the instructions up to the chilling step, and store the mixture covered in the refrigerator. For best quality, press a piece of parchment paper directly on the surface to prevent browning and maintain that rich texture. When you’re ready to serve, just churn the chilled mixture in your ice cream maker according to its instructions. This way, you’ll have delicious, creamy homemade chocolate ice cream ready in no time—with minimal effort!
How to Store and Freeze Chocolate Ice Cream
Fridge: Store any leftover chocolate ice cream in the refrigerator for up to 3 days, but its texture may change and become less creamy.
Freezer: For optimal freshness, transfer your chocolate ice cream to an airtight container and freeze for up to 2 months. Press parchment paper directly onto its surface before sealing to prevent ice crystals.
Reheating: If your ice cream is too firm to scoop, let it sit at room temperature for about 5 minutes. This will soften the chocolate ice cream without compromising its rich, creamy consistency.
Serving Tip: For an indulgent experience, serve your chocolate ice cream with chocolate shavings or fresh berries after thawing slightly, enhancing its flavor!
Expert Tips for Making Chocolate Ice Cream
- Chill Thoroughly: Ensure your ice cream base is very cold before churning to achieve a smooth, creamy texture without graininess.
- Use Quality Chocolate: Opt for high-quality dark chocolate, which enhances the richness of your chocolate ice cream. Cheap chocolate can lead to a less satisfying flavor.
- Egg-Free Alternative: If you’re skipping the egg yolks for an egg-free version, just replace them with additional heavy cream to maintain the desired creaminess.
- Avoid Ice Crystals: To prevent ice crystals from forming, cover the surface of the ice cream with parchment paper before sealing the container for freezing.
- Perfect Churning: Churn in an ice cream maker according to instructions, or follow the hand-churning method, stirring every 30 minutes for ideal consistency.
- Serve with Flair: Elevate your homemade chocolate ice cream experience by serving it with chocolate shavings, fresh fruit, or a drizzle of chocolate syrup.
Chocolate Ice Cream Variations & Substitutions
Feel free to make this delectable chocolate ice cream your own by trying out these exciting variations!
-
Lighter Version: Substitute heavy cream with more whole milk for a less indulgent texture.
-
Different Chocolates: Use white chocolate or milk chocolate for a sweeter, creamier flavor that provides a delightful twist.
-
Egg-Free: Omit the egg yolks and replace with additional heavy cream to maintain a smooth texture and satisfy those craving a lighter option.
-
Flavor Boost: Incorporate a pinch of espresso powder into the cocoa mixture to deepen the chocolate flavor; it enhances richness without the coffee taste.
-
Nutty Delight: Add finely chopped nuts, such as walnuts or pecans, during the last few minutes of churning for crunchy texture.
-
Minty Freshness: Infuse with mint extract or add crushed mint leaves during the cooking process for a refreshing mint chocolate ice cream. Pair it with a drizzle of hot fudge!
-
Fruit Flair: Swirl in pureed fruits like raspberries or strawberries during the last stages of churning for a fruity contrast against the chocolatey goodness.
-
Sweet & Salty: Mix in a light sprinkle of sea salt just before serving to enhance the sweetness and add a delightful contrast to the rich chocolate.
Explore these options and make this ice cream experience uniquely yours! You might also enjoy pairing it with some warm chocolate chip banana bread for a truly delightful dessert moment.
Chocolate Ice Cream Recipe FAQs
What type of cocoa powder should I use for the best flavor?
I highly recommend using Dutch-process cocoa powder for a richer taste that elevates your chocolate ice cream. It’s more intense and smoother than natural cocoa powder, giving your ice cream that deep, decadent flavor we all love.
How should I store leftover chocolate ice cream?
To maintain its quality, store any leftover chocolate ice cream in an airtight container in the freezer for up to 2 months. Before sealing the container, press parchment paper directly onto the surface of the ice cream to prevent ice crystals from forming. This little trick keeps it creamy and delightful!
Can I freeze chocolate ice cream that I make without an ice cream maker?
Absolutely! If you’re using a hand-churning method, pour your mixture into a shallow container and freeze it. Stir every 30 minutes for about 2 to 3 hours until it reaches a creamy consistency. This mimics the churn process and helps achieve that desired texture.
How long does the chocolate ice cream need to chill before churning?
It’s best to refrigerate the chocolate mixture for at least 6 hours or overnight. This long chilling period allows the flavors to meld beautifully and ensures a rich, creamy texture when you churn it. Patience is essential here—your taste buds will thank you!
Are there any dietary considerations for this chocolate ice cream?
Yes! If you prefer an egg-free version, simply omit the egg yolks and replace them with extra heavy cream. Additionally, if you’re concerned about allergies, be sure to check the labels for any allergens in your cocoa powder or chocolate, and select options that work for your dietary needs.
Creamy Homemade Chocolate Ice Cream for Pure Bliss
Ingredients
Equipment
Method
- Combine 1 cup of heavy cream with cocoa powder in a medium saucepan, whisking until smooth. Heat gently over medium-low until boiling. Simmer for about 30 seconds, then remove from heat.
- Add chopped dark chocolate to the cocoa mixture and stir until melted. Pour in remaining cup of heavy cream and whisk until uniform. Strain into a bowl to remove solids.
- In a separate saucepan, combine milk, sugar, and sea salt. Warm until sugar dissolves, being careful not to boil.
- Whisk egg yolks in a small bowl then gradually pour in about ½ cup warm milk while whisking. Return this mixture to the saucepan with the remaining milk.
- Cook the custard, stirring constantly, until it thickens and coats the back of a spoon (about 170°F).
- Strain the custard into the chocolate mixture. Stir in vanilla extract. Cover and refrigerate for at least 6 hours or overnight.
- Pour the chilled mixture into an ice cream maker and churn according to instructions for 30 to 40 minutes.
- Transfer churned ice cream into a container, smooth the top, and freeze for at least 6 hours. Press parchment paper onto the surface to prevent ice crystals.
Leave a Reply