
The first crackle of chocolate-covered honeycomb candy brings me right back to my grandmother’s cozy kitchen during the holidays. This airy confection—light and bubbly—creates a delightful fizz that dances on your tongue, making it a truly joyous treat. Not only is this Chocolate Honeycomb Candy easy to make, but it’s also an impressive dessert that’s perfect for gifting! Whether you’re hosting a festive gathering or looking to delight friends and family, this treat is sure to be a crowd-pleaser. Plus, with simple substitutions available for vegan diets, everyone can enjoy this festive indulgence. Ready to whip up something special that will have everyone asking for seconds? Let’s dive into this delightful recipe!
Why is Chocolate Honeycomb Candy Amazing?
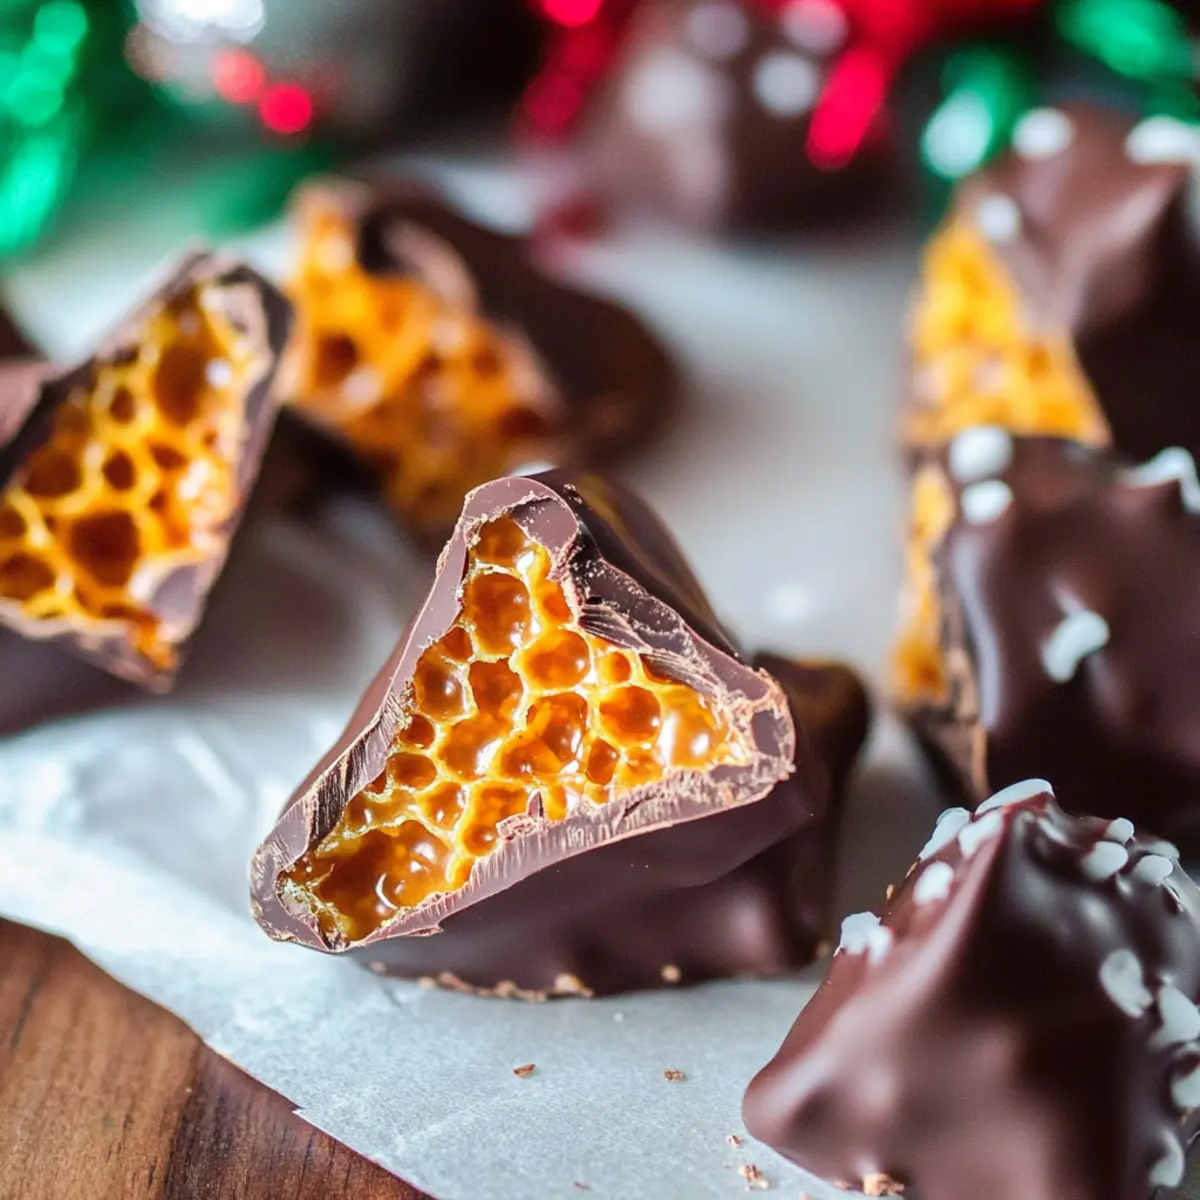
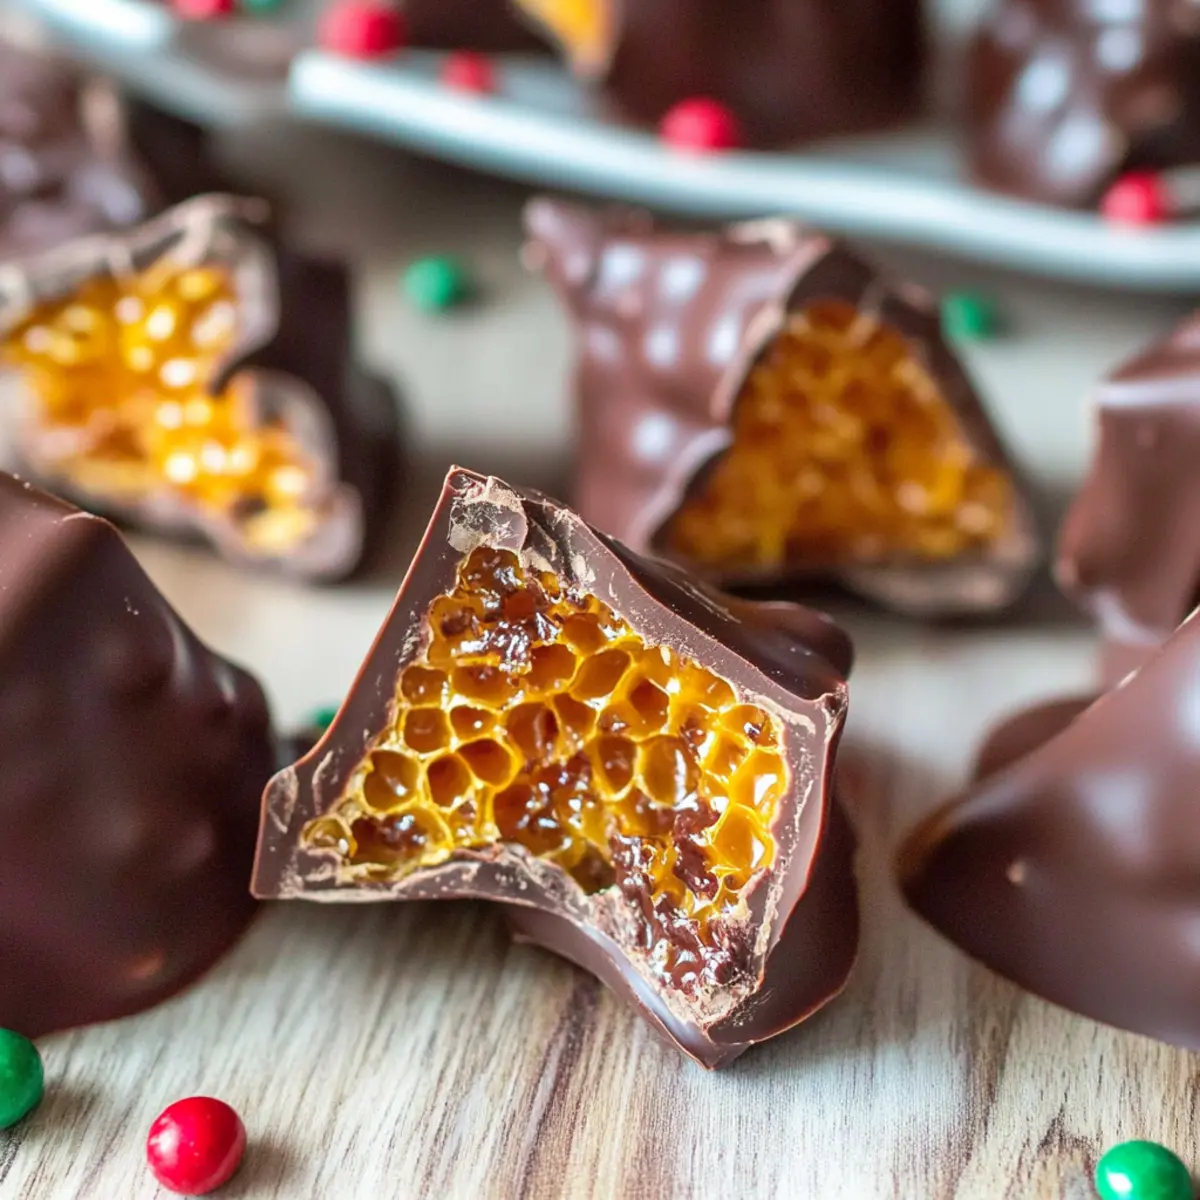
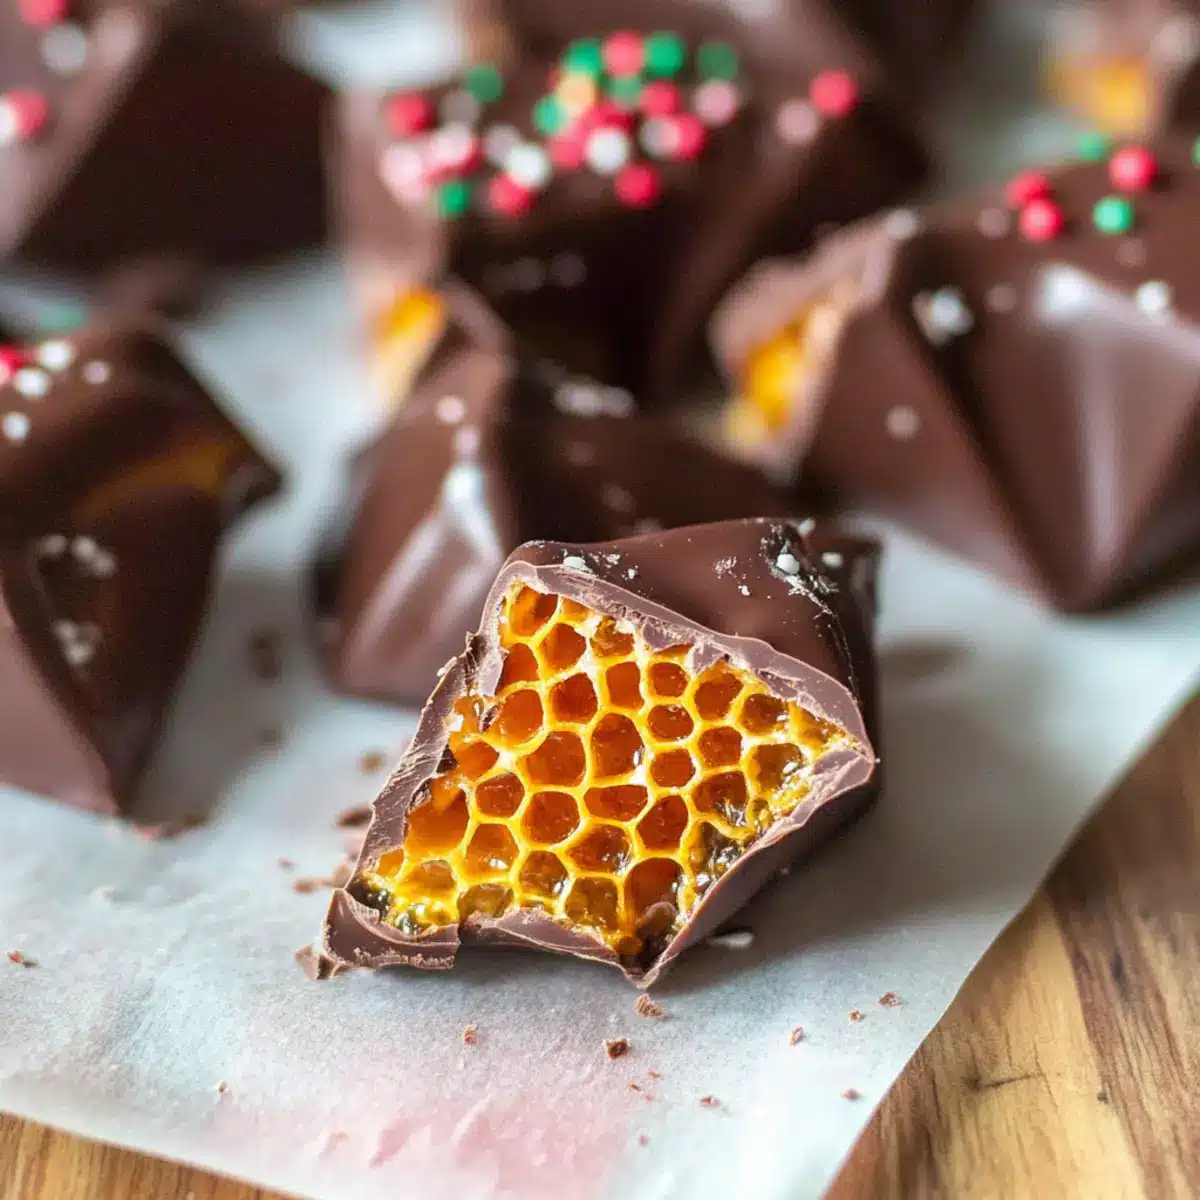
Unique texture: The airy, crispy structure of honeycomb candy contrasts beautifully with a rich chocolate coating, creating a delightful bite-sized treat.
Easy to Make: This recipe is simple, requiring only basic cooking skills and a candy thermometer, making it approachable even for beginner chefs.
Versatile Flavors: Feel free to swap honey with agave nectar for a vegan-friendly option, or experiment with dark chocolate for a more intense flavor.
Perfect for Gifting: Wrapped up, this candy makes an elegant gift, especially during the holiday season. Pair it with a cup of hot cocoa or use it to top off ice cream for an irresistible dessert!
Homemade Goodness: There’s something special about homemade treats, and this Chocolate Honeycomb Candy allows you to share your love for delicious sweets with family and friends!
Chocolate Honeycomb Candy Ingredients
For the Honeycomb Base
- Granulated Sugar – Essential for sweetness and texture; avoid substitutions for best results.
- Water – Helps dissolve sugar; critical for achieving the right consistency.
- Honey – Provides moisture and unique flavor; consider agave nectar as a vegan option.
- Corn Syrup – Prevents crystallization, ensuring a chewy texture; golden syrup makes a great alternative.
- Baking Soda – Creates the signature bubbles; ensure it’s fresh for optimal puffiness.
For the Chocolate Coating
- Chocolate Almond Bark or Melts – Adds flavor and retains moisture; you can use dairy-free chocolate for a vegan twist.
- Sprinkles (optional) – A fun decorative touch; choose any color or type to elevate presentation.
Indulge in this Chocolate Honeycomb Candy that’s not only a holiday treat but also an easy candy to prepare, making everyone’s sweet tooth rejoice!
Step‑by‑Step Instructions for Chocolate Honeycomb Candy
Step 1: Prepare the Baking Dish
Line a 9×13 inch baking dish with parchment paper, ensuring it covers the entire base and sides to prevent sticking. This setup is crucial for your Chocolate Honeycomb Candy, as it will provide a smooth surface for the candy to cool and set. Set this aside while you prepare the candy mixture.
Step 2: Combine the Ingredients
In a heavy-bottomed saucepan, combine granulated sugar, water, honey, and corn syrup. Stir gently with a wooden spoon to dissolve the sugar completely before turning on the heat. This step is essential for a smooth mixture—make sure all ingredients are well incorporated and ready for cooking.
Step 3: Cook Until Hard Crack Stage
Place the pot over medium-high heat and cook the mixture without stirring. Watch closely as it bubbles and changes color; it should reach a light caramel hue. Use a candy thermometer to monitor the temperature, aiming for 300°F, which is the hard crack stage. This step typically takes about 10-15 minutes, so be patient and attentive.
Step 4: Add Baking Soda
Once the mixture reaches the desired temperature, quickly remove it from heat. Stir in the baking soda vigorously; it will foam up dramatically. This reaction creates the signature bubbles in your candy. Immediately pour the foamy mixture into the prepared baking dish, spreading it evenly and letting it sit undisturbed for 1 hour to set completely.
Step 5: Break the Honeycomb Candy
After cooling for an hour, the honeycomb will have hardened into a crispy texture. Carefully lift the candy from the dish using the parchment paper and place it on a cutting board. Break it into pieces or use a sharp knife to cut it into desired shapes, revealing the airy, bubbly interior of the Chocolate Honeycomb Candy.
Step 6: Melt the Chocolate
In a microwave-safe bowl, add your choice of chocolate almond bark or melts. Heat in the microwave in 30-second intervals, stirring in between, until completely smooth and melted. Be careful not to burn the chocolate, as this could ruin the coating for your delicious honeycomb pieces.
Step 7: Coat the Honeycomb
Dip each piece of the honeycomb candy into the melted chocolate, ensuring it is fully coated. Allow excess chocolate to drip off before placing the pieces on a clean sheet of parchment paper. This step adds a rich layer of chocolate to complement the crispiness of the honeycomb.
Step 8: Add the Finishing Touches
If desired, sprinkle your freshly dipped chocolate honeycomb pieces with colorful sprinkles before the chocolate sets. This decorative touch not only enhances the appearance but also makes your Chocolate Honeycomb Candy perfect for gifting or sharing during festive occasions. Let the chocolate firm up completely before serving or storing.
What to Serve with Chocolate-Covered Honeycomb Candy?
Indulging in light, crunchy chocolate-covered honeycomb candy is a delightful experience perfect for any gathering. Enhance your sweet treat by pairing it with these complementary delights!
-
Creamy Hot Cocoa: Warm and luscious, rich hot cocoa perfectly balances the crunchy texture of honeycomb candy with a cozy touch.
-
Vanilla Ice Cream: The smooth creaminess of vanilla ice cream provides a delightful contrast to the sweet, crispy candy, creating a deliciously indulgent dessert.
-
Fresh Berries: Tart raspberries or strawberries provide a refreshing burst of flavor that beautifully complements the sweetness of the honeycomb candy.
-
Decadent Espresso: A robust espresso offers an aromatic punch, balancing the sweetness and enhancing the overall flavor experience.
-
Cheese Platter: Pairing honeycomb candy with a selection of soft cheeses, like brie or goat cheese, adds a sophisticated touch to your dessert spread.
-
Nutty Granola Parfait: Layer yogurt and nutty granola topped with honeycomb pieces for an enticing brunch option that combines textures and flavors seamlessly.
-
Sparkling Cider: A glass of bubbly cider adds a festive sparkle to your dessert table, enhancing the candy’s crunch while keeping it light.
-
Chocolate Fondue: Turn your chocolate-covered honeycomb into a fun dipping experience by serving with a pot of warm chocolate fondue—perfect for sharing!
Enjoy creating a delightful dessert experience with these beautiful pairings that complement your homemade Chocolate Honeycomb Candy!
Chocolate Honeycomb Candy Variations
Feel free to explore these fun and exciting twists to make your chocolate honeycomb candy truly your own!
-
Vegan Swap: Use agave nectar instead of honey for a plant-based treat. This change keeps the texture light while catering to vegan diets.
-
Dark Chocolate Delight: Opt for dark chocolate instead of milk chocolate for a richer flavor profile. This variation brings a sophisticated balance to the sweetness of honeycomb.
-
Nutty Addition: Incorporate crushed nuts like almonds or hazelnuts into the chocolate coating for a crunchy texture. The added nuttiness enhances the candy’s flavor and gives it extra character.
-
Spiced Up: Add a pinch of sea salt or a sprinkle of cayenne pepper to your chocolate to make things interesting. This surprising twist can elevate your candy to gourmet status.
-
Decorative Drizzle: Drizzle melted white chocolate over the cooled chocolate coating for an eye-catching contrast. This visually stunning touch adds an extra layer of sweetness.
-
Fruit Fusion: Mix in finely chopped dried fruits like cranberries or apricots into the honeycomb base before it sets. This fruity addition can bring a delightful chewiness!
-
Homemade Sprinkles: Instead of store-bought sprinkles, create your own by mixing sugar with a drop of food coloring. This personal touch can add a whimsical flair.
-
Easy Pairing: Serve these delicious pieces alongside a warm cup of hot cocoa or as a decadent topping on your favorite ice cream for an extra special treat!
With these variations, your chocolate honeycomb candy will not only be an elegant gift but also a uniquely personal creation the whole family will love. Want to try more delicious chocolate recipes? Check out my Rocky Road Chocolate or whip up a quick No-Bake Peanut Butter Chocolate treat!
Expert Tips
• Use a Candy Thermometer: Ensure accurate temperature readings with a reliable candy thermometer to achieve the perfect hard crack stage for your Chocolate Honeycomb Candy.
• Be Safe with Hot Sugar: Exercise caution when handling hot sugar mixtures. It can cause serious burns, so keep children and pets away from the cooking area.
• Fresh Baking Soda: Check that your baking soda is fresh before use. Expired baking soda can prevent your honeycomb from puffing up properly, resulting in a dense texture.
• Avoid Over-Stirring: Once you place the pot on heat, resist the urge to stir. Stirring can cause the sugar to crystallize, leading to a grainy candy instead of the desired airy honeycomb.
• Storage Matters: Keep your Chocolate Honeycomb Candy in an airtight container at room temperature. Avoid refrigeration, as it can lead to unwanted hardness and loss of texture.
Make Ahead Options
These Chocolate Honeycomb Candy treats are a fantastic option for meal prep enthusiasts! You can prepare the honeycomb base up to 24 hours in advance, allowing it plenty of time to set without losing its airy texture. Simply follow the initial steps of combining and cooking your ingredients, and once you let it sit to harden, keep it in an airtight container at room temperature. When you’re ready to serve, melt the chocolate and coat the honeycomb pieces right before gifting or enjoying. This method not only saves you time but also ensures that your candy remains just as delicious and crisp when it’s time to indulge!
How to Store and Freeze Chocolate Honeycomb Candy
Room Temperature: Store your Chocolate Honeycomb Candy in an airtight container at room temperature for up to 5 days. This helps maintain its delightful crunch without compromising texture.
Refrigeration: Avoid refrigerating the candy, as it can harden excessively, making it less enjoyable to eat.
Freezer: If you wish to extend its shelf life, you can freeze the chocolate-covered pieces. Wrap them tightly in plastic wrap and place them in a freezer-safe container for up to 2 months.
Thawing: To enjoy again, simply transfer the frozen candy to the refrigerator for several hours or let it sit at room temperature until it softens.
Chocolate Honeycomb Candy Recipe FAQs
What kind of honey is best to use for making honeycomb candy?
I recommend using a light, flavorful honey for your Chocolate Honeycomb Candy, as it enhances the overall taste. You can absolutely substitute it with agave nectar for a vegan option!
How should I store my Chocolate Honeycomb Candy?
Store your candy in an airtight container at room temperature for up to 5 days. This will help retain its signature crunch. Remember, refrigeration is a no-go—this can make the candy too hard to enjoy!
Can I freeze Chocolate Honeycomb Candy?
Yes, indeed! To freeze, wrap each chocolate-covered piece tightly in plastic wrap and place them in a freezer-safe container or bag. They can last up to 2 months in the freezer. To enjoy, simply thaw in the refrigerator overnight or let them sit at room temperature for a few hours.
Why didn’t my honeycomb puff up properly?
If your honeycomb doesn’t puff as expected, it could be due to expired baking soda or the temperature not reaching the hard crack stage. Ensure your baking soda is fresh and watch your candy thermometer closely—it should reach 300°F (hard crack stage) for that perfect airy texture!
Is this chocolate-covered honeycomb suitable for kids?
Absolutely! However, just keep an eye on younger ones while dipping into hot chocolate. It’s a delightful treat that kids usually love, but parental supervision is always a good idea when working with hot sugar.
What decorative options can I use for my honeycomb candy?
You can go wild with decorations! Use any type of sprinkles you like to make your Chocolate Honeycomb Candy stand out. Drizzle some melted white chocolate across the top for an extra visual treat, or even use crushed nuts for added flavor and texture!

Chocolate Honeycomb Candy: A Crispy Delight for Everyone
Ingredients
Equipment
Method
- Line a 9x13 inch baking dish with parchment paper, ensuring it covers the entire base and sides to prevent sticking.
- In a heavy-bottomed saucepan, combine granulated sugar, water, honey, and corn syrup. Stir gently with a wooden spoon to dissolve the sugar completely before turning on the heat.
- Place the pot over medium-high heat and cook the mixture without stirring, using a candy thermometer to monitor the temperature until it reaches 300°F (hard crack stage).
- Once the mixture reaches the desired temperature, quickly remove it from heat and stir in the baking soda vigorously; it will foam up dramatically. Pour the foamy mixture into the prepared baking dish.
- After cooling for an hour, lift the candy from the dish and break it into pieces or cut it into desired shapes.
- In a microwave-safe bowl, add your choice of chocolate almond bark or melts. Heat in the microwave in 30-second intervals until completely smooth and melted.
- Dip each piece of the honeycomb candy into the melted chocolate, ensuring it is fully coated. Allow excess chocolate to drip off before placing on parchment paper.
- If desired, sprinkle with colorful sprinkles before the chocolate sets. Let the chocolate firm up completely before serving or storing.
Leave a Reply