
As the holidays approach, the scent of baking evokes cherished memories of twinkling lights and cozy gatherings. That’s why I’m excited to share my delightfully scrumptious Melt-in-Your-Mouth Mint Chocolate Chip Snowball Cookies—a recipe that encapsulates all the festive cheer in each bite. This quick-to-prepare treat not only dazzles with its snowy powdered sugar coat but also makes for an unforgettable homemade gift that spreads joy to friends and family. With the perfect balance of refreshing mint and rich chocolate, these cookies combine elegance with comfort, truly redefining your holiday dessert game. Are you ready to create a batch that will leave everyone asking for seconds?
Why Are These Cookies So Irresistible?
Melt-in-Your-Mouth Texture: Each bite is a soft, tender delight that feels luxurious on your palate.
Flavor Explosion: The refreshing mint contrasts beautifully with rich chocolate chips, creating a taste sensation that surprises and delights.
Fast and Easy: With minimal steps, these cookies come together quickly, making them a perfect project for busy bakers.
Customizable Joy: Try adding crushed candy canes for extra crunch or swap mini chocolate chips for dark chocolate variations to suit your preferences.
Festive Appeal: With a snowy powdered sugar finish, they’re not just delicious but also visually stunning, perfect for holiday gifts or cozy gatherings. For more delicious treats, check out these Chocolate Chip Banana and High Protein Chocolate recipes!
Chocolate Chip Snowball Cookies Ingredients
• You’ll love how easy these are to make!
For the Dough
- Unsalted Butter – Adds creaminess and ensures a rich flavor; use softened butter for the best texture.
- Granulated Sugar – Provides sweetness; can be slightly reduced if you prefer a less sweet cookie.
- Pure Vanilla Extract – Enhances overall flavor; always opt for high-quality pure extract for the best results.
- Peppermint Extract – Infuses the cookies with a refreshing minty flavor; use sparingly, as it’s potent!
- All-Purpose Flour – Gives structure; mix just until combined to avoid a tough cookie.
- Salt – Balances sweetness and enhances the taste; don’t skip this essential ingredient.
- Mini Chocolate Chips – Adds delightful pockets of chocolate; feel free to experiment with different types, like dark or white chocolate.
For the Finish
- Powdered Sugar – Ideal for dusting, giving your cookies that snowy appearance we all love.
- Green Food Coloring (Optional) – For a festive look to delight and amuse your holiday guests.
Make these Chocolate Chip Snowball Cookies for a truly memorable homemade gift or indulge in them yourself—you won’t regret it!
Step‑by‑Step Instructions for Melt-in-Your-Mouth Mint Chocolate Chip Snowball Cookies
Step 1: Preheat and Prepare
Begin by preheating your oven to 350°F (175°C). While the oven warms up, line two baking sheets with parchment paper to prevent the cookies from sticking and to ensure even baking. Setting the sheets aside will allow you to work efficiently as you prepare the cookie dough.
Step 2: Whisk Dry Ingredients
In a medium bowl, whisk together 1 ½ cups of all-purpose flour and a pinch of salt until well combined. This step is crucial for evenly distributing the salt throughout the flour, which enhances the flavors in your Melt-in-Your-Mouth Mint Chocolate Chip Snowball Cookies. Set aside the bowl once completed to focus on creaming your butter.
Step 3: Cream Butter and Sugar
In a large mixing bowl, use a hand mixer or stand mixer to cream together ¾ cup of softened unsalted butter until creamy, about 1-2 minutes. Gradually add ⅓ cup of granulated sugar while continuing to mix until the mixture is light and fluffy, roughly 2-3 minutes. This aeration process is vital for achieving a tender cookie.
Step 4: Flavor the Dough
Mix in 1 teaspoon of pure vanilla extract and ½ teaspoon of peppermint extract to the creamed butter and sugar. If you desire a festive touch, you can also add a few drops of green food coloring at this point. Blend everything thoroughly to ensure the mint flavor permeates the dough, giving your cookies that refreshing taste.
Step 5: Combine Wet and Dry Ingredients
Gradually add the dry ingredient mixture to the wet ingredients, mixing until just combined. Be careful not to overmix, as this can lead to tough cookies. Gently fold in 1 cup of mini chocolate chips, ensuring they are evenly distributed throughout the dough for those delightful chocolatey pockets in your Chocolate Chip Snowball Cookies.
Step 6: Chill the Dough
Cover the cookie dough with plastic wrap and refrigerate for 30 to 60 minutes. Chilling the dough is important as it helps firm up the mixture, making it easier to scoop and shape later while also reducing spreading during baking. This small step is key to achieving the best texture.
Step 7: Shape the Cookies
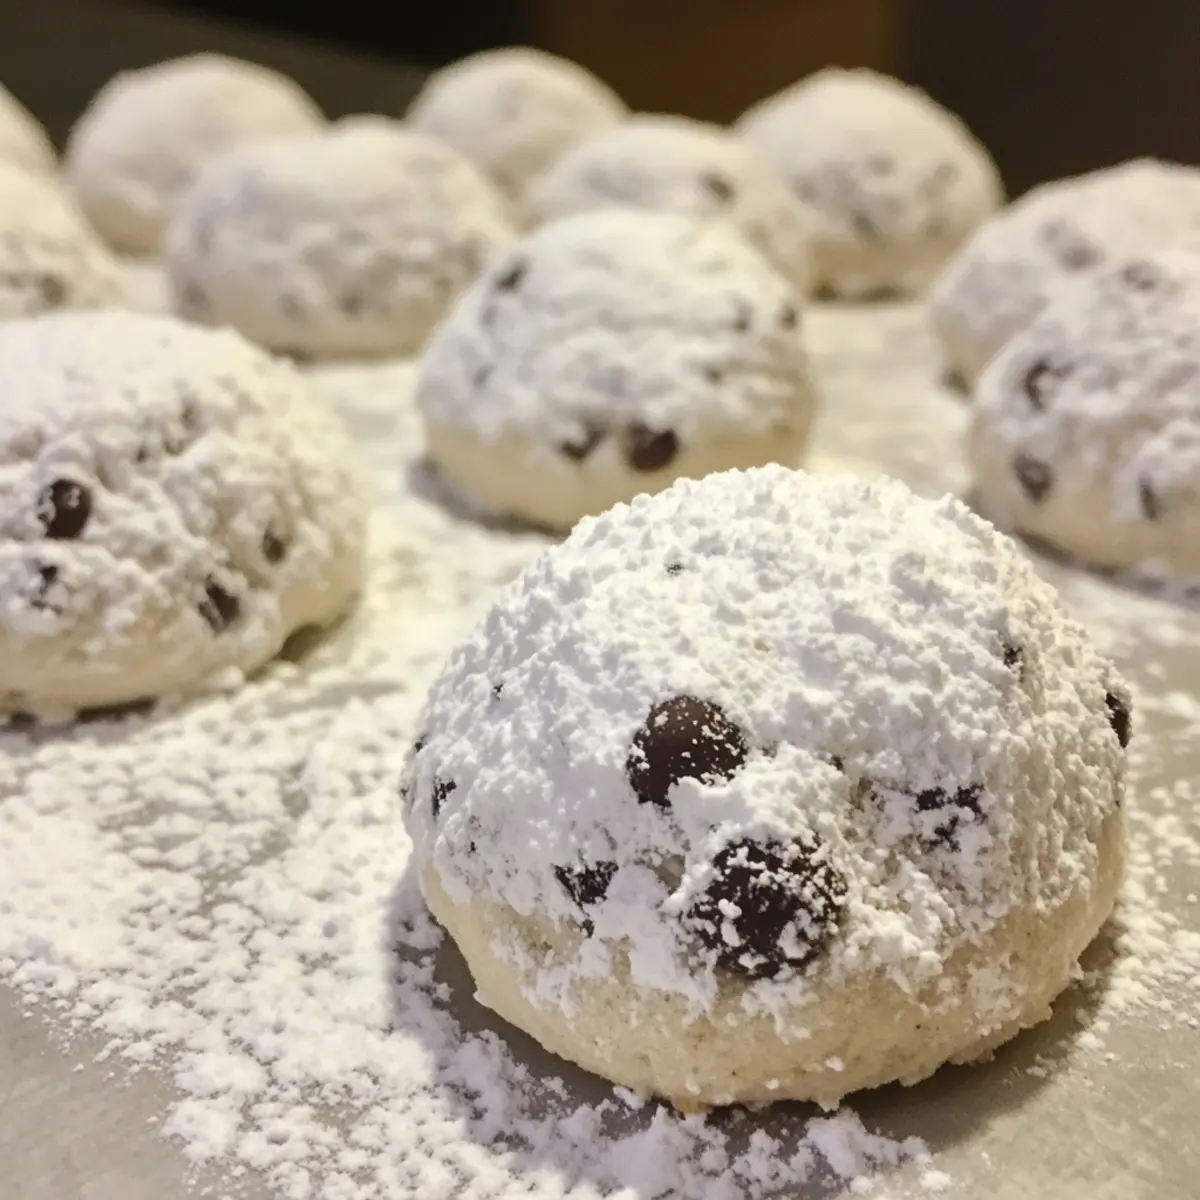
After chilling, scoop about 1-inch portions of dough and roll them into balls, placing them onto the prepared baking sheets about 2 inches apart. This spacing will allow the cookies to spread slightly without merging into one another during baking. Aim for about 12 cookies per sheet to maintain even baking.
Step 8: Bake the Cookies
Bake in the preheated oven for 10-12 minutes, or until the edges are lightly golden while the centers remain pale and soft. Keep a close eye on your Melt-in-Your-Mouth Mint Chocolate Chip Snowball Cookies to avoid overbaking, as they will continue to firm up slightly after being removed from the oven.
Step 9: Cool and Dust
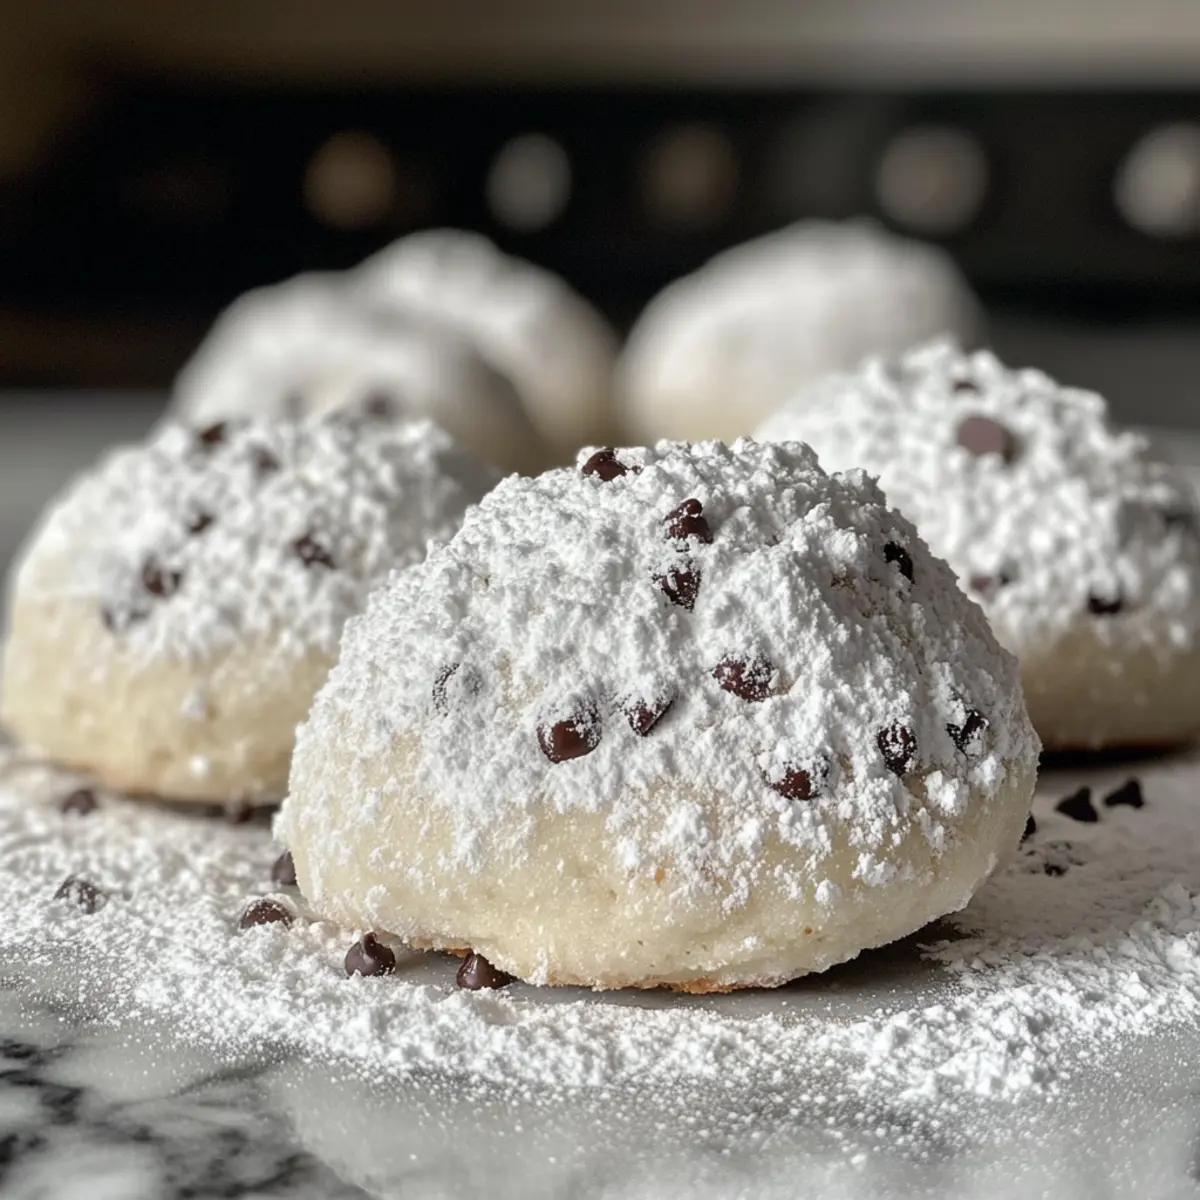
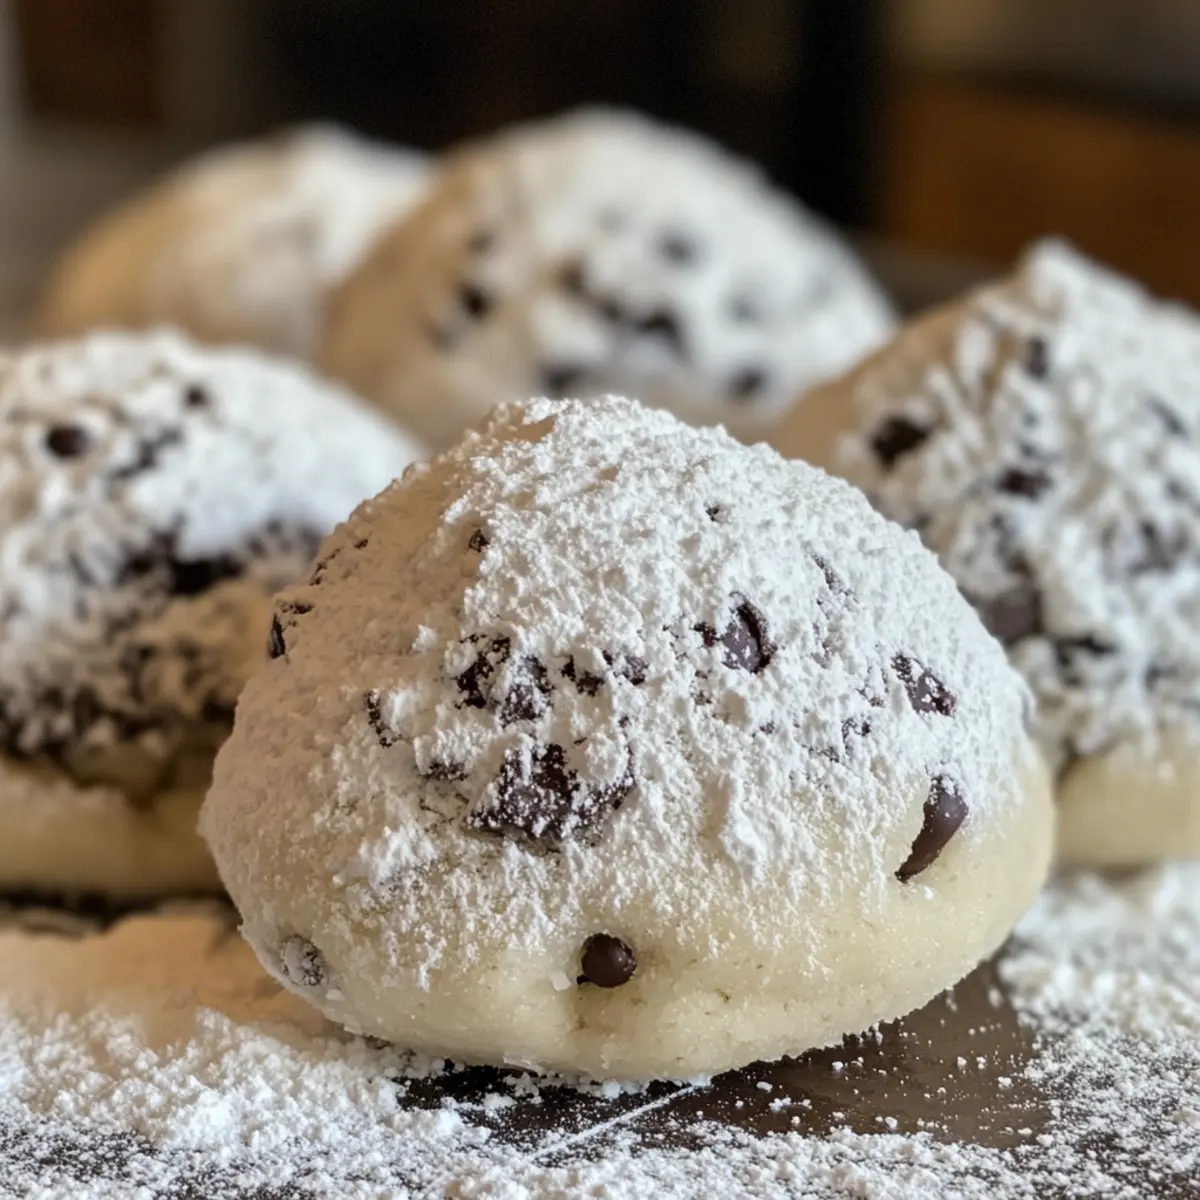
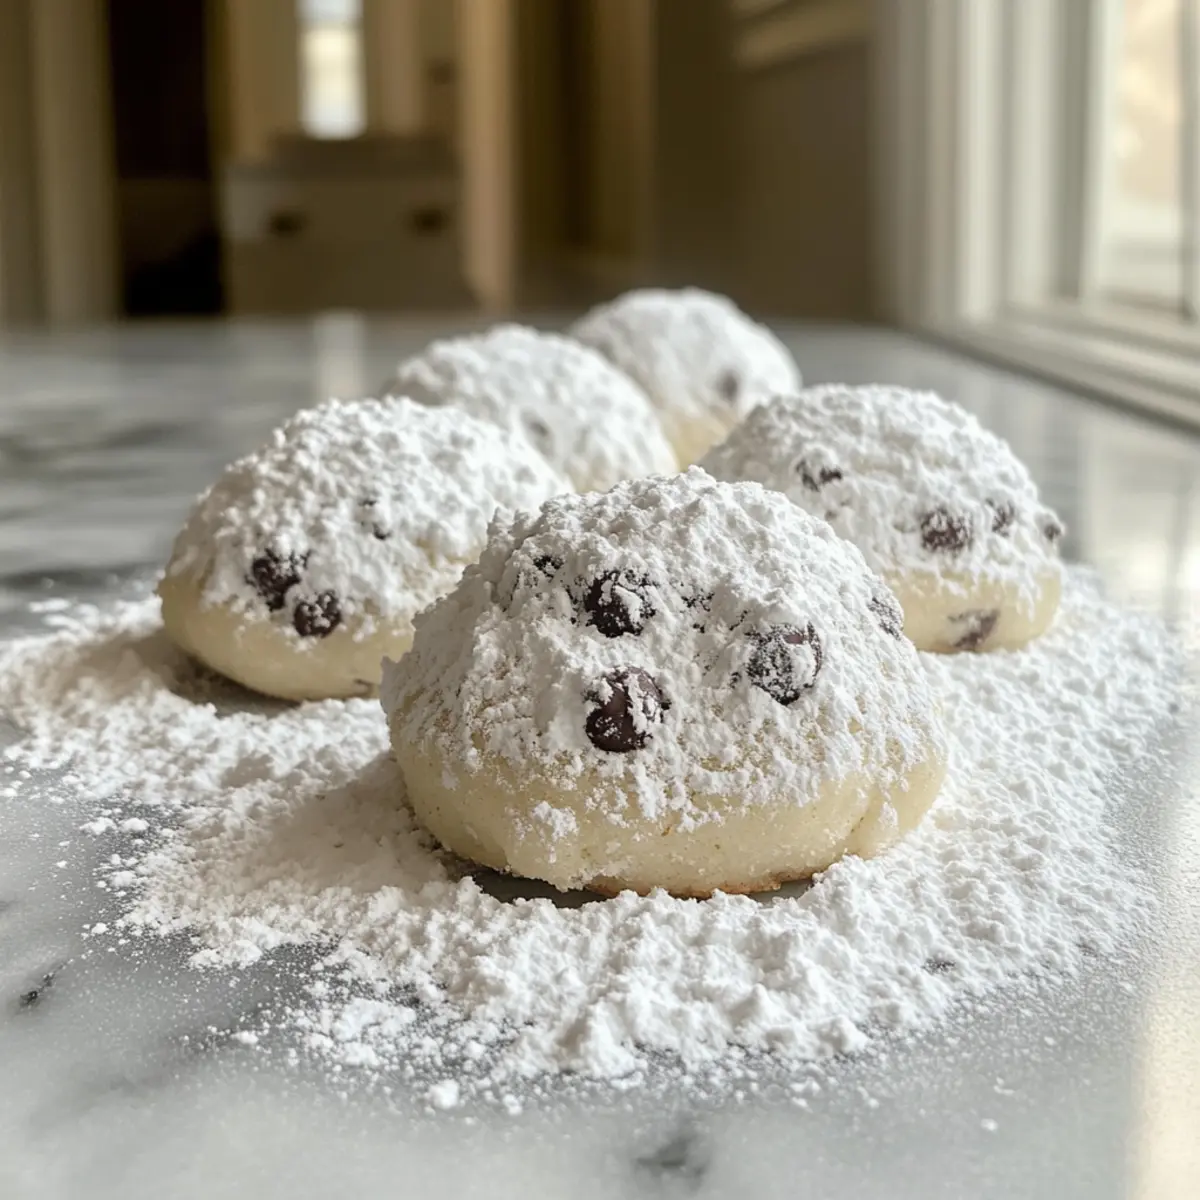
Once baked, remove the cookies from the oven and let them cool on the baking sheets for 5-10 minutes. This cooling time allows them to firm up. Afterwards, roll each cookie in powdered sugar while they’re still warm, then again after they’ve cooled completely to create that airy, snowy appearance that makes them so irresistible.
Step 10: Serve or Store
Your delicious Melt-in-Your-Mouth Mint Chocolate Chip Snowball Cookies are now ready for serving! Enjoy them fresh from the oven or store them in an airtight container at room temperature for up to a week. Either way, you’ll have a delightful homemade treat that’s perfect for the holidays or any cozy occasion.
What to Serve with Melt-in-Your-Mouth Mint Chocolate Chip Snowball Cookies
Celebrate the sweet, joyful spirit of the holidays by crafting a delightful spread that pairs perfectly with your warm cookies.
- Creamy Hot Cocoa: The rich, velvety texture of hot cocoa provides a luscious contrast to the cookies’ lightness and enhances the chocolate flavor.
- Peppermint Tea: This aromatic beverage not only complements the minty notes of the cookies but also adds a calming touch to festive gatherings.
- Vanilla Ice Cream: A scoop of this classic treat balances the cookies’ sweetness, creating a delightful melty experience with each bite.
- Fresh Fruit Salad: Bright and refreshing, a fruit salad adds a juicy element that cuts through the richness of the cookies for a delightful balance.
- Chocolate Fondue: Dip cookie halves into warm, melted chocolate for an extra decadent twist that will have your guests swooning with delight.
- Nutty Biscotti: The crunchiness of biscotti adds texture contrast to the melt-in-your-mouth cookies while offering a complementary flavor profile for dipping.
- Eggnog: Sweet and spiced, this classic holiday drink enhances the festive atmosphere and pairs beautifully with the minty sweetness of the cookies.
- Chocolate Mint Milkshake: For a fun and indulgent treat, a cold milkshake bursting with chocolate and mint flavors is the ultimate pairing experience.
- Mini Cheesecakes: Creamy, rich, and oh-so-decadent, cheesecakes provide a delightful contrast that complements the cookies without overshadowing their flavors.
Chocolate Chip Snowball Cookies Variations
Feel free to let your creativity shine and make these cookies your own with delicious tweaks!
- Dairy-Free: Substitute butter with coconut oil and use dairy-free chocolate chips for a plant-based treat. Just be mindful that the texture might be slightly different.
- Crushed Candy Canes: Add a quarter cup of crushed candy canes for a festive and crunchy twist, giving your cookies a holiday flair that your guests will adore.
- Nutty Goodness: Throw in half a cup of chopped walnuts or pecans for an extra layer of flavor and crunch, elevating the classic taste with a delightful nutty twist.
- Flavored Extracts: Swap the peppermint extract for almond or orange extract for unique flavor profiles that create delightful surprises in every bite. These variations add an unexpected twist that keeps things exciting.
- Gluten-Free: Use a gluten-free all-purpose flour blend to make these cookies gluten-free. Make sure all other ingredients are certified gluten-free to ensure everyone can enjoy your creations.
- Mint Chocolate Swirl: Substitute half of the mini chocolate chips with mint-flavored chocolate for an intensified mint experience that will make your taste buds sing.
- Spiced Flavor: Sprinkle in some spices like cinnamon or nutmeg for a warm depth of flavor that perfectly complements the festive season.
- Add Some Heat: Incorporate a pinch of cayenne or chili powder for a subtle kick, bringing a fun and spicy surprise that’s sure to impress adventurous eaters.
For more delightful holiday treats, consider checking out these wonderful recipes for Gluten Free Cookies or dive into the rich flavor of Rocky Road Chocolate! Each variation adds a unique twist to your cookie-making adventures.
Expert Tips for Chocolate Chip Snowball Cookies
- Room Temperature Butter: Make sure your unsalted butter is softened to room temperature for easier creaming, which ensures a light texture in the cookies.
- Chill the Dough: Don’t skip the chilling step! Refrigerating the dough for 30-60 minutes prevents spreading and makes it easier to handle, resulting in perfectly shaped Chocolate Chip Snowball Cookies.
- Avoid Overbaking: Keep a close eye on your cookies while baking; remove them when the edges are golden and the centers remain soft for that melt-in-your-mouth quality.
- Double Dust Sugar: For an extra fluffy coating, roll the cookies in powdered sugar twice: once while warm and again after cooling, enhancing their snowy appearance.
- Don’t Overmix: When combining wet and dry ingredients, mix just until combined to maintain that tender crumb your cookies are known for—no one likes a tough cookie!
Make Ahead Options
These Melt-in-Your-Mouth Mint Chocolate Chip Snowball Cookies are excellent for meal prep, allowing you to enjoy freshly baked cookies with less last-minute stress! You can prepare the cookie dough up to 24 hours in advance; simply cover it tightly with plastic wrap and refrigerate. Alternatively, you can scoop and roll the dough into balls and freeze them for up to 3 months—just make sure to place them in an airtight container or freezer bag to prevent freezer burn. When you’re ready to bake, there’s no need to thaw; simply bake straight from the freezer, adding an extra minute or two to the baking time. This way, you’ll achieve that warm, just-out-of-the-oven taste without the hassle, making holiday baking a breeze!
Storage Tips for Chocolate Chip Snowball Cookies
- Room Temperature: Store cookies in an airtight container at room temperature for up to 1 week to maintain their melt-in-your-mouth texture and flavor.
- Fridge: If you want to keep them fresh a bit longer, refrigerate for up to 2 weeks. Just remember to bring them to room temperature before enjoying!
- Freezer: Freeze cookies in a single layer on a baking sheet, then transfer them to a zip-top bag for up to 3 months. Thaw at room temperature or warm in a 350°F (175°C) oven for 5 minutes.
- Reheating: For the best experience, enjoy these Chocolate Chip Snowball Cookies warmed; they will retain their delightful texture and flavor!
Melt-in-Your-Mouth Mint Chocolate Chip Snowball Cookies Recipe FAQs
What is the best way to select mint leaves or mint extract?
Absolutely! When using fresh mint, look for vibrant, bright green leaves without dark spots or wilting. For mint extract, always opt for pure extracts as they have a more robust flavor compared to synthetic versions, which can taste artificial.
How should I store the cookies?
To keep your Chocolate Chip Snowball Cookies fresh, store them in an airtight container at room temperature for up to 1 week. If you want them to last longer, refrigerate them, and they will stay good for up to 2 weeks. Just remember to let them warm back to room temperature before serving for the best flavor and texture!
Can I freeze these cookies?
Yes, indeed! To freeze your cookies, simply arrange them in a single layer on a baking sheet and freeze until solid. After freezing, transfer them to a zip-top bag and store for up to 3 months. When you’re ready to indulge, thaw them at room temperature or pop them in a 350°F (175°C) oven for about 5 minutes to refresh their melt-in-your-mouth goodness.
What should I do if my cookies spread too much while baking?
Very! If you find your cookies spread too much, it’s likely due to dough that wasn’t chilled long enough or using warm butter. To counteract this, ensure your butter is softened to room temperature rather than melted, and chill the dough for at least 30 minutes before baking to help maintain shape.
Are these cookies safe for people with nut allergies?
Great question! Yes, the basic recipe for Chocolate Chip Snowball Cookies is nut-free as long as you use mini chocolate chips that don’t contain nuts. However, always double-check the labels on your ingredients to ensure they haven’t been processed in a facility with nuts if you’re catering to someone with severe allergies.
Can I use other types of chocolate in this recipe?
Definitely! I often make these cookies with different chocolate varieties. You can substitute mini chocolate chips with dark, milk, or even white chocolate chunks to create your preferred flavor profile. Experimenting with these alternatives can really personalize your cookie experience!
Melt-in-Your-Mouth Chocolate Chip Snowball Cookies Delight
Ingredients
Equipment
Method
- Preheat your oven to 350°F (175°C) and line two baking sheets with parchment paper.
- In a medium bowl, whisk together 1 1/2 cups of all-purpose flour and a pinch of salt until well combined.
- Cream together 3/4 cup of softened unsalted butter until creamy, then gradually add 1/3 cup of granulated sugar and mix until light and fluffy.
- Mix in 1 teaspoon of pure vanilla extract and 1/2 teaspoon of peppermint extract, and optionally add a few drops of green food coloring.
- Gradually add the dry ingredient mixture to the wet ingredients, mixing until just combined, and gently fold in 1 cup of mini chocolate chips.
- Cover the dough with plastic wrap and refrigerate for 30 to 60 minutes.
- Scoop about 1-inch portions of dough and roll into balls, placing them on prepared baking sheets about 2 inches apart.
- Bake for 10-12 minutes, until the edges are lightly golden and centers are pale.
- Remove from oven and cool on sheets for 5-10 minutes, then roll in powdered sugar while warm and again after cooling.
- Enjoy or store in an airtight container for up to a week.
Leave a Reply