
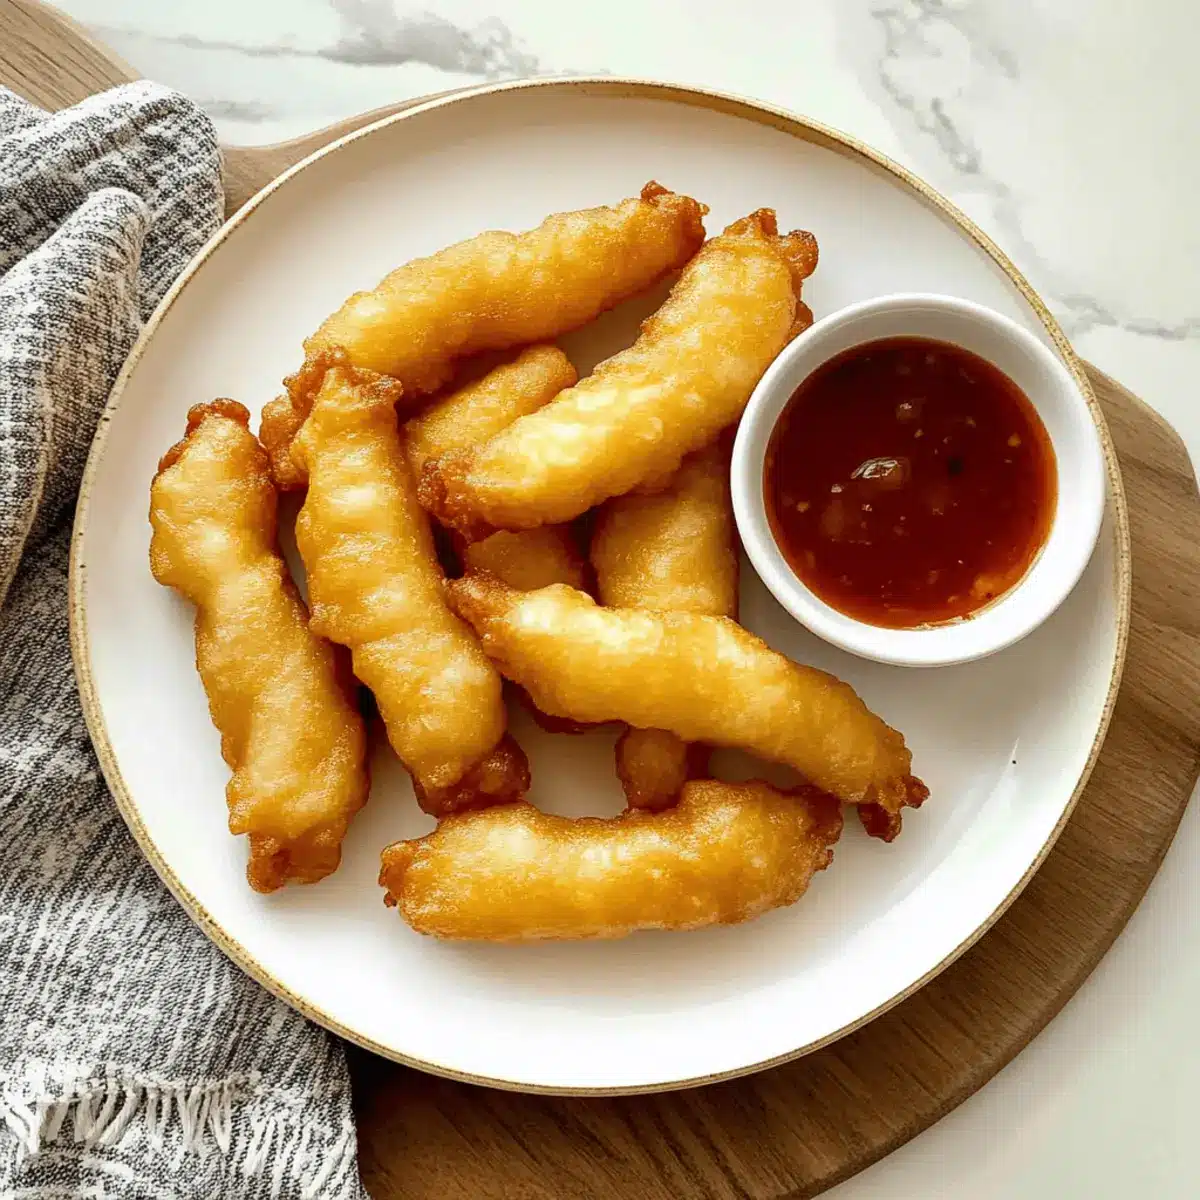
The sizzle of chicken strips hitting hot oil transports me back to evenings spent at my favorite Chinese takeout spot, eagerly awaiting a steaming plate of crispy goodness. These Crispy Chinese Chicken Fingers are a homemade twist on that nostalgia, featuring a unique wet batter that results in a crunchy, golden shell—perfectly puffy and oh-so-satisfying. What’s more, this recipe comes together quickly, making it an ideal solution for those mid-week cravings without the hassle of ordering out. And with a homemade sweet and sour sauce to dip, you’ll have a tasty, restaurant-style meal right in your kitchen. Ready to create a dinner that rivals your favorite takeout? Let’s dive into these delightful chicken fingers!
Why Are These Chicken Fingers So Irresistible?
Crispy Texture: Each bite delivers an incredible crunch, making you wonder why you ever settled for takeout.
Quick and Easy: Whipping up this dish is a breeze—perfect for busy evenings or unexpected guests looking for a satisfying treat.
Homemade Flavor: With just a few pantry staples, you’ll create that authentic takeout taste right in your own kitchen.
Sweet and Sour Delight: The homemade sauce adds a delightful tang that elevates the chicken fingers to a new level of deliciousness.
Customizable Options: Want a vegetarian twist? Swap chicken for firm tofu for a delightful alternative!
Crowd-Pleaser: Serve these crispy delights at your next gathering, and watch as everyone comes back for seconds!
Chinese Chicken Fingers Ingredients
For the Chicken:
- Chicken Breasts – cut into strips for even cooking, ensuring they fry perfectly.
For the Batter:
- Cornstarch – adds incredible crispiness and light texture; no substitutes recommended.
- All-Purpose Flour – forms the batter base; gluten-free flour works as a substitution.
- Baking Powder – helps create that desired puffed texture; can be replaced with self-rising flour.
- Sugar – brings a hint of sweetness to balance the flavors; consider using brown sugar for depth.
- Salt – enhances overall flavor and is essential for this dish.
- Cold Water – activates the batter ingredients; ensure you follow the quantity for the best consistency.
For the Sweet and Sour Sauce:
- Ketchup – the sweetness base for the sauce, giving it that quintessential takeout flavor.
- Brown Sugar – adds depth and a touch of sweetness to the sauce for a delicious twist.
- White Vinegar – balances the sweetness and provides that necessary acidity.
- Cornstarch – thickens the sauce, ensuring it clings beautifully to your chicken fingers.
- Salt – enhances the flavor of the sauce, rounding off the taste.
- Lychee Juice (or Pineapple Juice) – provides a fruity base for the sauce; feel free to use what you have on hand.
Prepare to step up your dinner game with these delectable Chinese Chicken Fingers!
Step‑by‑Step Instructions for Crispy Chinese Chicken Fingers
Step 1: Prepare the Chicken
Begin by cutting the chicken breasts into ½-inch thick strips, ensuring even sizes for consistent cooking. Once cut, set the chicken aside on a plate, ready to be coated with a delightful batter that will create a crispy texture in your Chinese Chicken Fingers.
Step 2: Make the Batter
In a large mixing bowl, whisk together cornstarch, all-purpose flour, baking powder, sugar, and salt until well blended. Gradually add cold water, stirring continuously until the batter reaches a smooth, slightly thick consistency. This wet batter is the secret to achieving that perfect crunch when frying your chicken fingers.
Step 3: Heat the Oil
In a heavy pot, heat about 2 inches of oil over medium-high heat until it reaches 350°F (175°C). Use a deep-fry thermometer for accuracy, as this temperature ensures your chicken fingers fry beautifully without absorbing excess oil. You’ll know it’s ready when the oil shimmers and small bubbles form on the surface.
Step 4: Coat the Chicken
Carefully dip each chicken strip into the prepared batter, ensuring a generous coating while letting any excess drip off. This step is crucial, as the batter will create the wonderful crispy exterior on your Chinese Chicken Fingers.
Step 5: Fry the Chicken
Once the oil is hot, gently lower the battered chicken strips into the oil in batches of 5-7 pieces. Fry for 6 to 7 minutes, or until each piece turns a beautiful golden brown and becomes crispy. Avoid overcrowding the pot to maintain the oil temperature, ensuring even cooking.
Step 6: Drain Excess Oil
After frying, use a slotted spoon to transfer the chicken fingers to a wire rack placed over a baking sheet. This method allows excess oil to drain off, keeping your crispy Chinese Chicken Fingers light and crunchy. Now, they’re one step closer to being ready to enjoy!
Step 7: Prepare the Sweet and Sour Sauce
In a saucepan, combine ketchup, brown sugar, white vinegar, cornstarch, salt, and your choice of lychee juice or pineapple juice. Bring the mixture to a boil over medium-high heat, stirring constantly until it thickens. This homemade sweet and sour sauce adds the perfect tangy delight to perfectly complement your delicious chicken fingers.
Step 8: Serve
Once the chicken fingers are crispy and the sauce is ready, serve them hot with the homemade sweet and sour sauce on the side. Pair your Crispy Chinese Chicken Fingers with a bed of fried rice or enjoy them as a snack with friends. The flavors will remind you of your favorite takeout, but with the warmth of home-cooked goodness!
Helpful Tricks for Chinese Chicken Fingers
-
Proper Batter Consistency: Ensure your batter is slightly thick but smooth. Too thin can lead to soggy chicken fingers when frying.
-
Maintain Oil Temperature: A thermometer is your best friend! Frying at 350°F creates that perfect crispy coating, avoiding overcooked or greasy results.
-
Batch Frying: Don’t overcrowd the pot; fry in small batches to keep the oil hot, ensuring each piece cooks evenly and achieves that coveted crispiness.
-
Drain Well: After frying, let the chicken fingers rest on a wire rack to drain excess oil. This keeps them crispy and light, enhancing their texture.
-
Customize the Dip: While the homemade sweet and sour sauce is a winner, feel free to mix it up! Experiment with dipping sauces like sweet chili or tangy mustard for added flavor to your Chinese Chicken Fingers.
Chinese Chicken Fingers Variations & Substitutions
Ready to add your personal touch to these delightful chicken fingers? Let your culinary creativity shine as you explore these fun twists!
- Vegetarian Option: Substitute chicken with firm tofu or tempeh for a delicious plant-based version. The batter will keep it crispy just like the original.
- Gluten-Free: Use a gluten-free all-purpose flour blend instead of standard flour, ensuring everyone can enjoy these bites. It offers a similar texture that pairs perfectly with your favorite sauce.
- Sweet Chili Dip: Swap the sweet and sour sauce for a zesty sweet chili sauce for a tangy twist. It brings a delightfully spicy kick that takes your chicken fingers to a whole new level!
- Herb-Infused Batter: Add chopped fresh herbs like cilantro or basil to the batter for a burst of flavor that brightens every bite. This fresh addition makes the dish unique and appealing.
- Crispy Add-Ins: Toss in some finely chopped green onions or chopped bell peppers into the batter for added texture and flavor. They will add a colorful crunch that’s irresistible.
- Heat Level Up: Incorporate a dash of chili powder or cayenne pepper to the batter for those who love a little heat. It’s a fantastic way to spice things up!
- Air Fryer Friendly: If you’re looking for a healthier method, try cooking these chicken fingers in an air fryer; they can come out crispy without excess oil. Just adjust the cooking time for optimal results.
- Serve with Variety: Pair with multiple dipping sauces like teriyaki or honey mustard alongside the sweet and sour sauce for a fun dipping experience. Everyone can have their favorite!
These variations not only cater to diverse tastes but also let you customize your meal to fit any occasion. For more delicious chicken ideas, check out my Garlic Chicken Gnocchi or enjoy the flavors of Chimichurri Grilled Chicken for your next gathering. Let’s get cooking and make these chicken fingers uniquely yours!
What to Serve with Crispy Chinese Chicken Fingers?
Bring home the essence of takeout with delightful sides that will complement your crispy chicken fingers perfectly.
- Fried Rice: A classic pairing, the savory flavors of fried rice harmonize beautifully with the crispy chicken, creating a satisfying meal.
- Steamed Broccoli: Bright green and lightly seasoned, steamed broccoli adds a fresh crunch and balances the richness of the chicken fingers.
- Sweet and Sour Cabbage Salad: This vibrant salad introduces an additional sweet and tangy element, enhancing the flavors of the chicken fingers while providing a satisfying crunch.
- Chili Garlic Noodles: Spicy and garlic-infused, these noodles offer a delightful contrast to the sweet and savory elements of the chicken, amplifying the overall flavor.
- Spring Rolls: Light and crispy, spring rolls make a perfect finger food that complements the dish while adding a fun, fresh element to your meal.
- Mango Lassi: A refreshing drink, the creamy sweetness of mango lassi pairs wonderfully with the spices of the chicken fingers for a delightful contrast.
- Green Tea: Known for its lightness, green tea cleanses the palate and enhances the flavors of your meal, making it a perfect accompaniment.
- Chocolate Chip Cookies: End your meal on a sweet note! The chewy texture and sweetness of cookies create a delightful way to round off your dining experience.
Make Ahead Options
These Crispy Chinese Chicken Fingers are perfect for meal prep enthusiasts! You can prepare the chicken strips up to 24 hours in advance by cutting them and storing them in an airtight container in the refrigerator. Additionally, you can mix the batter and keep it covered in the refrigerator for up to 2 hours before cooking to ensure a fresh, crispy texture. When you’re ready to serve, simply heat your oil (to 350°F/175°C) and fry the battered chicken strips until they’re golden brown and delicious. This way, you’ll have mouthwatering takeout-style chicken fingers ready in no time, saving you precious minutes on busy weeknights!
Storage Tips for Chinese Chicken Fingers
-
Room Temperature: Allow Chinese Chicken Fingers to cool completely before storing to prevent moisture buildup. They can sit out for up to 2 hours safely.
-
Fridge: Store leftover chicken fingers in an airtight container in the refrigerator for up to 3 days. Reheat in the oven for about 10 minutes at 375°F (190°C) for the best crispiness.
-
Freezer: For longer storage, freeze the chicken fingers on a baking sheet until solid, then transfer them to a freezer-safe bag. They will keep well for up to 2 months.
-
Reheating: When you’re ready to enjoy them, bake frozen chicken fingers at 400°F (200°C) for 15-20 minutes or until heated through and crispy again.
Chinese Chicken Fingers Recipe FAQs
How do I choose the right chicken for this recipe?
Absolutely! For the best results, opt for fresh, high-quality boneless, skinless chicken breasts. Look for breasts that are pinkish in color without dark spots or an off smell. They should feel firm and not have any excessive moisture. If you can find chicken that hasn’t been frozen, that’s even better as it tends to be juicier.
How should I store leftover crispy Chinese chicken fingers?
Very easy! Once your chicken fingers have cooled completely, store them in an airtight container in the refrigerator for up to 3 days. To keep them crispy, reheat in the oven at 375°F (190°C) for about 10 minutes. For best results, avoid the microwave as it tends to make them soggy.
Can I freeze Chinese chicken fingers?
You bet! Freezing is a great way to enjoy your chicken fingers later. I recommend laying them out on a baking sheet in a single layer and freezing them for about 1 hour until solid. Then, transfer them to a freezer-safe bag or container. They can be stored in the freezer for up to 2 months. When ready to enjoy, bake from frozen at 400°F (200°C) for 15-20 minutes, or until heated through and crispy again.
What if my chicken fingers are getting soggy after frying?
The key is all in the frying technique! Ensure your oil is hot enough—around 350°F (175°C) and avoid overcrowding the pot, which can lower the oil temperature. Fry the chicken in small batches and make sure to drain them properly on a wire rack to keep that delicious crispiness.
Are there any dietary considerations for this recipe?
Yes, absolutely! If you or your guests have allergies, ensure to check for any gluten intolerances since the recipe uses all-purpose flour. You can easily swap it out for a gluten-free alternative. Additionally, if you’re looking for a vegetarian version, firm tofu or tempeh can be substituted for the chicken, following the same battering and frying steps to achieve that crunchy texture.
Can I prepare the batter in advance?
Certainly! You can make the batter ahead of time and store it in the refrigerator for up to 2 hours before frying your chicken fingers. Just give it a good stir before using, as it may thicken slightly while sitting. This can be a great time-saver if you’re hosting guests or just want to streamline your cooking process!
Crispy Chinese Chicken Fingers That Beat Takeout Every Time
Ingredients
Equipment
Method
- Begin by cutting the chicken breasts into ½-inch thick strips and set aside.
- In a large bowl, whisk together cornstarch, all-purpose flour, baking powder, sugar, and salt. Gradually add cold water until smooth and slightly thick.
- Heat about 2 inches of oil in a heavy pot to 350°F (175°C). Use a thermometer for accuracy.
- Dip each chicken strip into the batter, ensuring a generous coating while letting excess drip off.
- Carefully lower the battered chicken strips into the hot oil in batches of 5-7, frying for 6-7 minutes until golden brown.
- Transfer cooked chicken fingers to a wire rack over a baking sheet to drain excess oil.
- In a saucepan, combine ketchup, brown sugar, white vinegar, cornstarch, salt, and lychee or pineapple juice. Boil over medium-high heat while stirring until thickened.
- Serve the crispy chicken fingers hot with the sweet and sour sauce on the side.
Leave a Reply