
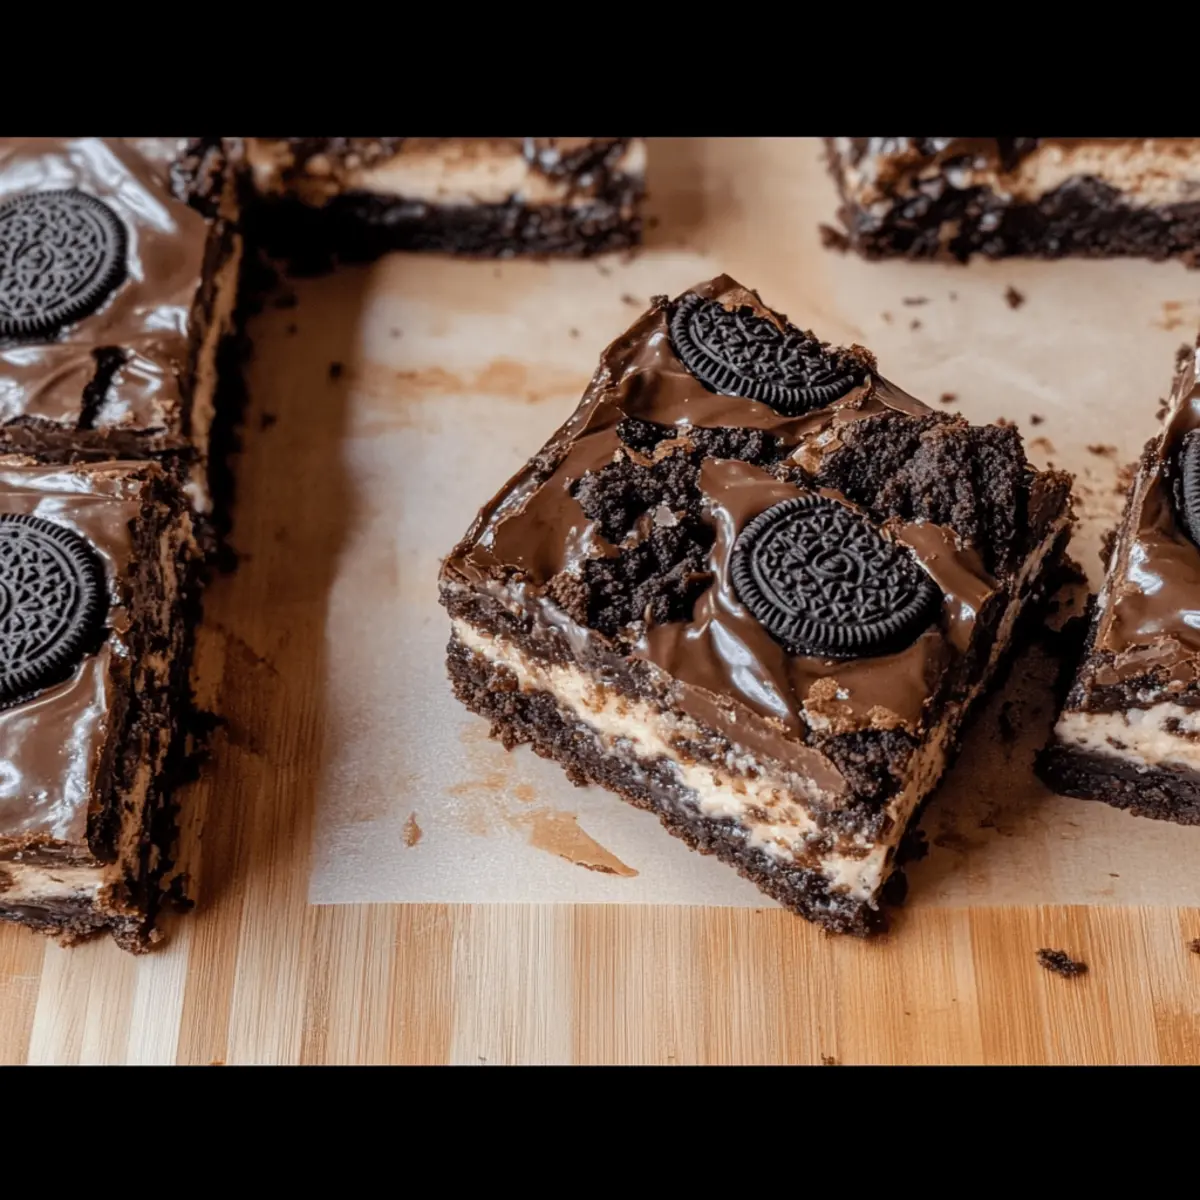
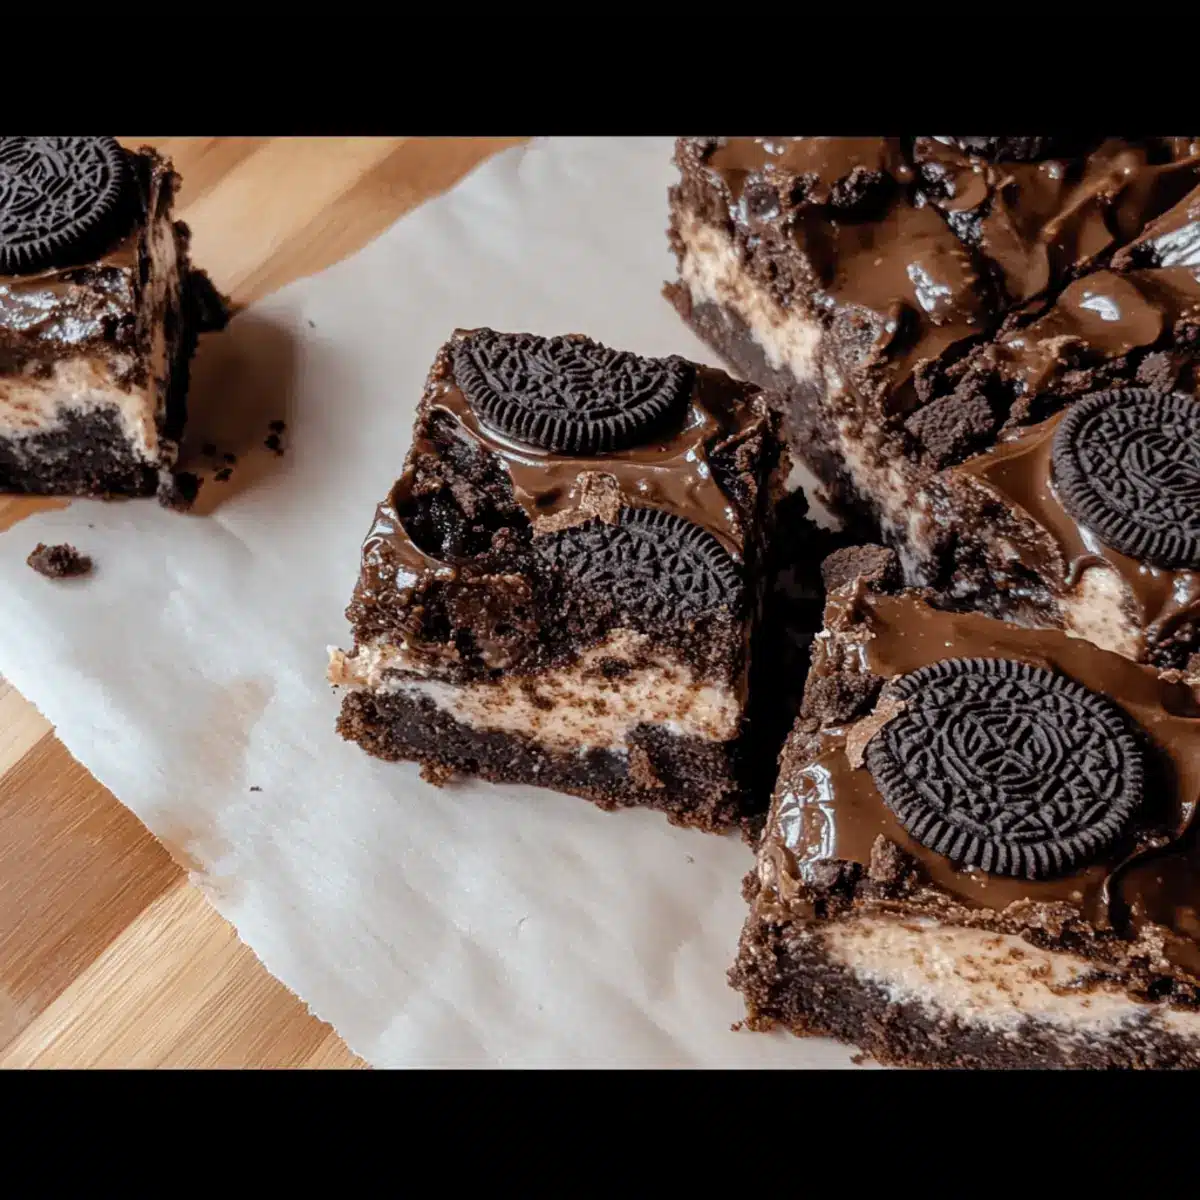
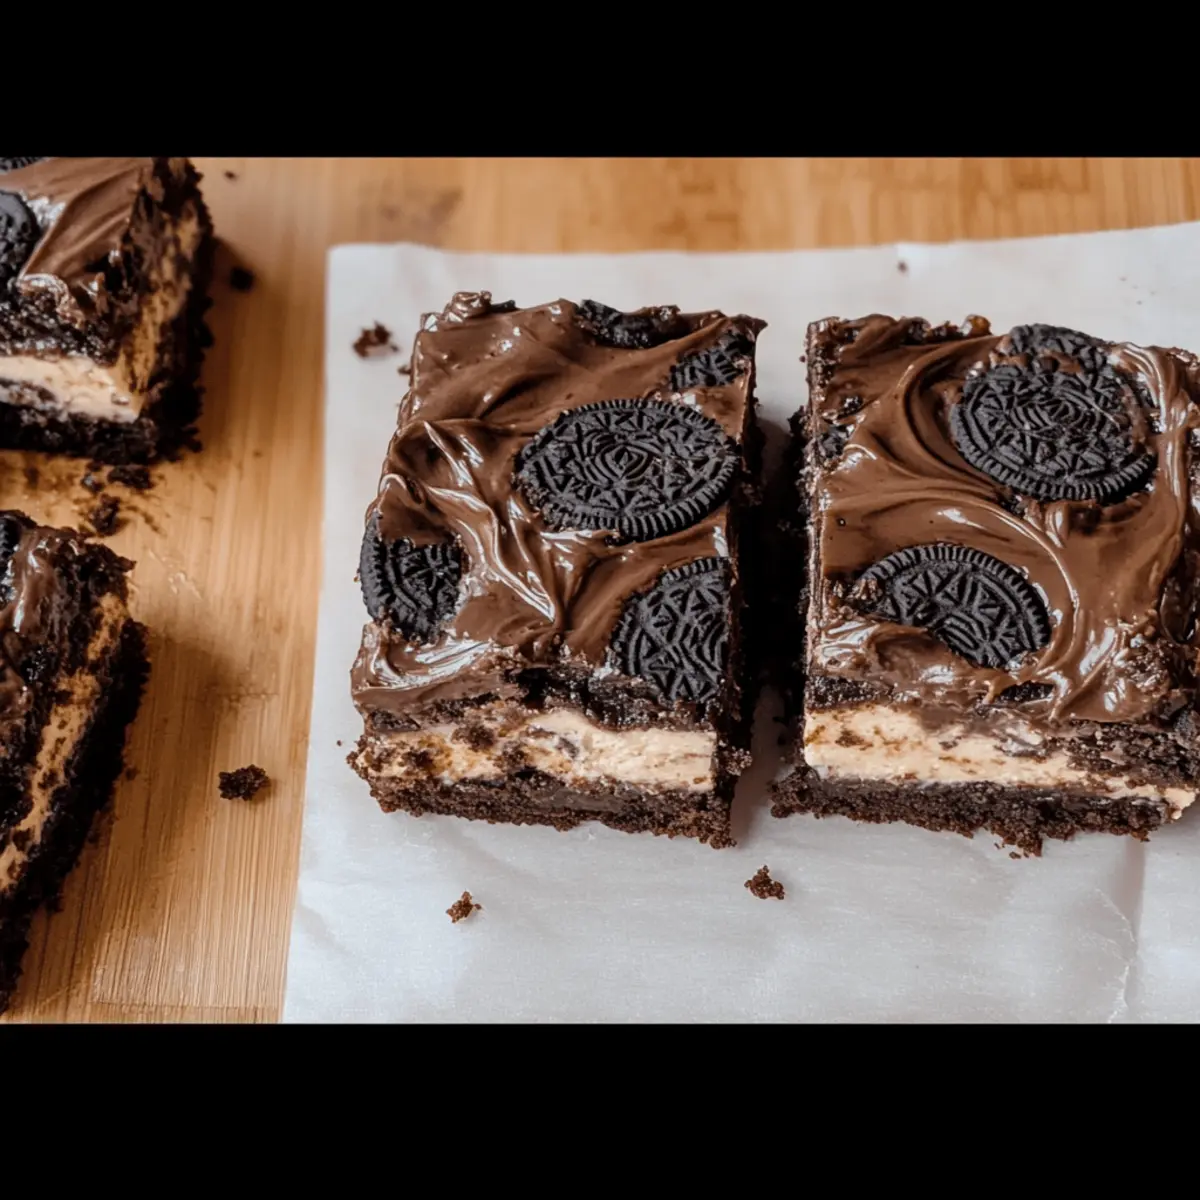
As the aroma of chocolate wafts through the kitchen, I find myself in a delightful dilemma: how to make a classic dessert even more irresistible. Enter my Brownie Cheesecake Bars! With a deeply fudgy brownie base, velvety cheesecake layer, and a luscious Oreo ganache topping, these bars are not just a treat; they’re a celebration of flavors and textures that will have everyone reaching for seconds. They’re wonderfully easy to put together, making them the perfect option for impromptu gatherings or after-dinner cravings. Plus, they’re a crowd-pleaser, guaranteed to earn you rave reviews from family and friends. Curious about how to craft this mouthwatering delight yourself? Let’s dive in!
Why Are Brownie Cheesecake Bars So Irresistible?
Decadence in Every Bite: These Brownie Cheesecake Bars combine the best of both worlds, featuring a fudgy brownie base topped with a creamy cheesecake layer. Customization Galore: Whether you fancy Mint Oreo or Salted Caramel, there’s a variation for every occasion! Quick and Easy: Prepare in under an hour, making them perfect for last-minute gatherings. Kid-Approved: With their indulgent flavors, they’re sure to win over both kids and adults alike. Make-Ahead Friendly: Prepare a day before for a treat that only gets better with time. Explore more delightful desserts like Bake Keto Cheesecake or Gluten Free Brownies to keep your dessert table exciting!
Brownie Cheesecake Bars Ingredients
These Brownie Cheesecake Bars are so easy to make and delicious that you’ll want to keep the ingredients on hand!
For the Brownie Base
- Box Brownie Mix – Creates the rich foundation; feel free to swap with a homemade recipe if you’re feeling adventurous!
- Oreos – Adds crunch and rich flavor; choose your favorite variety for a personal touch.
For the Cheesecake Layer
- Cream Cheese – Provides that creamy, dreamy texture; make sure it’s softened for easy mixing.
- Large Egg – Binds the ingredients perfectly; it’s essential for the cheesecake consistency.
- Vanilla Extract – Elevates the taste; opt for pure vanilla for a more aromatic flavor.
- Granulated Sugar – Sweetness to balance the cream cheese; adjust if your Oreos are particularly sweet.
- Sour Cream – Adds creaminess; Greek yogurt can also work as a delightful substitute.
For the Ganache Topping
- Chocolate Chips – Brings richness and depth; you can switch to milk or white chocolate for a different twist.
- Heavy Whipping Cream – Ensures a velvety ganache; using light cream won’t achieve the same luxurious texture.
Optional Garnish
- Crushed Oreos – For topping the ganache; sprinkles of Oreo bits add that final crunch and flair.
Get ready to whip up these incredible Brownie Cheesecake Bars that will leave your family and friends craving more!
Step‑by‑Step Instructions for Brownie Cheesecake Bars
Step 1: Preheat the Oven
Begin by preheating your oven to 350°F (175°C). Prepare a 9×13 inch baking pan by spraying it with nonstick spray or lining it with parchment paper. This will prevent the layers from sticking and ensure easy removal once baked. Set the prepared pan aside as you mix your brownie batter.
Step 2: Prepare the Brownie Layer
In a large mixing bowl, follow the instructions on the box brownie mix to prepare the brownie layer. After mixing, pour the thick brownie batter into the prepared baking pan, spreading it evenly. Place the pan in the oven and bake for about 20-25 minutes, or until you can insert a toothpick into the center and it comes out with a few moist crumbs.
Step 3: Mix the Cheesecake Layer
While the brownie base is baking, make the cheesecake layer. In a separate bowl, combine softened cream cheese, a large egg, vanilla extract, granulated sugar, and sour cream. Use an electric mixer on medium speed to blend until smooth and creamy. This mixture should be free of lumps, creating a beautiful contrast to the dense brownie base.
Step 4: Add the Cheesecake Layer
Once the brownie layer is baked, remove it from the oven and carefully pour the cheesecake mixture over the hot brownie layer. Use a spatula to spread the cheesecake evenly across the top, making sure it covers the brownie completely. Return the pan to the oven and bake for an additional 25-30 minutes, until the cheesecake has set but still has a slight jiggle in the center.
Step 5: Cool and Chill the Bars
After baking, let the Brownie Cheesecake Bars cool at room temperature for about 30 minutes. Once cooled, cover the pan with plastic wrap and chill in the refrigerator for at least 1 hour, though overnight chilling is best. This will help the cheesecake layer firm up and enhance the flavors.
Step 6: Prepare the Ganache Topping
For the Oreo ganache, melt heavy whipping cream and chocolate chips together in a heat-proof bowl, using either a microwave or a double boiler. Stir until the mixture is completely smooth and glossy. Gently fold in crushed Oreos to add delightful texture. This ganache will provide a rich finish to your Brownie Cheesecake Bars.
Step 7: Top the Cheesecake Bars
After the bars have chilled and the ganache is ready, remove the pan from the refrigerator. Pour the Oreo ganache over the chilled cheesecake layer, spreading it evenly to cover the entire top. Allow the ganache to set for about 15-20 minutes at room temperature before slicing your bars. This will help the layers meld together beautifully.
Step 8: Slice and Serve
When the ganache is set, use a sharp knife to cut the Brownie Cheesecake Bars into squares. Wiping the knife between cuts will ensure clean edges. Serve these decadent bars chilled, and prepare for smiles and compliments as family and friends indulge in your delicious homemade treat!
How to Store and Freeze Brownie Cheesecake Bars
Fridge: Keep the Brownie Cheesecake Bars in an airtight container in the refrigerator for up to 5-6 days. This helps maintain their deliciously creamy texture and flavor.
Freezer: For longer storage, wrap individual bars tightly in plastic wrap and aluminum foil before placing them in a freezer-safe bag. They can last up to 3 months in the freezer.
Thawing: When you’re ready to enjoy, thaw the bars overnight in the refrigerator. This preserves the rich flavors and ensures they’re ready for indulgence.
Reheating: If you prefer them slightly warm, gently warm them in the microwave for about 10-15 seconds before serving.
Expert Tips for Brownie Cheesecake Bars
- Cool First: Allow the brownie layer to cool for at least 30 minutes before adding the cheesecake mixture; this prevents the cheesecake from melting.
- Chill Overnight: For the best texture and easier slicing of the Brownie Cheesecake Bars, chill them overnight in the refrigerator after baking.
- Flavor Experimentation: Don’t hesitate to try different Oreo flavors or even add fun toppings like crushed candy bars to make your bars unique!
- Smooth Cheesecake: Ensure your cream cheese is at room temperature for a lump-free cheesecake layer, making for a rich and creamy filling.
- Watch Baking Time: Keep a close eye on the baking time; overbaking the cheesecake can lead to a dry texture instead of the desired creaminess.
Make Ahead Options
These Brownie Cheesecake Bars are a fantastic choice for meal prep, saving you time during busy weeks! You can prepare the brownie base and cheesecake layer up to 24 hours in advance. Simply bake the brownie layer and allow it to cool before adding the cheesecake mixture. Cover the pan with plastic wrap and refrigerate; this helps the flavors meld beautifully. When you’re ready to enjoy your delicious bar, let them chill in the fridge for at least 1 hour (preferably overnight), then top with the ganache before serving. This way, you’ll have indulgent, ready-to-serve Brownie Cheesecake Bars waiting for you!
Brownie Cheesecake Bars Variations
Feel free to unleash your creativity and make these indulgent bars uniquely yours!
-
Mint Oreo Cheesecake Bars: Swap regular Oreos for Mint Oreos and stir in peppermint extract for an exhilarating twist. The mint instantly refreshes the classic chocolate flavor, making each bite even more delightful.
-
Salted Caramel Version: Drizzle with rich caramel sauce and sprinkle sea salt on top before serving. This creates a beautiful contrast between sweet and salty, elevating your dessert game to gourmet levels.
-
Holiday-Ready Red Velvet: Use red velvet brownie mix and top with festive crushed candy canes or peppermint Oreos. Not only does this add a pop of color, but it also brings a seasonal cheer that everyone will adore!
-
Nuts for Texture: Fold in your choice of chopped nuts, like walnuts or pecans, into the brownie layer. This addition will bring a delightful crunch and enhance the overall flavor profile.
-
Vegan Adaptation: Use a vegan brownie mix, substitute eggs with flaxseed meal, and use coconut cream in place of heavy cream. You still get that creamy decadence without any animal products.
-
Chocolate Lovers Dream: Replace the chocolate chips in the ganache with dark chocolate for an intense chocolate experience. Pairing it with a hint of espresso powder in the cheesecake will make every bite a dream come true!
-
Fruity Fusion: Add a layer of fresh raspberries or strawberries on top of the cheesecake before adding the ganache. The fruit’s natural tartness perfectly offsets the sweetness of the bars.
For more delightful recipes, you might enjoy trying out the Bake Peanut Bars or diving into some tasty Gluten Free Brownies. Let those sweet inspirations flow!
What to Serve with Brownie Cheesecake Bars
Want to elevate your dessert experience beyond just bars?
- Fresh Berries: The bright tartness of strawberries or raspberries cuts through the richness, adding a refreshing contrast.
- Whipped Cream: Light and airy, a dollop of fresh whipped cream creates a delightful creaminess that complements the dense layers.
- Vanilla Ice Cream: A scoop of creamy vanilla ice cream brings a chill that balances the warm, fudgy textures of the bars perfectly.
- Coffee or Espresso: The deep flavors of coffee enhance the chocolate and cheesecake beautifully, making each bite even more decadent.
- Caramel Sauce: A drizzle of warm caramel adds an indulgent sweet layer, enhancing the already luxurious treat with a touch of gooey goodness.
- Chocolate Sauce: Intensify the chocolate experience with a rich drizzle, perfect for chocolate lovers craving that extra kick.
- Nutty Toppings: Chopped nuts, like pecans or walnuts, sprinkled on top add a satisfying crunch and depth of flavor.
- Malted Milkshake: A thick, chocolate malted milkshake provides a nostalgic pairing that echoes the richness of the bars.
Pair any of these options with your Brownie Cheesecake Bars, and you’ll create a dessert experience that your family and friends will remember!

Brownie Cheesecake Bars Recipe FAQs
How do I select the right Oreos for my Brownie Cheesecake Bars?
Absolutely! You can choose any Oreo flavor that suits your taste. Classic Oreos add the traditional crunch, while Mint Oreos bring a refreshing twist. If you’re feeling adventurous, try Double-Stuf for extra creaminess or even seasonal flavors for a fun variation!
What’s the best way to store leftover Brownie Cheesecake Bars?
Great question! Keep your Brownie Cheesecake Bars in an airtight container in the refrigerator for up to 5-6 days. This keeps them fresh and maintains their creamy texture. If you’re not going to finish them within that timeframe, freezing them is a good option.
Can I freeze Brownie Cheesecake Bars? If so, how?
Yes, you can! To freeze your Brownie Cheesecake Bars, wrap them tightly in plastic wrap or aluminum foil, then place them in a freezer-safe bag. They’ll stay good for up to 3 months. When you’re ready to enjoy, just thaw them overnight in the refrigerator for the best flavor and texture.
What should I do if my cheesecake layer is too runny?
Very! If you find that your cheesecake layer is runny, it might be due to underbaking or using cold ingredients. Make sure your cream cheese is softened before mixing. If it hasn’t set, pop the bars back in the oven for a few extra minutes, checking frequently until it has a slight jiggle in the center. Cooling it longer in the refrigerator can also help it firm up.
Are these Brownie Cheesecake Bars safe for pets or people with allergies?
Absolutely! However, keep in mind that these bars contain dairy and gluten. They are not suitable for pets, especially dogs, as chocolate is toxic to them. For those with gluten allergies, consider using a gluten-free brownie mix and check if the Oreos are suitable for gluten-free diets.
Can I make these bars ahead of time?
Very! In fact, I recommend it! Preparing your Brownie Cheesecake Bars a day before serving enhances the flavors as they meld together beautifully. Just be sure to chill them overnight for the best texture. Enjoy your delicious creation the next day, giving you more time to relax with family and friends!
Brownie Cheesecake Bars: Decadent Layers of Indulgence
Ingredients
Equipment
Method
- Preheat your oven to 350°F (175°C) and prepare a 9x13 inch baking pan by spraying it with nonstick spray or lining it with parchment paper.
- In a large mixing bowl, follow the box directions to prepare the brownie layer. Pour the brownie batter into the prepared baking pan and bake for 20-25 minutes.
- While the brownie layer bakes, mix the cheesecake layer by combining softened cream cheese, the egg, vanilla extract, granulated sugar, and sour cream. Blend until smooth.
- After the brownie layer is baked, pour the cheesecake mixture over the hot brownie layer and spread evenly. Return to the oven and bake for an additional 25-30 minutes.
- Allow the bars to cool at room temperature for 30 minutes, then cover and chill in the refrigerator for at least 1 hour.
- For the ganache, melt the heavy whipping cream and chocolate chips in a heat-proof bowl until smooth. Fold in crushed Oreos.
- Pour the ganache over the chilled cheesecake layer and let it set for 15-20 minutes before slicing.
- Cut into squares and serve chilled.
Leave a Reply