
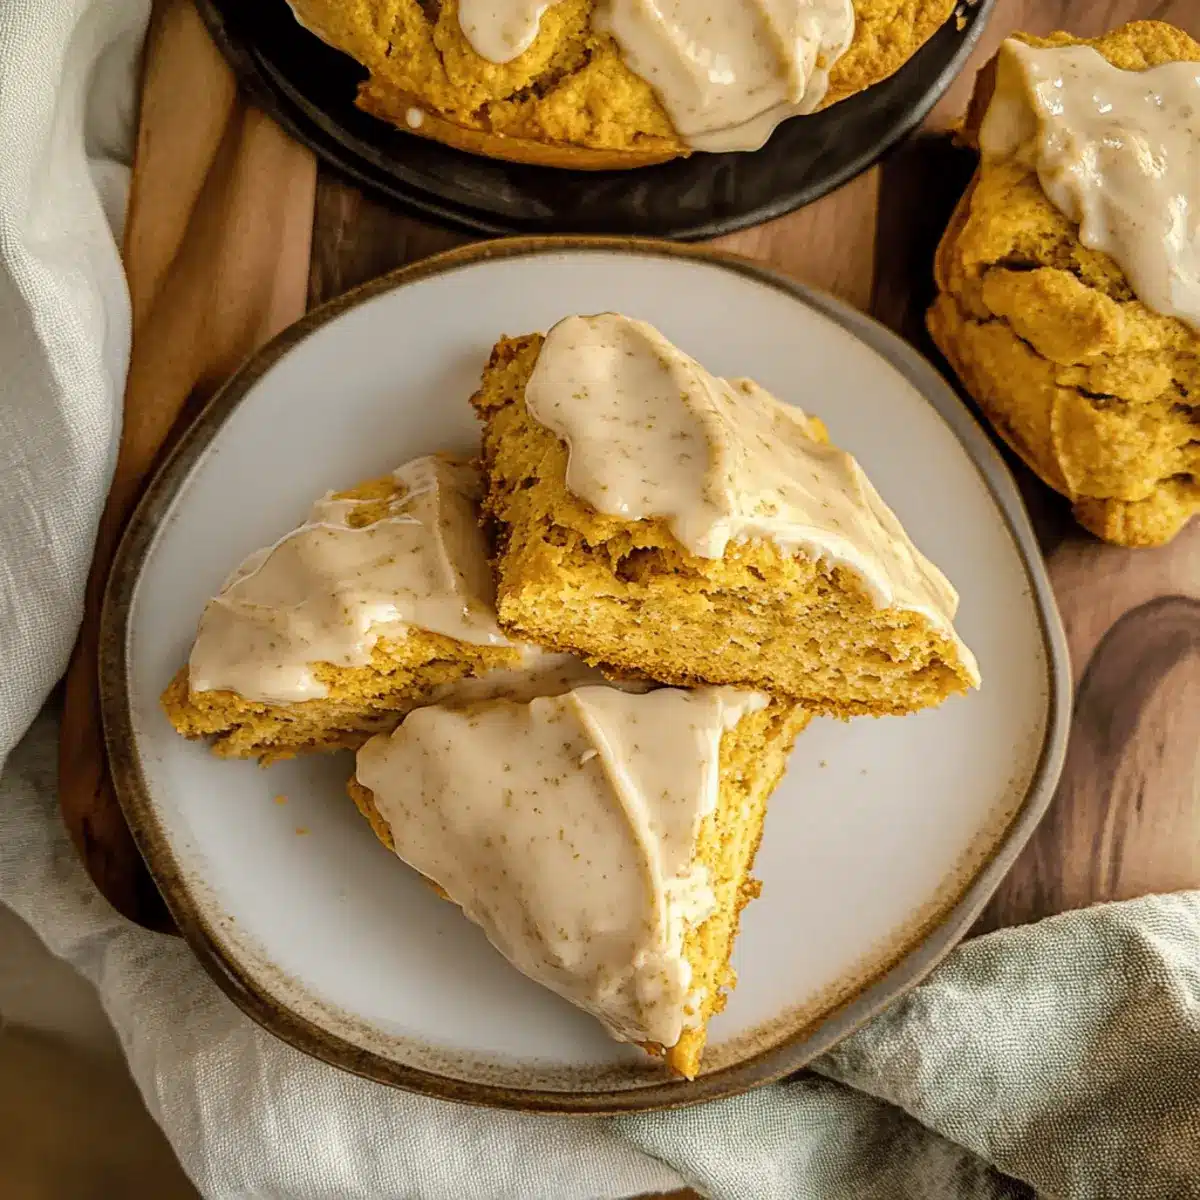
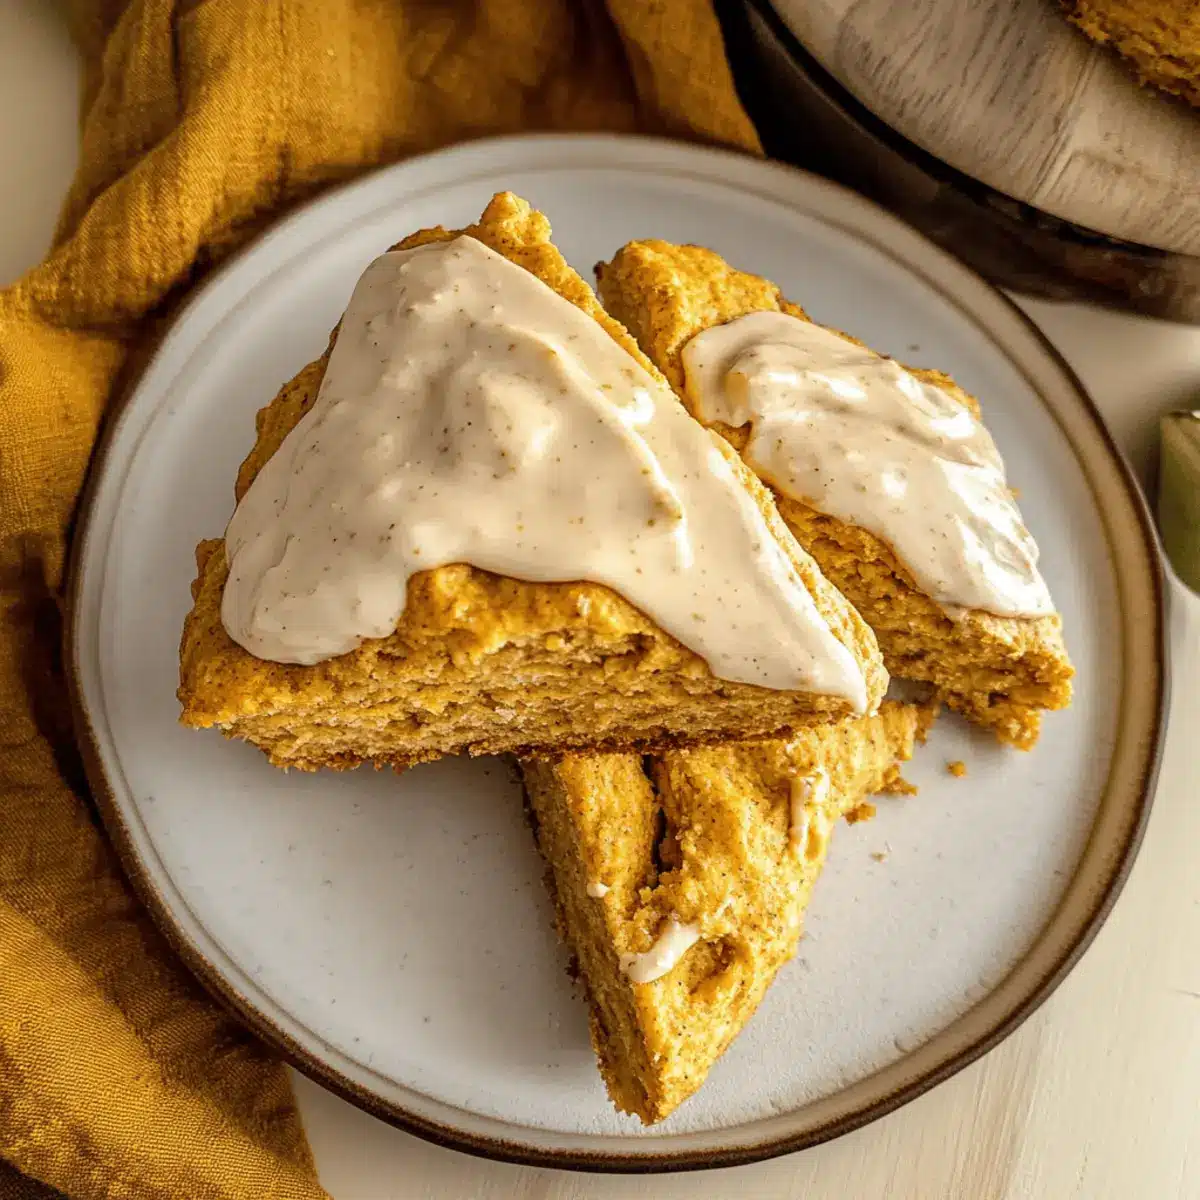
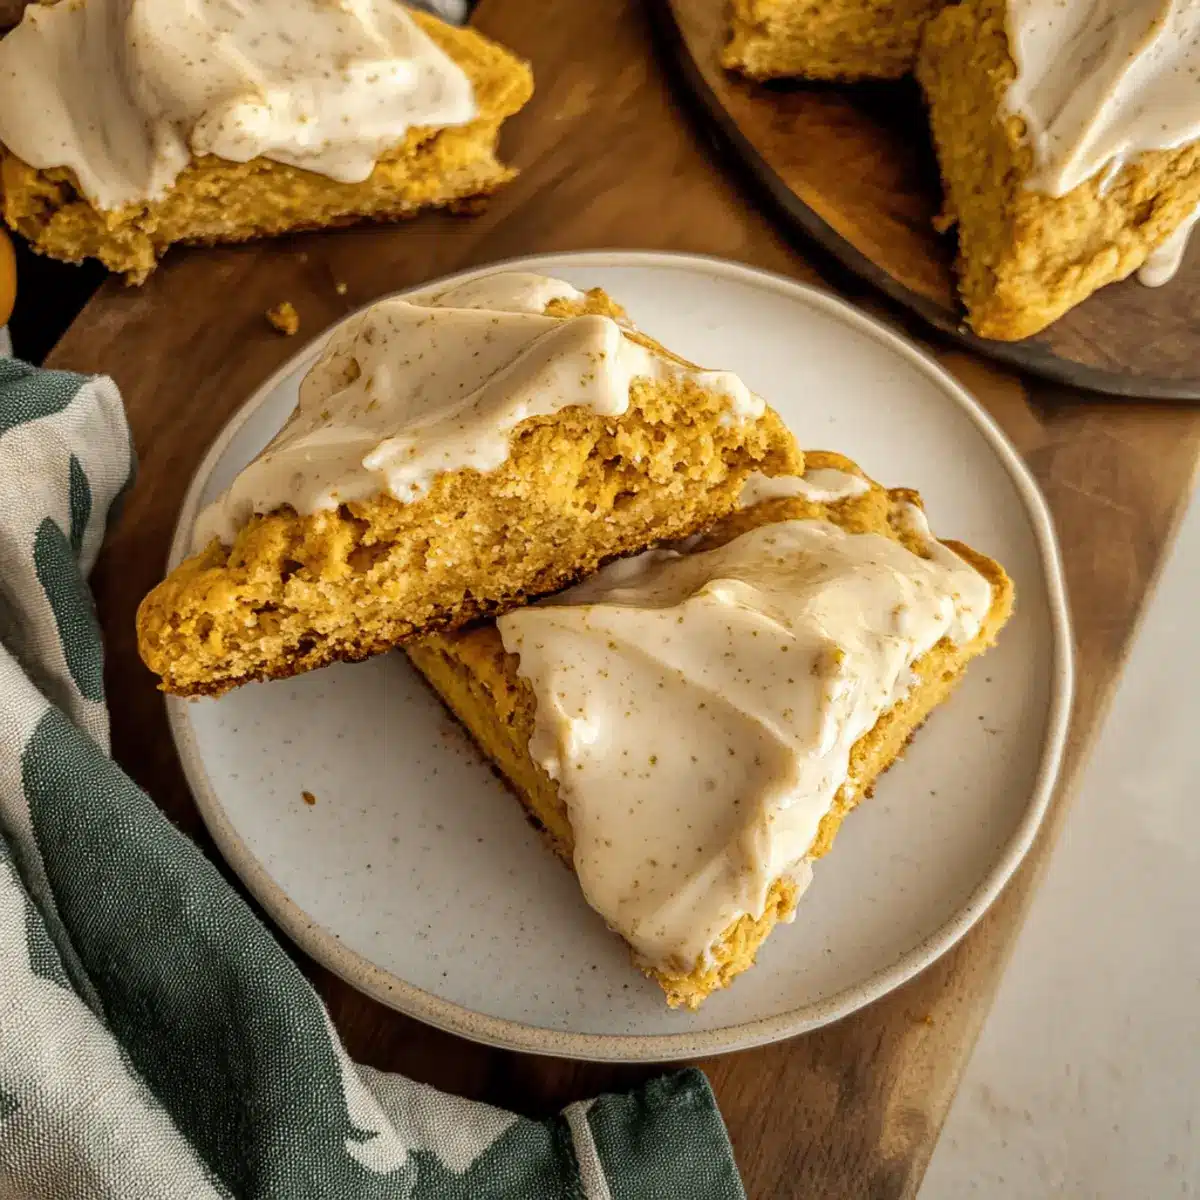
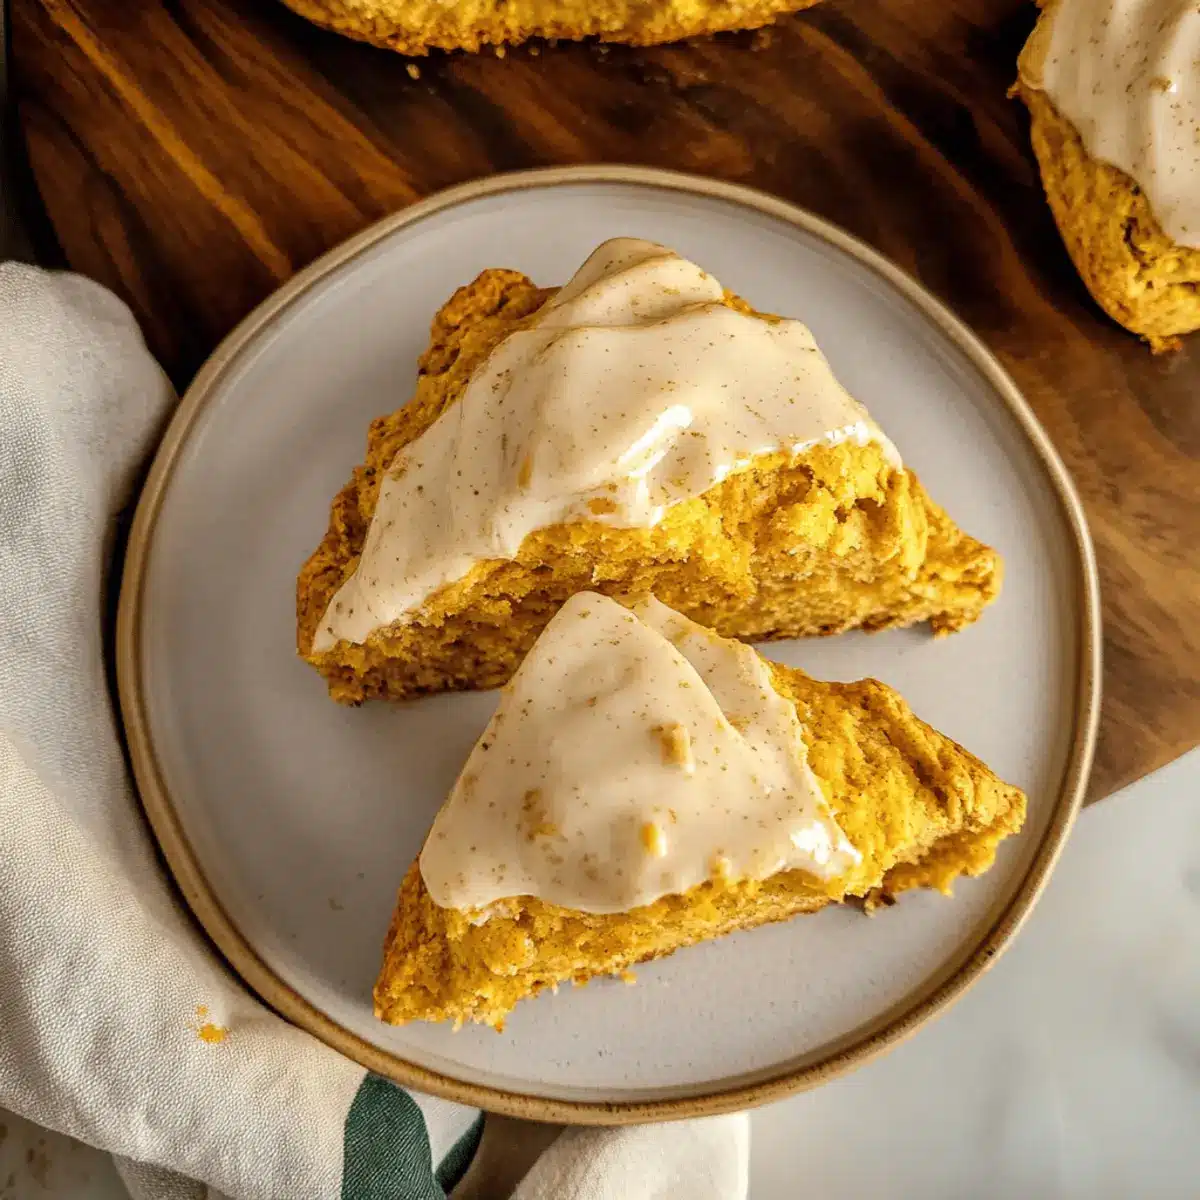
As the leaves turn and the air cools, there’s nothing quite like the aroma of freshly baked goods wafting through the kitchen. Enter my Brown Butter Pumpkin Scones, a cozy fall breakfast that brings warmth and comfort to your mornings. These delightful scones are not only packed with the rich, nutty flavor of brown butter, but they also feature sweet pumpkin puree for that perfect seasonal touch. With a quick prep time and the ability to impress even the most discerning brunch guests, these beauties are a must-try! Drizzled with a luscious brown butter icing, they make ideal companions to your favorite coffee or tea. What’s your go-to fall flavor that makes your heart sing?
Why You’ll Love Brown Butter Pumpkin Scones
Cozy Comfort: These scones capture the essence of fall with every bite, bringing the warm aromas of pumpkin and spices into your kitchen.
Nutty Flavor: The brown butter adds a rich, toasty flavor that elevates these scones beyond the ordinary, making each one a special treat.
Quick Prep Time: With a straightforward process, you’ll have delicious scones ready in no time—perfect for those busy mornings or spontaneous brunches!
Crowd-Pleaser: Whether for family gatherings or a cozy coffee date, these scones are sure to impress, pairing beautifully with drinks and conversations alike.
Versatile Treat: Feel free to customize by adding chocolate or dried fruits for a personal touch! For other delightful flavors, check out my Garlic Butter Steak or Breakfast Butter Swim.
Indulge in the delightful taste and cozy feel of these Brown Butter Pumpkin Scones—your new favorite autumn breakfast!
Brown Butter Pumpkin Scone Ingredients
• Gather your ingredients for an unforgettable cozy fall breakfast.
For the Scones
- Unsalted Butter – Provides rich flavor and ensures you control the saltiness.
- All-Purpose Flour – The backbone of these scones; substitute with gluten-free flour if needed.
- Granulated Sugar – Adds sweetness; feel free to use coconut sugar for a deeper flavor.
- Light Brown Sugar – Enhances moisture; dark brown sugar works for a bolder taste.
- Baking Powder – Acts as a leavening agent to keep the scones light; make sure it’s fresh!
- Pumpkin Pie Spice – Infuses warm fall notes; can be swapped with cinnamon, nutmeg, and ginger.
- Salt – Balances sweetness; use fine grain for even distribution.
- Milk – Adds moisture, helping the dough come together; plant-based options work great here.
- Large Egg – Binds everything together; for an egg-free option, use applesauce or a flax egg.
- Pumpkin Puree – Adds needed moisture and the delightful pumpkin flavor; canned pumpkin is a time-saver.
- Vanilla Extract – Elevates overall flavor; pure vanilla is best for quality.
For the Icing
- Powdered Sugar – The star of the icing, providing that sweet, smooth finish.
Get ready to enjoy the warm, nutty aroma of your homemade Brown Butter Pumpkin Scones!
Step‑by‑Step Instructions for Brown Butter Pumpkin Scones
Step 1: Prepare Brown Butter
Start by melting two sticks of unsalted butter in a medium saucepan over medium heat. Stir continuously as the butter bubbles, allowing it to foam and then settle. Keep a close eye on it, as it will turn a deep golden brown and emit a nutty aroma—this should take about 5-7 minutes. Once ready, remove it from heat and let it cool until solid.
Step 2: Mix Dry Ingredients
In a large mixing bowl, whisk together 2 cups of all-purpose flour, ¼ cup granulated sugar, ¼ cup light brown sugar, 1 tablespoon baking powder, 1 teaspoon salt, and 2 teaspoons pumpkin pie spice. Ensure all ingredients are well combined and aerated, which will help create the light and fluffy texture characteristic of these Brown Butter Pumpkin Scones. Set aside for the next step.
Step 3: Combine Mixtures
Once the brown butter has solidified, cut it into small pieces and mix it into the dry ingredients using a pastry cutter or your hands until crumbly. In a separate bowl, whisk together ½ cup milk, 1 large egg, 1 cup pumpkin puree, and 1 teaspoon vanilla extract. Pour the wet mixture into the bowl with the dry ingredients and gently mix until a shaggy dough forms—avoid overmixing for the best texture.
Step 4: Shape Scones
Turn the shaggy dough out onto a floured surface. Gently knead the dough just a few times to bring it together, then flatten it into a 1-inch thick circle. Use a sharp knife or pizza cutter to slice the dough into wedges (like a pizza). Carefully transfer the scones onto a parchment-lined baking sheet, ensuring they are spaced apart for even baking.
Step 5: Chill and Bake
Refrigerate the shaped scones for about 20 minutes while preheating your oven to 400ºF (200ºC). This step helps them maintain their shape while baking. Before placing them in the oven, brush the tops with a splash of milk and, if desired, sprinkle with a little brown sugar for added sweetness. Bake for 20 minutes or until the tops are golden brown and a toothpick inserted comes out clean.
Step 6: Prepare Icing
While the scones bake, prepare the creamy icing. Melt the remaining brown butter in a small saucepan over low heat. In a mixing bowl, combine the melted butter with 1 cup of powdered sugar and an additional teaspoon of vanilla extract, whisking until smooth. If the icing is too thick, adjust the consistency using a splash of milk until it reaches your desired texture.
Step 7: Serve
Once the scones are baked and have cooled slightly, drizzle the brown butter icing over the top. Let the icing set for a few moments before serving. These delightful Brown Butter Pumpkin Scones are best enjoyed warm, making them a perfect treat alongside a cozy cup of coffee or tea on a beautiful fall morning!
Storage Tips for Brown Butter Pumpkin Scones
Room Temperature: Store the scones in an airtight container at room temperature for up to 3-5 days to maintain their delightful texture and flavor.
Fridge: If you want to prolong freshness, keep them in the fridge for up to a week. Make sure they’re well wrapped to prevent drying out.
Freezer: For longer storage, freeze your Brown Butter Pumpkin Scones for up to 3 months. Place wax paper between layers and seal in an airtight container.
Reheating: To enjoy them warm, reheat scones in the oven at 350°F (175°C) for 5-10 minutes, or microwave for about 15-20 seconds until warmed through.
Brown Butter Pumpkin Scones Variations
Feel free to get creative with your Brown Butter Pumpkin Scones—there’s so much deliciousness waiting to be explored!
-
Chocolate Chunks: Stir in chopped dark or milk chocolate for a rich, sweet addition to the scones. The melty chocolate pieces create a delightful contrast to the pumpkin flavor.
-
Maple Icing: Swap traditional icing for a maple-flavored version by mixing powdered sugar with maple syrup. This adds a unique depth of flavor, perfect for fall mornings.
-
Dried Fruit: Incorporate dried cranberries or apricots for a chewy texture and a burst of sweetness. These fruits add lovely chews and extra flavor to each bite.
-
Nuts: Add chopped pecans or walnuts for an added crunch. The nutty flavor pairs beautifully with the pumpkin and brown butter, enhancing the overall taste.
-
Spiced Variation: Experiment with an extra pinch of nutmeg or cardamom in the dough for a spicier kick. This twist brings a new layer of warmth that’s perfect for crisp autumn days.
-
Coconut Flour: For a gluten-free option, substitute all-purpose flour with coconut flour—just use a smaller amount, as coconut flour absorbs more moisture than traditional flour.
-
Savory Twist: Add cooked, crumbled bacon or cheese to make a savory version of the scones. This unexpected flavor combination is sure to surprise and delight!
Ready to elevate your scone experience? Serve these warm delights with a steaming cup of chai or coffee, and don’t forget to pair them with a slice of Garlic Butter Shrimp for a cozy fall gathering!
Tips for the Best Brown Butter Pumpkin Scones
-
Perfectly Browned Butter: Monitor closely while melting butter; aim for a deep brown without burning. This adds rich flavor to your scones.
-
Gentle Mixing: When combining wet and dry ingredients, mix just until combined. Overmixing can lead to tough scones rather than the desired fluffy texture.
-
Uniform Shapes: For evenly baked scones, ensure all wedges are similar in size. Uneven sizes can lead to uneven baking and varying textures.
-
Chill for Texture: Chilling the shaped scones for at least 20 minutes before baking helps maintain their shape and achieve a tender crumb in the final product.
-
Icing Consistency: If your brown butter icing is too thin, gradually add more powdered sugar until you reach your desired thickness. This ensures a luscious finish on your scones.
-
Storage Savvy: Store leftover scones in an airtight container at room temperature for several days, or freeze without icing for longer storage. Enjoy your homemade Brown Butter Pumpkin Scones whenever you crave that cozy fall flavor!
What to Serve with Brown Butter Pumpkin Scones
As the aroma of freshly baked scones fills the air, the perfect meal awaits to be completed with delightful pairings.
-
Creamy Mashed Potatoes: Their buttery, smooth texture complements the richness of the scones while providing a savory contrast.
-
Warm Apple Cider: This seasonal drink enhances the autumnal flavors, warming your soul and perfectly balancing the sweet notes of pumpkin.
-
Crisp Green Salad: A refreshing mix of greens with a light vinaigrette adds a bright, tangy note, harmonizing beautifully with the rich scones.
-
Maple-Glazed Bacon: The sweetness of the maple and the savory flavor of bacon create an irresistible combination that elevates your breakfast.
-
Caramelized Pears: Sautéed in cinnamon and butter, these soft, sweet pears add a luxurious touch and echo the fall flavors of your scones.
-
Chai Latte: With its warm spices, a spicy chai latte makes the perfect cozy drink companion, perfectly warming your chilly morning.
-
Dark Chocolate Espresso: The bitterness of espresso and richness of dark chocolate create a decadent end to your glorious brunch spread, balancing the sweetness of the scones.
-
Vanilla Yogurt Parfait: Layer with granola and fresh berries for a delightful breakfast twist that’ll introduce different textures and flavors, keeping it light yet satisfying.
Enjoy these pairings as you create a delightful, inviting breakfast table showcasing your homemade Brown Butter Pumpkin Scones!
Make Ahead Options
These Brown Butter Pumpkin Scones are perfect for meal prep enthusiasts! You can prepare the brown butter up to 3 days in advance; simply melt it, then chill until solid before using. Additionally, you can mix the dry ingredients and store them in an airtight container for up to 24 hours. When you’re ready to bake, just combine the chilled brown butter with the dry mix and follow the remaining steps. To maintain quality, refrigerate the uncooked scones if not baking immediately, ensuring they remain fresh and fluffy. Bake them straight from the fridge for golden, delightful results that will impress your family or guests!
Brown Butter Pumpkin Scones Recipe FAQs
What type of pumpkin puree should I use?
Absolutely! You can use either homemade pumpkin puree or canned pumpkin. Canned pumpkin is a great time-saver and ensures consistency. Just make sure to select one that’s pure pumpkin, without added sugars or spices, for the best flavor.
How should I store my Brown Butter Pumpkin Scones?
For room temperature storage, keep your scones in an airtight container for about 3-5 days. If you prefer to keep them fresher for longer, store them in the fridge for up to a week, wrapped well to avoid drying out.
Can I freeze Brown Butter Pumpkin Scones?
Yes! For up to 3 months of delicious scone enjoyment, freeze your Brown Butter Pumpkin Scones by placing wax paper between layers in an airtight container. To thaw, simply leave them at room temperature or unwrap and warm them in the oven at 350°F (175°C) for about 5-10 minutes.
Why did my scones turn out too dense?
Very! A common reason for dense scones is overmixing the dough. When combining wet and dry ingredients, mix until just combined to maintain that fluffy texture. Additionally, ensure that your baking powder is fresh, as expired leavening agents can lead to inadequate rising.
Can I substitute any ingredients due to allergies?
Of course! For those with egg allergies, you can use a flax egg (1 tablespoon flaxseed meal mixed with 2.5 tablespoons of water) as a suitable replacement. For a dairy-free option, substitute the milk with plant-based milk, and make sure to use dairy-free butter as well. Always check ingredient labels for allergens!
How can I tell when my scones are done baking?
The more the merrier when it comes to visual cues! Your scones should be golden brown on top, and a toothpick inserted into the center should come out clean. Bake them for about 20 minutes at 400ºF (200ºC) for that perfect balance of fluffy and firm!
Brown Butter Pumpkin Scones for a Cozy Fall Morning
Ingredients
Equipment
Method
- Step 1: Prepare Brown Butter - Melt two sticks of unsalted butter in a medium saucepan over medium heat, stirring continuously for 5-7 minutes until deep golden brown and nutty aroma is emitted. Remove from heat and let cool until solid.
- Step 2: Mix Dry Ingredients - In a large mixing bowl, whisk together flour, granulated sugar, light brown sugar, baking powder, salt, and pumpkin pie spice until well combined.
- Step 3: Combine Mixtures - Cut solidified brown butter into small pieces and mix into dry ingredients. In a separate bowl, whisk together milk, egg, pumpkin puree, and vanilla extract. Pour wet mixture into dry ingredients and gently mix until a shaggy dough forms.
- Step 4: Shape Scones - Turn dough onto a floured surface and gently knead. Flatten into a 1-inch thick circle. Slice into wedges and transfer to a parchment-lined baking sheet.
- Step 5: Chill and Bake - Refrigerate shaped scones for 20 minutes while preheating the oven to 400ºF (200ºC). Brush tops with milk and sprinkle with brown sugar. Bake for 20 minutes or until golden brown.
- Step 6: Prepare Icing - Melt remaining brown butter in a small saucepan. Combine with powdered sugar and vanilla in a bowl, whisking until smooth. Adjust consistency with milk if necessary.
- Step 7: Serve - Drizzle the icing over warm scones and let set before serving, best enjoyed with coffee or tea.
Leave a Reply