
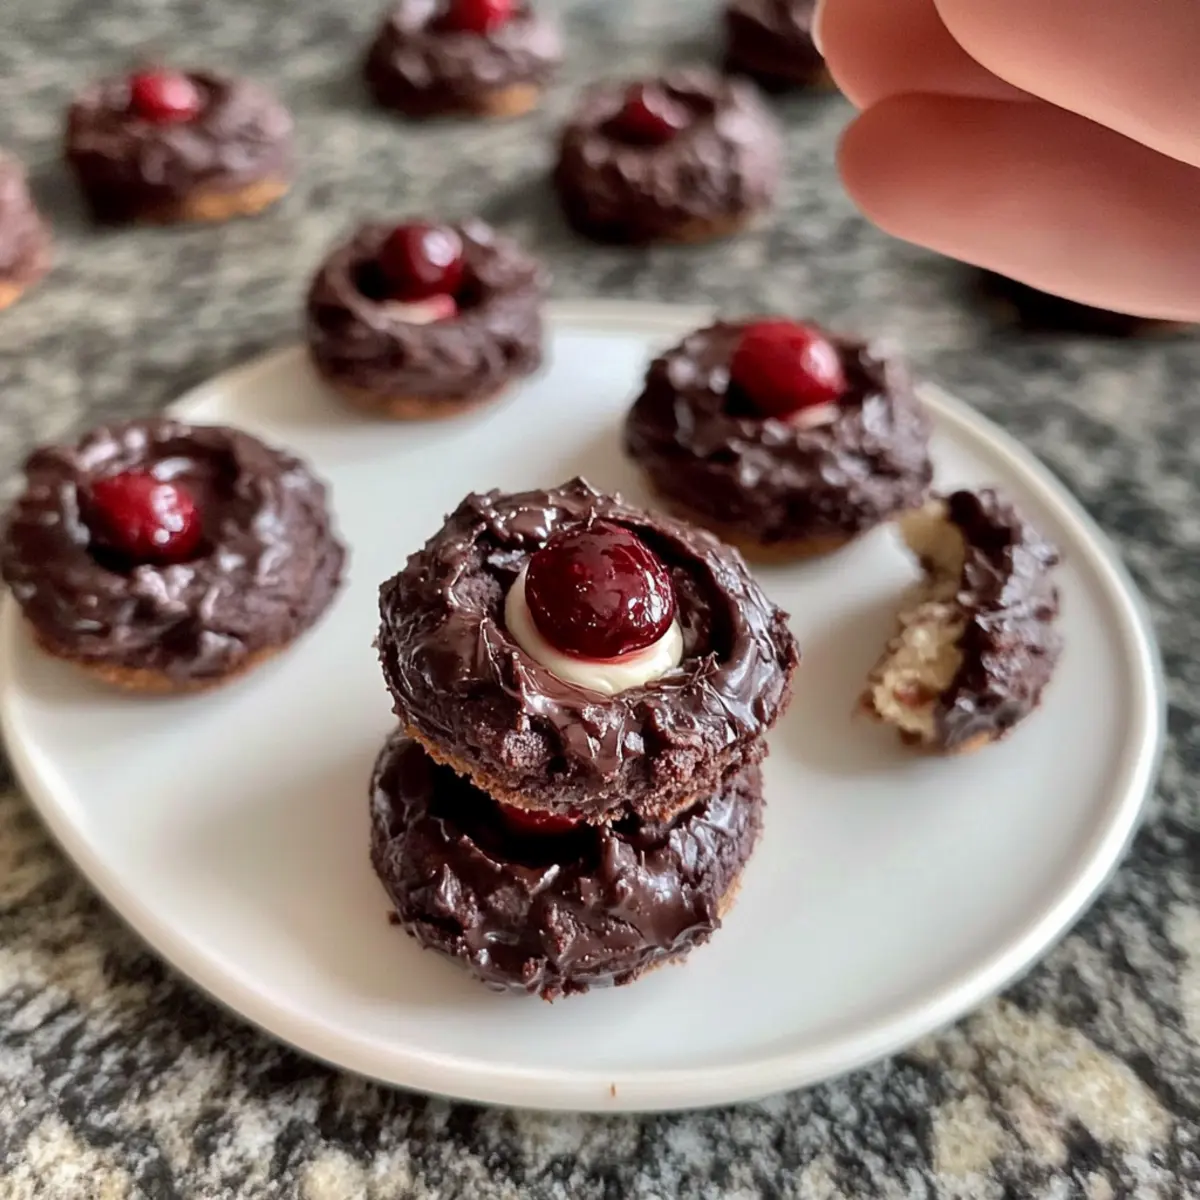
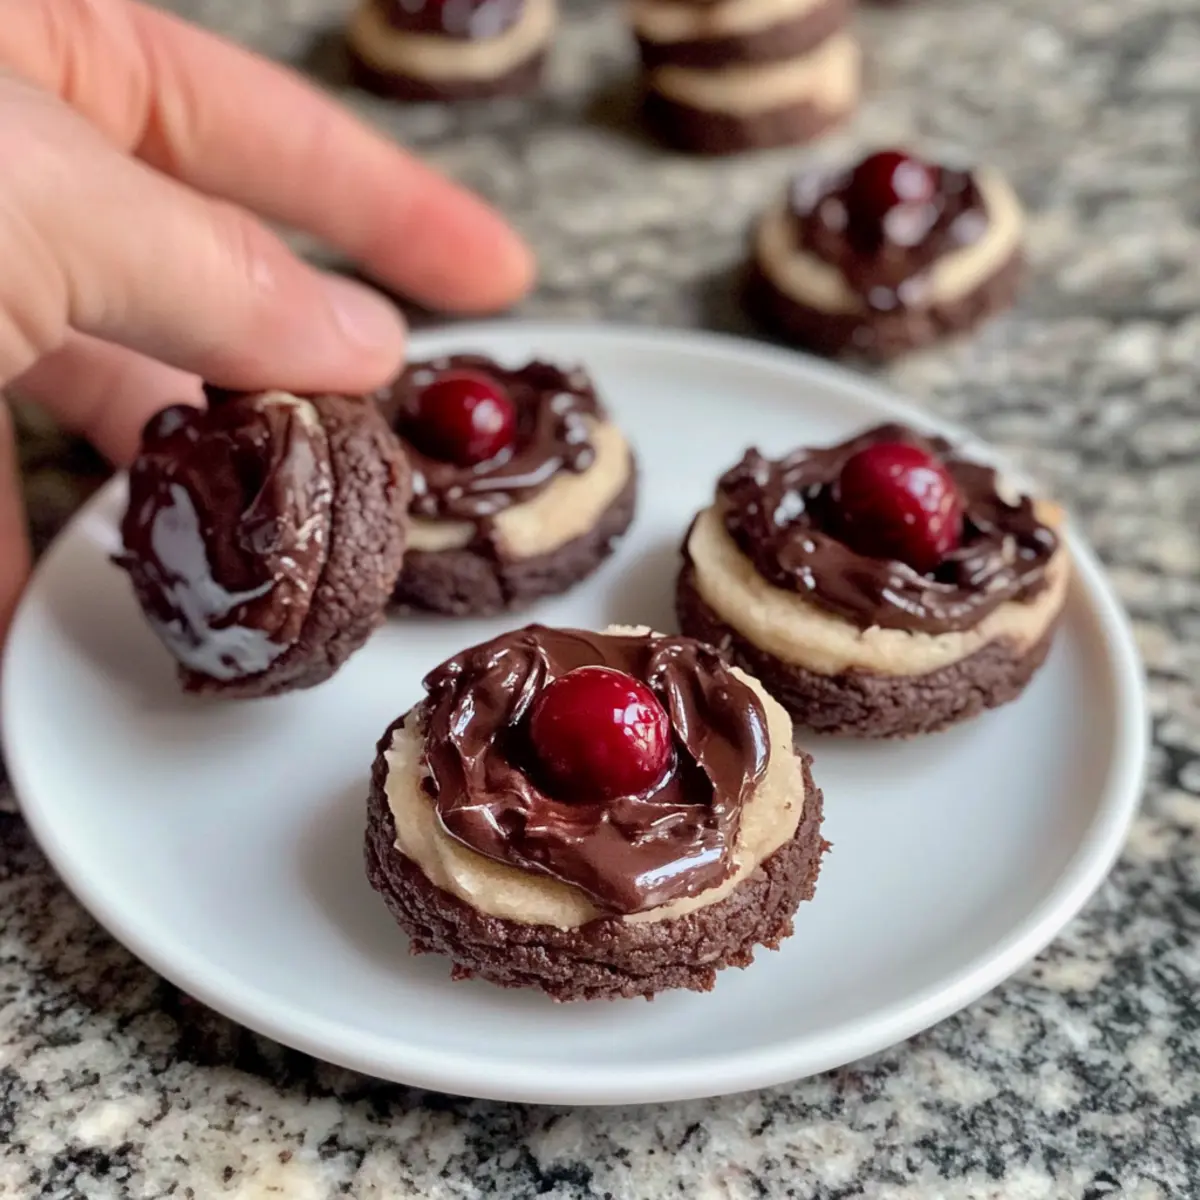
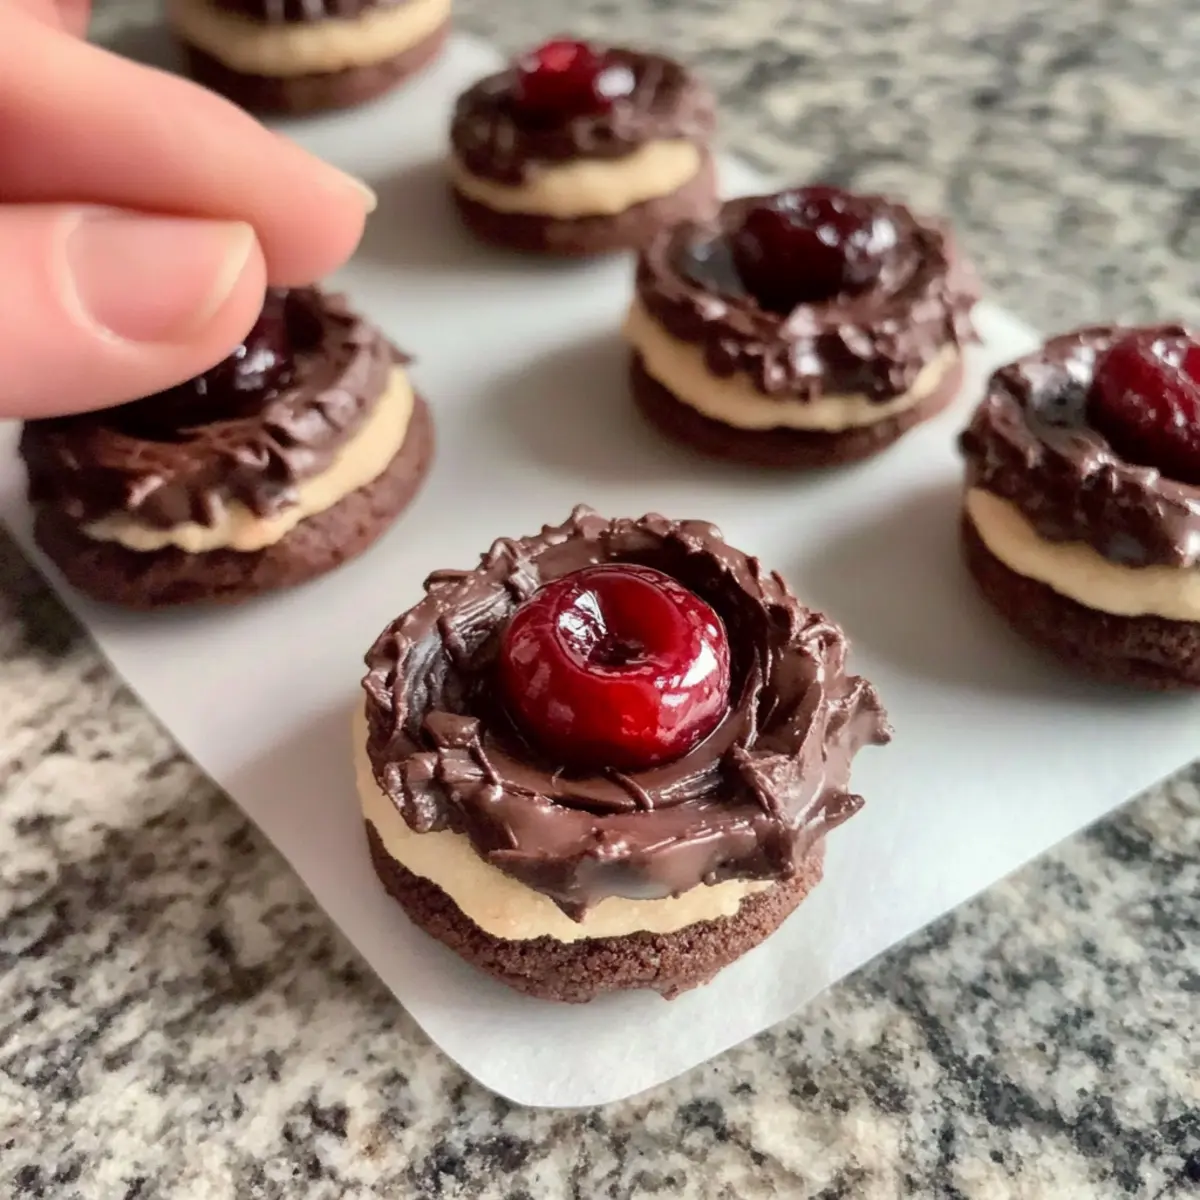
As I pulled the warm, inviting Black Forest Cookies from the oven, the sweet scent of chocolate mingled with a hint of cherries, instantly transporting me to a cozy holiday kitchen. These delightful cookies are a festive twist on a classic, featuring soft, chewy centers that perfectly balance rich cocoa and tart cherry flavors. Not only are they incredibly simple to whip up, making them a great last-minute holiday treat, but they also promise to impress family and friends alike with their luscious taste. With every bite, you’ll experience the essence of a beloved German dessert in cookie form! Are you ready to bring a touch of sweetness to your holiday baking tradition?
Why Will You Love Black Forest Cookies?
Irresistible flavor combinations of rich chocolate and tart cherries create a festive delight perfect for your holiday baking. Quick and Easy to make, these cookies require no special skills—just mix, scoop, and bake! A True Crowd-Pleaser that will impress both family and guests, they embody the beloved German dessert in cookie form. If you’re looking for more delicious treats, don’t miss out on our Gluten Free Cookies and Chocolate Oat Cookies for variety! Make-Ahead Friendly, these cookies can be stored or frozen, ensuring you’re always ready for a sweet surprise. Grab your ingredients and get ready to indulge in the joys of holiday baking!
Black Forest Cookies Ingredients
• Dive into the festive delight with these flavorful ingredients that make every bite memorable!
For the Cookie Dough
- Unsweetened Cocoa Powder – This provides a rich chocolate flavor and color. Can substitute with dark chocolate if preferred.
- All-Purpose Flour – Holds the cookie together for perfect structure; for a gluten-free option, use almond flour, adjusting the quantity as it behaves differently.
- Granulated Sugar – Adds sweetness and tenderness; substitute with coconut sugar for a lower glycemic option.
- Brown Sugar – Enhances moisture and adds subtle caramel flavor; use light or dark based on your flavor preference.
- Butter (unsalted) – Adds richness and helps achieve a tender cookie; substitute with coconut oil for a dairy-free version.
- Egg – Serves as a binder that contributes to the cookie’s rise; for a vegan option, use applesauce or a flax egg.
- Cherries (dried or fresh) – Adds delightful pockets of fruity goodness; if unavailable, dark chocolate chips can work as a substitute.
- Vanilla Extract – Enhances overall flavor; it’s best not to substitute, as it adds depth to the cookie’s flavor profile.
Indulging in these Black Forest Cookies is not only about the flavors—it’s about creating sweet memories with every batch you bake!
Step‑by‑Step Instructions for Black Forest Cookies
Step 1: Preheat the Oven
Begin by preheating your oven to 350°F (175°C). This ensures the temperature is just right for baking your Black Forest Cookies. While the oven warms up, gather your baking sheets and line them with parchment paper, which will prevent the cookies from sticking and make cleanup a breeze.
Step 2: Mix Dry Ingredients
In a medium-sized bowl, whisk together the unsweetened cocoa powder, all-purpose flour, granulated sugar, brown sugar, and baking soda. This combination of dry ingredients is crucial for achieving that rich chocolate flavor and chewy texture. Make sure to mix them thoroughly until well-combined and set the bowl aside for the next step.
Step 3: Cream Butter and Sugar
In a large mixing bowl, beat the unsalted butter with both sugars using an electric mixer on medium speed. Cream them together until the mixture is light and fluffy, which should take about 3-5 minutes. You’ll know it’s ready when the color lightens and the texture becomes smooth, creating the ideal base for your Black Forest Cookies.
Step 4: Incorporate Eggs and Vanilla
Add in the egg and vanilla extract to the creamed butter and sugar mixture. Continue mixing on medium speed until everything is well combined, about 1-2 minutes. The mixture should appear shiny and cohesive, setting the stage for the dry ingredients to join the party.
Step 5: Combine Mixtures
Gradually add the dry ingredient mixture to your wet mixture, stirring gently with a spatula or wooden spoon. Mix until just combined—be careful not to overmix, as that can affect the tenderness of your Black Forest Cookies. You’ll achieve a thick, rich dough that highlights the chocolate base.
Step 6: Fold in Cherries
Gently fold the cherries into the cookie dough, ensuring they are evenly distributed throughout. This step adds bursts of fruity flavor that perfectly complement the rich chocolate. Use a spatula to mix carefully, maintaining the dough’s texture while allowing every cookie to enjoy the delicious cherry goodness.
Step 7: Scoop and Bake
Using a cookie scoop or tablespoon, drop spoonfuls of dough onto your lined baking sheets, leaving about two inches between each cookie to allow for spreading. Bake in your preheated oven for 10-12 minutes until the edges are set, but the centers remain soft and slightly underbaked for that chewy texture everyone loves in Black Forest Cookies.
Step 8: Cool Down
Once baked, let the cookies cool on the baking sheet for about 5 minutes. This helps them firm up a bit without losing their soft centers. Afterward, carefully transfer the cookies to a wire rack to cool completely, allowing you to enjoy them at the perfect temperature and texture!
Expert Tips for Black Forest Cookies
-
Room Temperature Butter: Make sure your butter is at room temperature before creaming to achieve a light and fluffy texture.
-
Avoid Overmixing: Once you add flour to the mixture, mix gently—overmixing can result in tough cookies instead of the tender Black Forest Cookies you want.
-
Cherry Selection: Use high-quality dried or fresh cherries for the best flavor. If fresh is scarce, consider using dark chocolate chips as a tasty alternative.
-
Baking Time: For chewier cookies, slightly underbake them, keeping the centers soft. They’ll continue to cook on the baking sheet once removed from the oven.
-
Storage Tips: Store your cookies in an airtight container at room temperature for up to one week, or freeze them with parchment in between layers for up to three months.
Black Forest Cookies Variations & Substitutions
Feel free to get creative with your Black Forest Cookies! Each variation opens a new realm of delightful flavors.
-
Gluten-Free: Substitute all-purpose flour with almond flour for a gluten-free option; adjust quantities as needed. This maintains the cookie’s dreamy texture while accommodating dietary needs.
-
Dairy-Free: Use coconut oil instead of unsalted butter to create a dairy-free version. Coconut oil lends a lovely richness without the dairy, perfect for sensitive tummies!
-
Vegan-Friendly: Swap the egg with applesauce or a flax egg for a simple vegan twist. It’ll keep your cookies moist and delicious without the animal products!
-
Cherry Boost: Try adding a few tablespoons of cherry juice or cherry extract for an extra cherry flavor that elevates this classic dessert. You’ll love that tangy richness with every bite!
-
Nutty Crunch: Fold in chopped walnuts or pecans for added texture and flavor. The crunch will harmonize beautifully with the soft cookie and cherries, creating a delightful contrast that keeps each bite interesting.
-
Spicy Kick: Add a pinch of cayenne pepper or cinnamon to the dry ingredients for a warm, spicy twist. This surprising element will make your cookies stand out during the holidays!
-
Chocolate Lovers Delight: Replace half of the dried cherries with dark chocolate chips for a double chocolate experience. This indulgent option is sure to please chocolate enthusiasts!
-
Fruit-Infused: Use dried cranberries or blueberries instead of cherries for a different yet equally delightful fruity flavor. These swaps still offer that lovely balance of sweetness and tartness in every cookie!
Each delicious variation lets you customize the classic Black Forest Cookie experience, so choose one (or a few!) to suit your fancy. If you enjoyed these tweaks, you might also want to try our Healthy Carrot Cookies for another delicious dessert option!
What to Serve with Black Forest Cookies
Imagine a cozy gathering filled with laughter, warmth, and the delightful aroma of freshly baked treats brightening your table.
- Whipped Cream: A dollop of freshly whipped cream adds a rich, creamy element that enhances the chocolate and cherry flavors beautifully.
- Hot Chocolate: Serve these cookies alongside a warm cup of hot chocolate for a comforting pairing that elevates the holiday spirit.
- Cherry Tart: A slice of cherry tart echoes the cookie’s fruity sweetness, creating a harmonious harmony of flavors on your dessert platter.
- Roasted Nuts: Crunchy roasted almonds or walnuts provide a delightful texture contrast, balancing the soft, chewy cookies with a satisfying crunch.
- Mulled Wine: The spiced notes of mulled wine are a perfect pairing, adding warmth and depth that perfectly match the cookies’ festive essence.
- Coffee or Espresso: The bitterness of a good cup of coffee or espresso balances the sweetness of the cookies, making each bite even more enjoyable.
- Ice Cream Sandwiches: For a fun twist, use your cookies to create ice cream sandwiches; vanilla or cherry ice cream complements the flavors beautifully.
- Fruit Salad: A refreshing fruit salad of seasonal berries brightens the plate and cleanses the palate between indulgent bites.
Storage Tips for Black Forest Cookies
-
Room Temperature: Keep your Black Forest Cookies in an airtight container at room temperature for up to 1 week. This will maintain their deliciously chewy texture and rich flavor.
-
Freezer: For longer storage, freeze cookies for up to 3 months. Place parchment paper between layers to prevent sticking, allowing for easy access whenever a sweet craving strikes.
-
Reheating: To enjoy cookies after freezing, thaw at room temperature for about 30 minutes, or gently reheat in the microwave for 10-15 seconds. This will return that warm, freshly-baked essence.
-
Make-Ahead: If you plan to bake ahead of time, prepare the dough and keep it in the fridge for up to 3 days before baking. This way, you can whip up fresh Black Forest Cookies whenever you need a festive treat!
Make Ahead Options
These decadent Black Forest Cookies are perfect for meal prep, allowing you to enjoy sweet treats even on the busiest days! You can prepare the cookie dough up to 24 hours in advance. Simply mix all the ingredients as directed, then cover the bowl tightly with plastic wrap and refrigerate. If you’re looking to prepare further in advance, shaped cookie dough can be frozen for up to 3 months—just scoop onto a baking sheet, freeze until solid, then transfer to a freezer bag. When you’re ready to bake, simply preheat your oven and bake straight from the freezer, adding a couple of extra minutes to the baking time. This way, your Black Forest Cookies will still taste just as delicious and fresh as if they were made the day you serve them!
Black Forest Cookies Recipe FAQs
What should I look for when selecting cherries for my Black Forest Cookies?
Absolutely! Choose fresh cherries that are plump and firm with vibrant colors, avoiding any that have dark spots or blemishes. If using dried cherries, opt for ones that are moist and chewy rather than hard and dry to ensure they integrate well with the cookie dough.
How should I store my Black Forest Cookies?
Store your Black Forest Cookies in an airtight container at room temperature for up to one week. This helps retain their perfect chewy texture. If you plan on enjoying them later, freeze the cookies for up to three months, placing parchment paper between layers to prevent sticking.
Can I freeze Black Forest Cookies, and if so, how?
Very! To freeze, first allow the cookies to cool completely. Then, arrange them in a single layer on a baking sheet and freeze for 2 hours until solid. Transfer the frozen cookies to an airtight container with parchment paper between layers and freeze for up to three months. To enjoy, thaw at room temperature for about 30 minutes.
What can I do if my cookies come out too dry?
If your Black Forest Cookies turn out dry, it may be due to overbaking or incorrect ingredient measurements. Make sure you don’t bake them longer than the recommended 10-12 minutes, and consider weighing your flour to ensure accuracy. For next time, slightly underbake them, allowing the cookies to set on the baking sheet for that soft, chewy texture!
Are there any dietary considerations I should keep in mind with this recipe?
Of course! If you’re concerned about allergies, keep in mind that this recipe contains gluten from the all-purpose flour and eggs. For gluten-free options, substitute the all-purpose flour with almond flour and consider using a flax egg as a replacement for the egg. Additionally, ensure that any cherries you use do not contain added sugars or allergens if you’re preparing for someone with dietary restrictions.
Can I use different types of chocolate in this recipe?
Absolutely! If you want to experiment a bit, you can substitute unsweetened cocoa powder with dark chocolate or even semi-sweet chocolate chips for a sweeter, fudgier result. Just be mindful of the additional sweetness and adjust the sugar accordingly if needed!
Irresistible Black Forest Cookies for Your Holiday Baking
Ingredients
Equipment
Method
- Preheat your oven to 350°F (175°C). Line baking sheets with parchment paper.
- In a medium bowl, whisk together cocoa powder, flour, granulated sugar, brown sugar, and baking soda.
- In a large bowl, beat unsalted butter with both sugars until light and fluffy for about 3-5 minutes.
- Add egg and vanilla to the mixture, continuing to mix until well combined.
- Gradually add the dry ingredients to the wet mixture, stirring until just combined.
- Fold in the cherries gently to distribute throughout the dough.
- Drop spoonfuls of dough onto baking sheets, leaving space between each cookie. Bake for 10-12 minutes.
- Let the cookies cool on the baking sheet for 5 minutes before transferring to a wire rack to cool completely.
Leave a Reply