
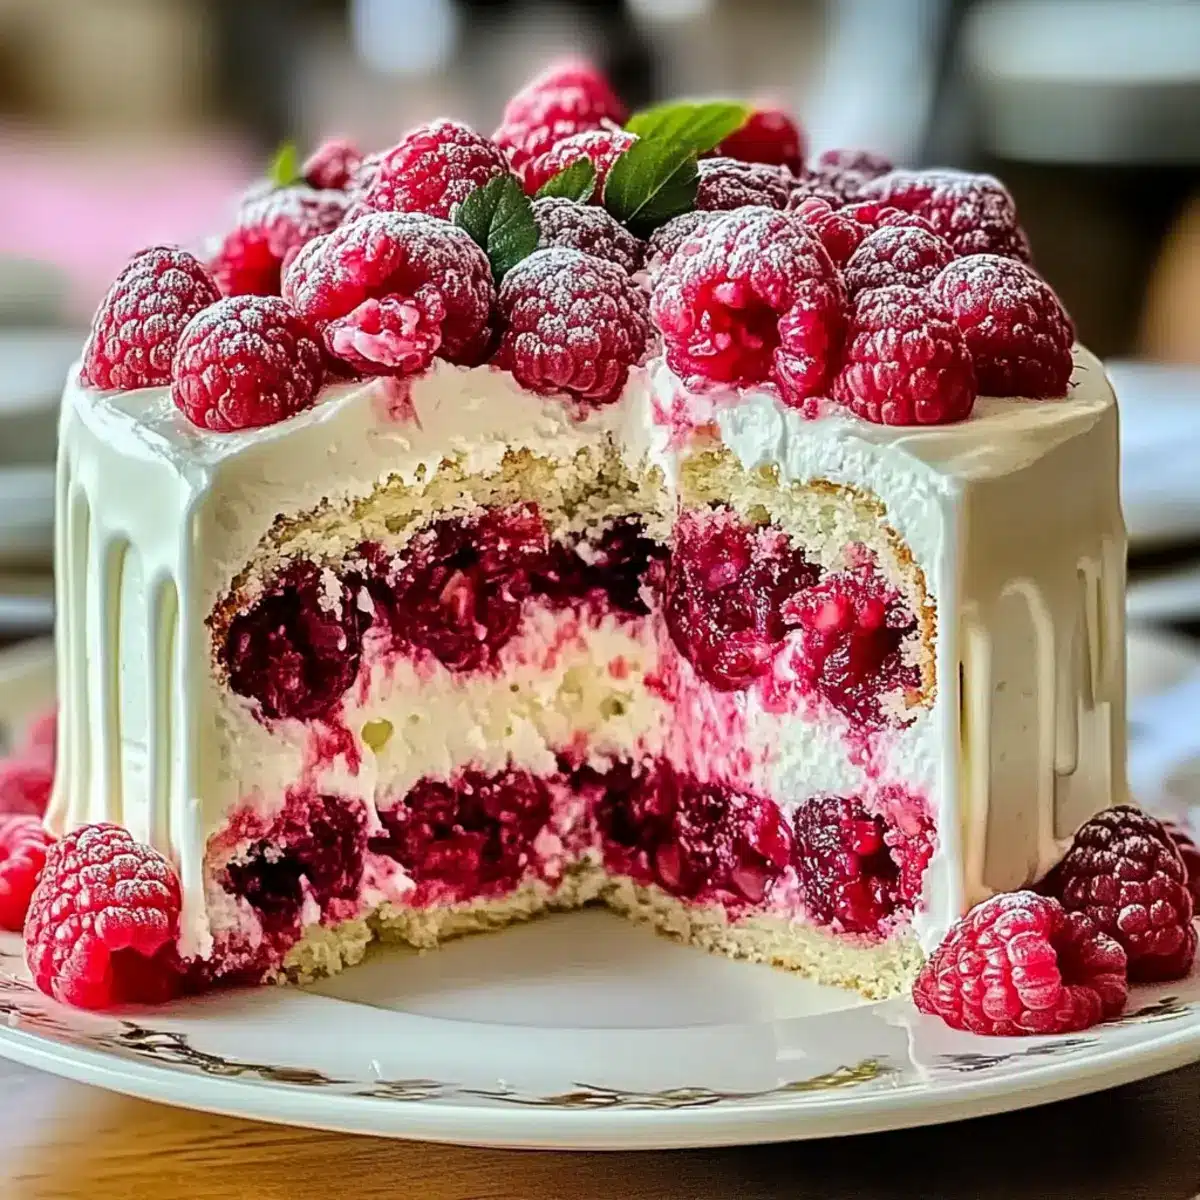
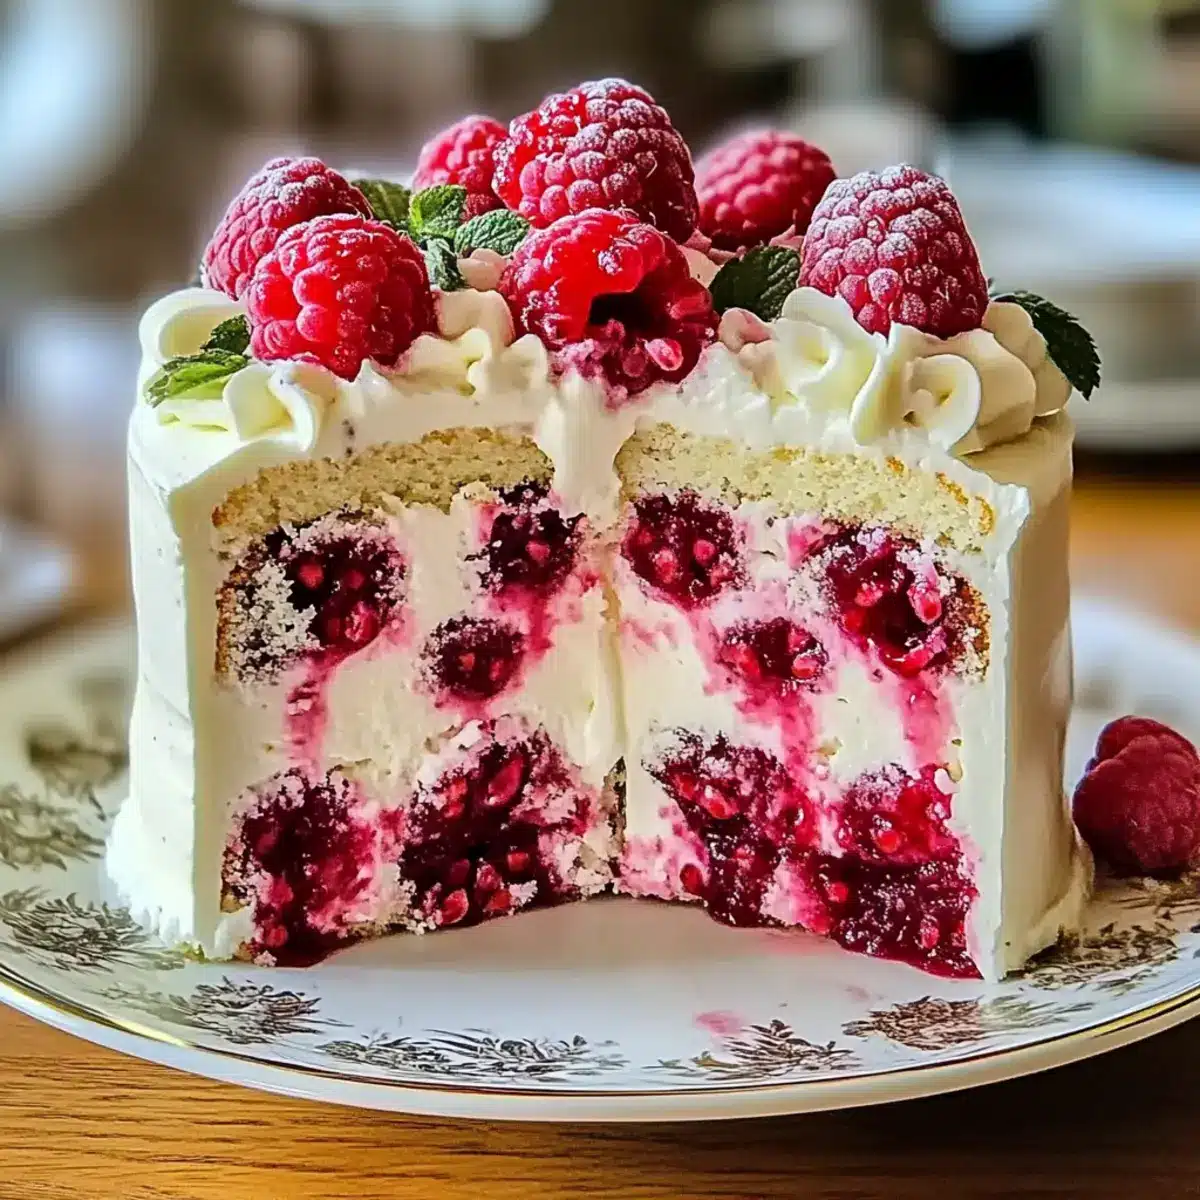
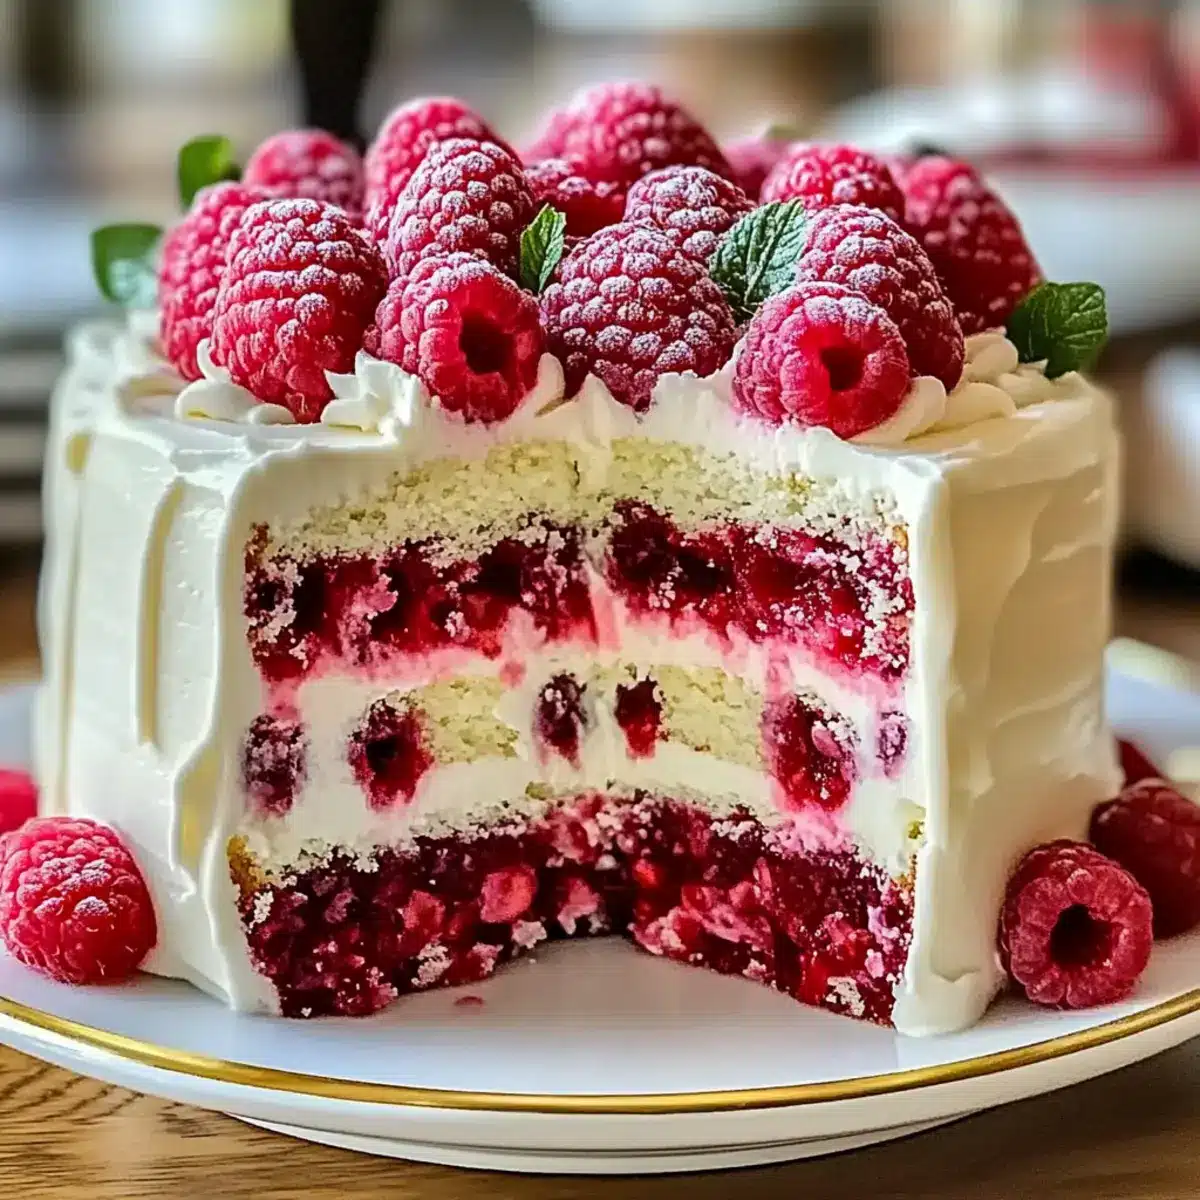
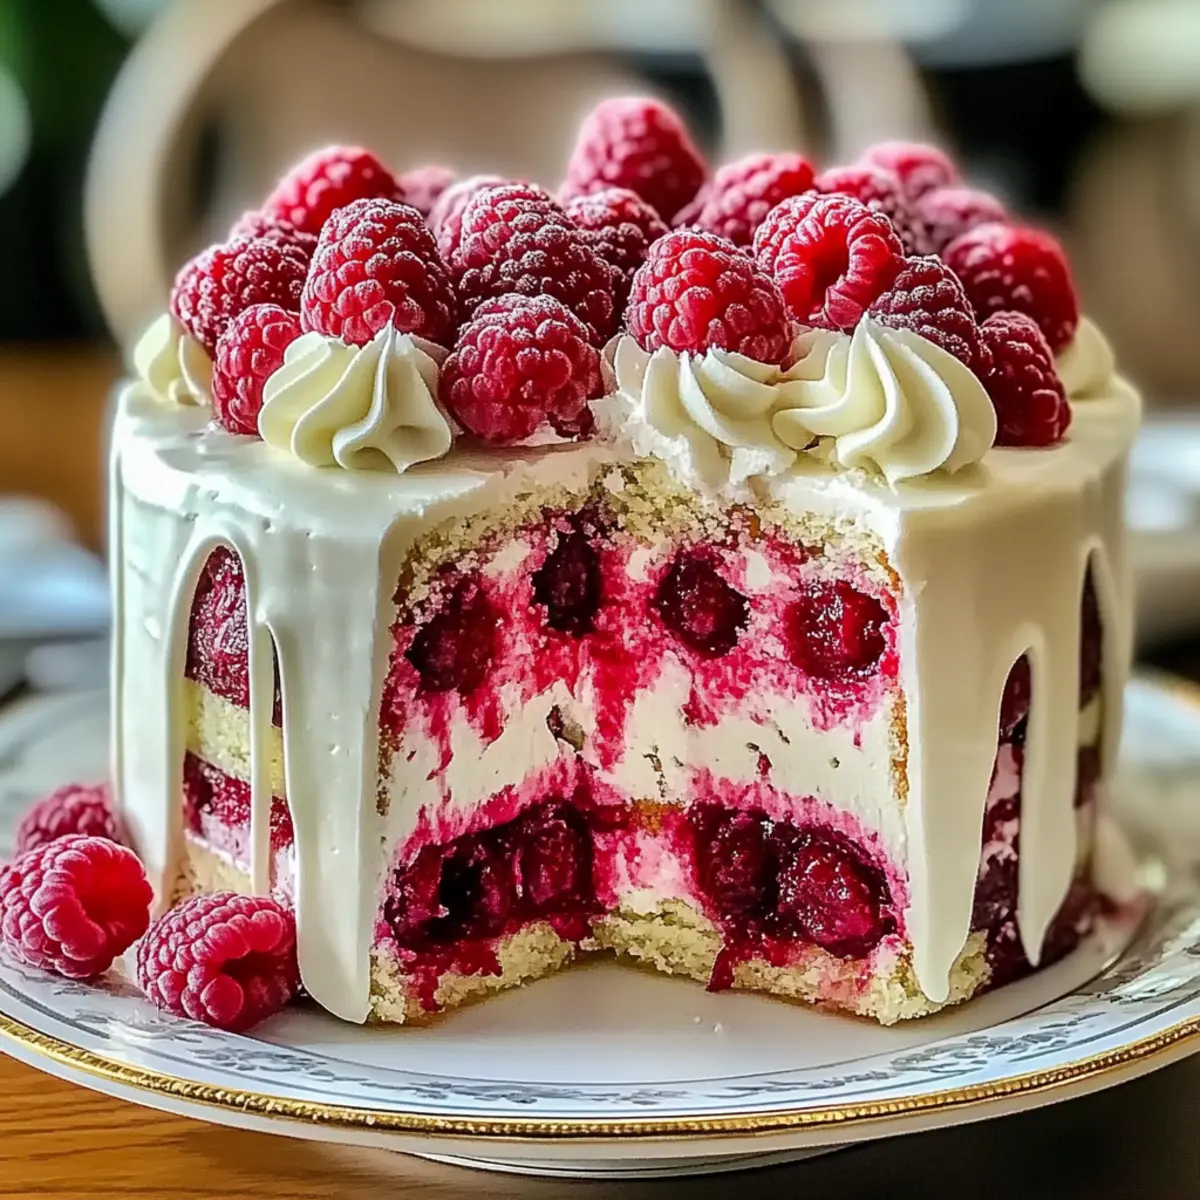
The moment I first tasted a slice of White Chocolate Raspberry Dream Cake, I knew I had discovered something truly special. This stunning dessert layers velvety white chocolate with a tangy raspberry filling that balances sweetness and tartness in the most delightful way. Perfect for those cherished special occasions, whether it’s a birthday or an elegant dinner party, this cake is a showstopper that will impress even the most discerning dessert lovers. Not only does it boast an eye-catching aesthetic, but it’s also surprisingly simple to prepare, making it a go-to recipe for bakers of all skill levels. With its soft, buttery crumb and luscious frosting, each bite is a taste of pure joy. Ready to create a dessert that will leave your guests raving? Let’s dive into this dreamy recipe!
Why is this cake a must-try?
Exquisite Flavor Combos: The luscious blend of white chocolate and tangy raspberries creates a dreamy taste that everyone will adore.
Visually Stunning: Layered beautifully, this cake is a showstopper—perfect for impressing guests at any gathering!
Easy to Make: Don’t worry—this recipe is surprisingly simple, so even novice bakers can shine like pros.
Versatile Treat: Change things up by swapping fillings or creating cupcakes using the same batter for a fun twist!
Perfect for Celebrations: Whether it’s a birthday or anniversary, this cake adds an elegant touch to any occasion.
Serve alongside delightful treats like Coconut Dream Cake or High Protein Chocolate Pudding for a lavish dessert spread.
White Chocolate Raspberry Dream Cake Ingredients
For the Cake Layers
- All-Purpose Flour – Provides structure to the cake and can be substituted with a gluten-free flour blend.
- Baking Powder – Acts as a leavening agent; ensure it’s fresh for optimal rise.
- Salt – Enhances flavor and balances sweetness; standard table salt works well.
- Unsalted Butter – Adds richness and moisture; use salted if preferred, but reduce additional salt.
- Granulated Sugar – Sweetens the cake and helps create a tender crumb; brown sugar can add a deeper flavor.
- Eggs – Binds the ingredients and provides moisture; use room temperature eggs for best results.
- Vanilla Extract – Adds flavor complexity; opt for pure vanilla extract for superior taste.
- White Chocolate Chips – Delivers a rich, sweet flavor; look for high-quality baking chocolate.
- Whole Milk – Ensures moist and tender cake; almond milk is a good dairy-free substitute.
For the Raspberry Filling
- Fresh or Frozen Raspberries – Provides the tart filling; thaw and drain frozen berries before use.
- Lemon Juice – Brightens the raspberry flavor; freshly squeezed juice is best.
- Cornstarch – Thickens the raspberry filling; flour can be a substitute, but texture may vary.
For the Frosting
- Powdered Sugar – Sweetens the frosting and stabilizes texture; sifting ensures smoothness.
- Milk (for frosting) – Adjusts the frosting’s consistency; use cream for a richer texture.
For Garnishing
- Fresh Raspberries, White Chocolate Curls, Mint Leaves – Optional garnishes that add aesthetic appeal to the White Chocolate Raspberry Dream Cake.
Step‑by‑Step Instructions for White Chocolate Raspberry Dream Cake
Step 1: Preheat and Prepare Pans
Preheat your oven to 350°F (175°C). While the oven warms up, generously grease and flour three 8-inch round cake pans to ensure easy release after baking. This step is crucial for achieving a beautifully presented White Chocolate Raspberry Dream Cake, so be thorough in covering the surfaces.
Step 2: Combine Dry Ingredients
In a medium bowl, whisk together 2 ½ cups of all-purpose flour, 2 ½ teaspoons of baking powder, and ½ teaspoon of salt until well mixed. This mixture acts as the foundation of your cake layers, providing structure and a great rise. Set this bowl aside as you prepare the wet ingredients next.
Step 3: Cream Butter and Sugar
In a large mixing bowl, cream 1 cup of unsalted butter and 2 cups of granulated sugar together using an electric mixer on medium speed for about 4-5 minutes, until the mixture becomes light and fluffy. This aeration is key to a tender, moist cake.
Step 4: Add Eggs and Vanilla
Beat in 4 large room temperature eggs, one at a time, ensuring each egg is fully incorporated before adding the next. Following the eggs, mix in 2 teaspoons of pure vanilla extract and 1 cup of melted white chocolate, allowing the batter to reach a silky consistency rich in flavor.
Step 5: Alternate Dry Ingredients and Milk
Gradually add the flour mixture to the wet ingredients in three parts, alternating with 1 cup of whole milk. Start and end with the flour mixture, mixing on low speed just until combined. This method keeps the batter light, perfect for creating a fluffy White Chocolate Raspberry Dream Cake.
Step 6: Bake the Cake Layers
Divide the batter evenly among the three prepared pans, smoothing the tops with a spatula. Bake in your preheated oven for 25-30 minutes, or until a toothpick inserted into the center comes out clean. Allow the cakes to cool in the pans for 10 minutes before transferring them to wire racks to cool completely.
Step 7: Prepare Raspberry Filling
While the cakes cool, make the raspberry filling by combining 2 cups of fresh or thawed raspberries, ½ cup of sugar, and 2 tablespoons of lemon juice in a saucepan over medium heat. Cook until the raspberries break down, about 5-7 minutes. Stir in a cornstarch slurry made of 2 tablespoons cornstarch mixed with 2 tablespoons water to thicken, allowing it to cool completely.
Step 8: Make the Frosting
To prepare the frosting, beat 1 cup of softened unsalted butter in a mixing bowl until creamy. Gradually add 4 cups of sifted powdered sugar, along with ¼ cup of melted white chocolate, 1 teaspoon of vanilla extract, and enough milk to achieve your desired frosting consistency, mixing until smooth and fluffy.
Step 9: Assemble the Cake
Once the cake layers are completely cool, level them with a sharp knife if needed. Place the first layer on a serving platter and spread a layer of raspberry filling followed by frosting. Repeat with the second layer, then place the final cake layer on top and frost the top and sides of the cake. Chill for at least 30 minutes to set.
Step 10: Decorate and Serve
After chilling, decorate the White Chocolate Raspberry Dream Cake with fresh raspberries, white chocolate curls, and mint leaves as desired for a stunning presentation. Slice and serve, showcasing the delightful layers of cake and filling that will surely impress your guests!
What to Serve with White Chocolate Raspberry Dream Cake
Enhance your dessert experience with delightful pairings that perfectly complement this luxurious cake.
-
Rich Coffee: A warm cup of coffee balances the sweetness of the cake and enhances the white chocolate’s creamy flavors. The bitterness contrasts beautifully, creating a harmonious blend.
-
Lightly Whipped Cream: Serve with a dollop of light whipped cream for added richness without overwhelming sweetness. Its airy texture harmonizes with the cake’s layers, creating an indulgent bite.
-
Berry Compote: A homemade berry compote made from mixed berries adds a fresh burst of flavor that brightens each slice. The tartness elegantly elevates the dreamy cake layers.
-
Sparkling Wine: A glass of sparkling wine or champagne brings a touch of festivity, its effervescence cutting through the cake’s richness and enhancing the overall tasting experience.
-
Mint Tea: For a refreshing option, pair the cake with a soothing mint tea. Its coolness provides a refreshing contrast that cleanses the palate between bites of the decadent cake.
-
Chocolate Mousse: For the ultimate dessert platter, serve alongside a light chocolate mousse. The combination of flavors will delight chocolate lovers and provide a pleasing textural contrast.
-
Fresh Fruit Salad: A vibrant fruit salad with seasonal berries offers a refreshing, sweet-tart contrast that pairs wonderfully with the cake’s richness, ensuring a well-rounded dessert experience.
White Chocolate Raspberry Dream Cake Variations
Feel free to mix things up and make this recipe your own, turning a beloved classic into a unique creation!
- Gluten-Free: Substitute all-purpose flour with a gluten-free blend for a cake that everyone can enjoy without sacrificing flavor.
- Dairy-Free: Use almond or coconut milk instead of whole milk, and swap in a vegan butter alternative for a creamy and rich texture without the dairy.
- Chocolate Lovers: Elevate the cake by incorporating chocolate ganache in between layers for a decadent addition that chocolate enthusiasts will adore.
- Fruity Twists: Try adding fresh strawberries or blueberries along with the raspberries for a mixed berry filling that bursts with flavor and vibrant color.
- Nutty Infusion: Incorporate almond or hazelnut extract into the batter for a delightful, nutty aroma that complements the white chocolate beautifully.
- Cupcake Version: Transform the cake into cupcakes using the same batter, and top them with raspberry frosting for bite-sized treats that are perfect for parties!
- Zesty Kick: Add citrus zest, such as orange or lemon, to the batter for an exquisite hint of brightness that elevates the entire dessert experience.
- Gourmet Frosting: For a twist, blend cream cheese into the frosting for a delightful tang that pairs sensationally with the white chocolate and raspberry.
Explore these variations to cater to different palates, making every occasion a deliciously memorable one. Pair your cake with Rocky Road Chocolate Bark for a wonderful dessert duo that brightens up any gathering!
How to Store and Freeze White Chocolate Raspberry Dream Cake
Airtight Container: Store any leftover cake layers in an airtight container at room temperature for up to 4 days to maintain freshness and moisture.
Refrigerate: If your cake has already been frosted, keep it in the fridge, where it will last for up to 5 days. Just cover it gently to avoid drying out.
Freezing Slices: For longer storage, freeze individual slices of White Chocolate Raspberry Dream Cake wrapped tightly in plastic wrap and then foil, where they can last for up to 2 months.
Thawing: When ready to enjoy, thaw slices in the refrigerator overnight for a perfect treat the next day!
Expert Tips for White Chocolate Raspberry Dream Cake
-
Room Temperature Ingredients: Always use room temperature eggs and butter for a smooth batter and optimal rise during baking.
-
Batter Care: Avoid overmixing—combine just until the flour is incorporated to ensure a tender cake texture.
-
Cool Chocolate: Melt white chocolate gently and let it cool slightly before adding it to the batter to prevent overheating and altering the consistency.
-
Filling Temperature: Ensure the raspberry filling is completely cool before layering; hot filling can melt the frosting and make the cake messy.
-
Chill Before Slicing: For clean and beautiful slices, chill the finished White Chocolate Raspberry Dream Cake before cutting—this helps maintain the layers.
Make Ahead Options
These White Chocolate Raspberry Dream Cake layers are perfect for meal prep enthusiasts looking to save time! You can bake the cake layers and let them cool completely up to three days in advance, storing them wrapped in plastic wrap in the refrigerator to keep them fresh. The raspberry filling can also be prepared and refrigerated for up to 24 hours; just ensure it’s entirely cooled before storing to maintain its texture. When you’re ready to assemble, simply whip up the frosting and layer everything together. With these make-ahead tips, you’ll have an impressive dessert ready with minimal effort—even on the busiest of days!
White Chocolate Raspberry Dream Cake Recipe FAQs
What kind of raspberries should I use for the filling?
Absolutely! Fresh raspberries provide the best flavor and texture, but if they’re out of season, frozen raspberries are a great alternative. Just make sure to thaw and drain the frozen ones to avoid excess moisture in your filling.
How should I store the White Chocolate Raspberry Dream Cake?
Store any leftover cake in an airtight container at room temperature for up to 4 days. If you’ve already frosted the cake, it’s best to refrigerate it, where it will last for up to 5 days. Just cover it gently to prevent it from drying out.
Can I freeze slices of the cake?
Yes, you can! Wrap individual slices of the White Chocolate Raspberry Dream Cake tightly in plastic wrap, then in foil to prevent freezer burn. They can be frozen for up to 2 months. When you’re ready to enjoy, simply thaw them in the refrigerator overnight.
What if my cake layers are uneven after baking?
No worries! If your cake layers dome on top, you can easily level them with a sharp knife. Just gently slice off the domed part for an even surface before stacking and frosting. This creates a professional-looking cake that’s perfect for serving!
Are there any dietary considerations I should keep in mind?
If you have allergy concerns, note that this cake contains gluten, dairy, and eggs. For a gluten-free version, you can substitute all-purpose flour with a gluten-free blend. Additionally, if you’re looking for a dairy-free option, almond milk and dairy-free white chocolate can be used.
How can I tell when the cake is fully baked?
To ensure the White Chocolate Raspberry Dream Cake layers are perfectly baked, insert a toothpick into the center of each cake. If it comes out clean or with a few crumbs attached, it’s done! This usually takes about 25-30 minutes at 350°F.
White Chocolate Raspberry Dream Cake: A Slice of Bliss
Ingredients
Equipment
Method
- Preheat your oven to 350°F (175°C). Grease and flour three 8-inch round cake pans.
- In a medium bowl, whisk together the flour, baking powder, and salt.
- In a large bowl, cream together the unsalted butter and granulated sugar until light and fluffy.
- Beat in the eggs one at a time, followed by vanilla extract and melted white chocolate.
- Gradually add the dry ingredients and milk alternately, starting and ending with flour.
- Divide the batter among the prepared pans and bake for 25-30 minutes.
- While cooling, prepare the raspberry filling by cooking raspberries, sugar, and lemon juice until soft, then stir in a cornstarch slurry.
- For the frosting, beat softened butter, add powdered sugar and vanilla, then mix in milk to achieve desired consistency.
- Once cool, level the cake layers and assemble with raspberry filling and frosting, chilling to set.
- Decorate with fresh raspberries, white chocolate curls, and mint leaves, then serve.
Leave a Reply