
As I stood in my kitchen, the aroma of sizzling chicken filled the air, instantly transporting me to cozy Japanese convenience stores. Today, I’m excited to share my recipe for Easy Chicken Onigiri with Teriyaki Sauce, a delightful twist on a traditional Japanese snack. These little rice balls not only showcase tender marinated chicken but also feature that perfect sticky sushi rice, making them an easy and fun addition to your appetizer roster. With their portability and quick prep time, these onigiri are perfect for busy weeknight dinners or as grab-and-go snacks any time of day. Imagine impressing your friends and family with a dish that tastes as good as it looks! Ready to dive into this tasty journey? Let’s get cooking!
Why Chicken Onigiri Will Delight You
Flavorful Fusion: Tender chicken meets sticky sushi rice in a harmonious blend.
Quick Prep: Ready in just 30 minutes, these onigiri are a swift solution to mealtime dilemmas.
Customizable: Whether you prefer chicken thighs or ground chicken, you can tailor these bites to your taste.
Portable Snack: Perfect for on-the-go munching or an impressive appetizer to share, they fit any occasion.
Cultural Connection: Enjoy a bite of Japanese tradition that brings comfort and nostalgia to your table.
For a delightful meal pairing, consider serving with Honey Pepper Chicken for a complete feast!
Chicken Onigiri Ingredients
• The essential components for your Chicken Onigiri adventure!
For the Rice
- Short-grain sushi rice – Ensures the perfect sticky texture needed to hold your onigiri together.
- Fine salt – Enhances the rice’s flavor and allows for an even distribution.
For the Chicken Filling
- Boneless, skinless chicken – Thighs or drumsticks are ideal for tenderness; ground chicken works too.
- Soy sauce – Adds saltiness and depth to your marinade and teriyaki sauce.
- Sake (or water) – Helps tenderize the chicken and keeps it moist during cooking.
- Baking soda – A little secret to soften the chicken’s texture.
- Cornstarch – Ensures a crispy exterior for your stir-fried chicken.
- Minced garlic – Infuses aromatic goodness into your chicken filling.
For the Teriyaki Sauce
- Mirin – Sweet rice wine that brings a delightful sweetness to your sauce.
- Brown sugar – Balances the saltiness of soy sauce for a well-rounded flavor.
- Oil – A neutral oil is best for cooking your chicken to perfection.
For Wrapping
- Nori – Seaweed sheets to hold your onigiri together and add a savory crunch.
Optional: Consider adding furikake – A tasty topping to sprinkle on for extra umami flavor!
These ingredients will come together to create delicious Chicken Onigiri, a fantastic appetizer or snack for any occasion!
Step‑by‑Step Instructions for Chicken Onigiri
Step 1: Cook the Rice
Begin by rinsing 1 cup of short-grain sushi rice under cold water until the water runs clear. Cook the rinsed rice in a rice cooker using the appropriate water-to-rice ratio; typically, add about 1.15 cups of water. Once cooked, let it steam for an additional 10 minutes before transferring it to a bowl. Mix in fine salt and furikake (if using) while the rice is warm for a flavorful base for your Chicken Onigiri.
Step 2: Prepare the Chicken
Dice 1 pound of boneless, skinless chicken into small, bite-sized pieces. In a bowl, combine the chicken with soy sauce, sake, baking soda, and cornstarch. Make sure the chicken is evenly coated in the marinade. Cover the bowl with plastic wrap and let it marinate in the refrigerator for at least 30 minutes to allow the flavors to meld and the chicken to tenderize.
Step 3: Make the Teriyaki Sauce
In a small bowl, whisk together 2 tablespoons of soy sauce, 1 tablespoon of mirin, and 1 tablespoon of brown sugar until well combined. This teriyaki sauce will add a sweet and savory glaze to the chicken filling later. Set the sauce aside, allowing the sugar to dissolve while you finish cooking the chicken.
Step 4: Cook the Chicken
Heat 2 tablespoons of neutral oil in a non-stick skillet over medium heat. Once the oil is shimmering, add the marinated chicken pieces, spreading them evenly in the pan. Stir-fry for about 5-6 minutes until the chicken is fully cooked, golden brown, and no longer pink inside. Ensure the chicken reaches a safe internal temperature of 165°F (75°C) for maximum safety and flavor.
Step 5: Add Garlic and Sauce
Once the chicken is cooked, add 2 cloves of minced garlic to the skillet. Sauté for 30 seconds until fragrant, being careful not to burn the garlic. Next, pour in the prepared teriyaki sauce and stir to coat all the chicken pieces evenly. Allow the mixture to simmer for 2-3 minutes, until the sauce thickens slightly, creating a luscious glaze.
Step 6: Shape the Onigiri
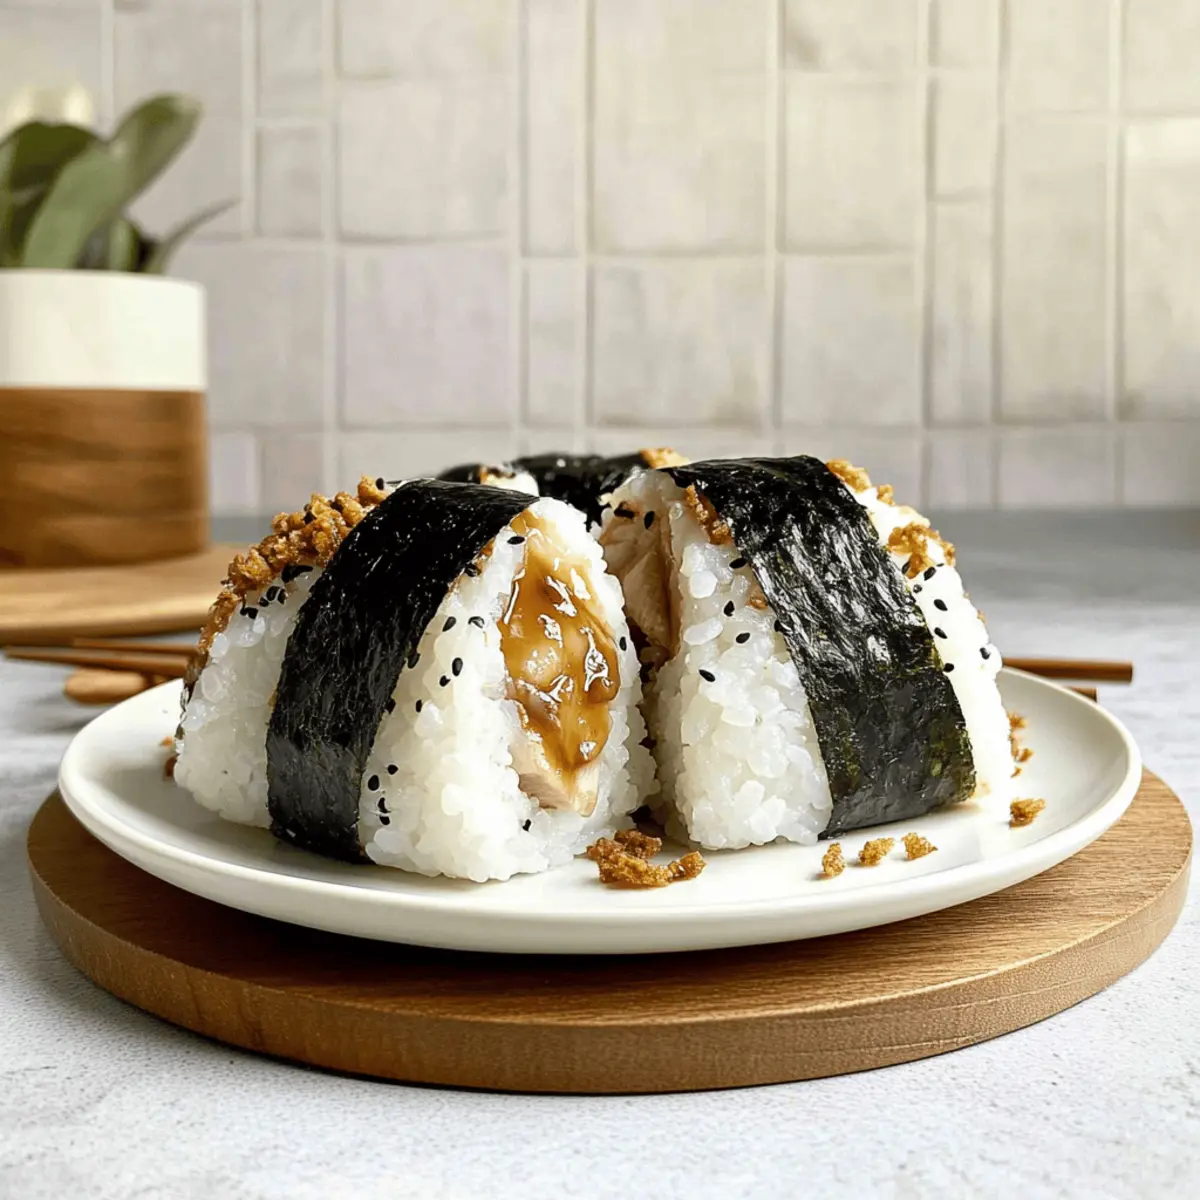
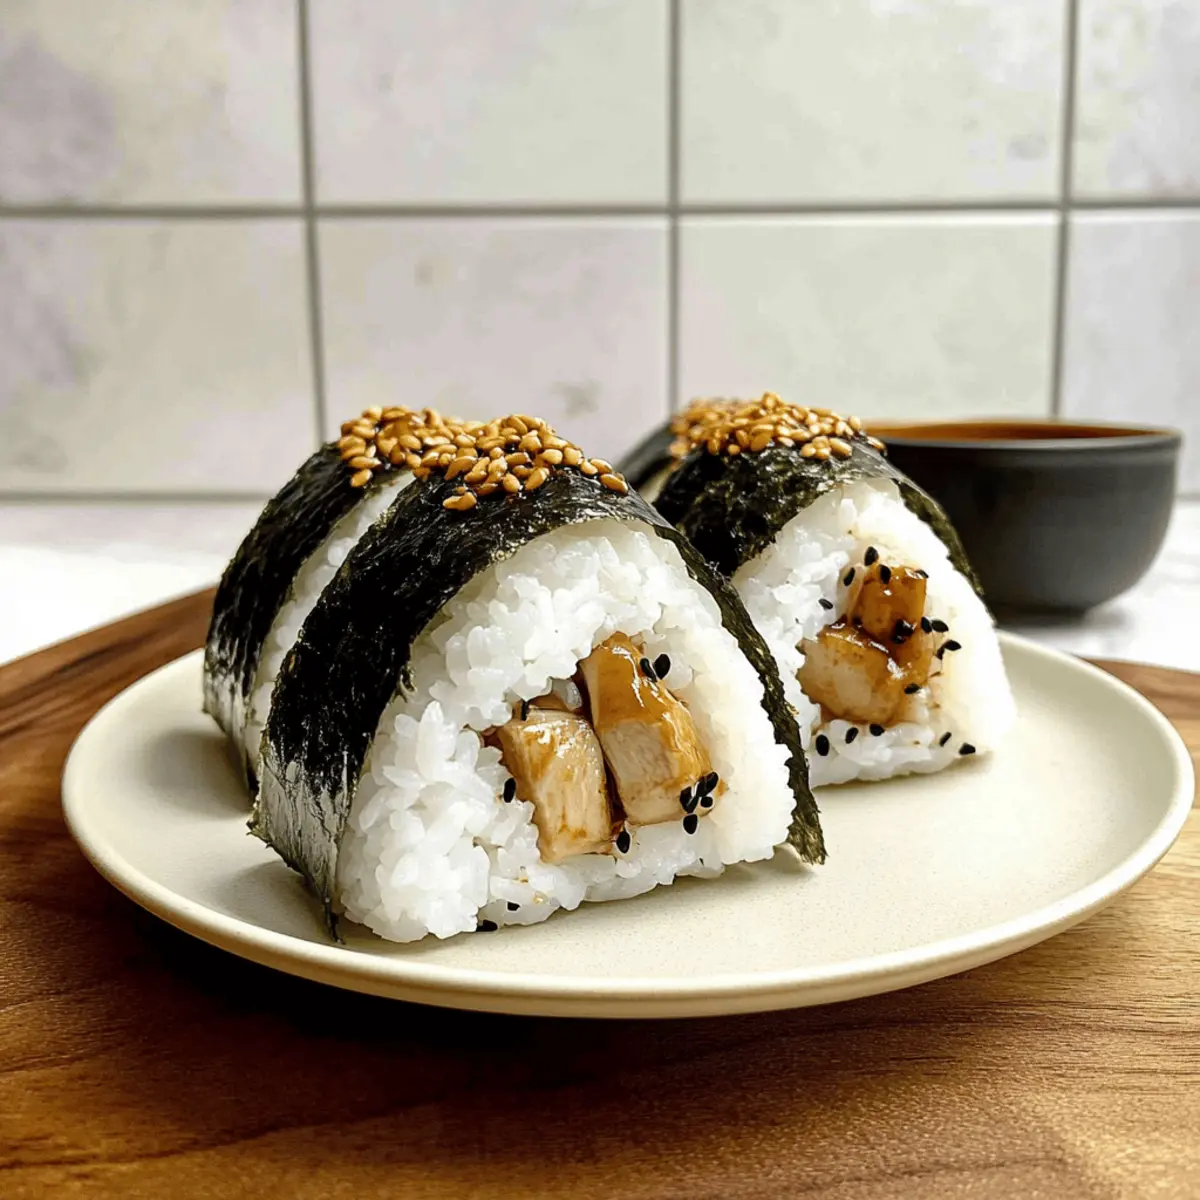
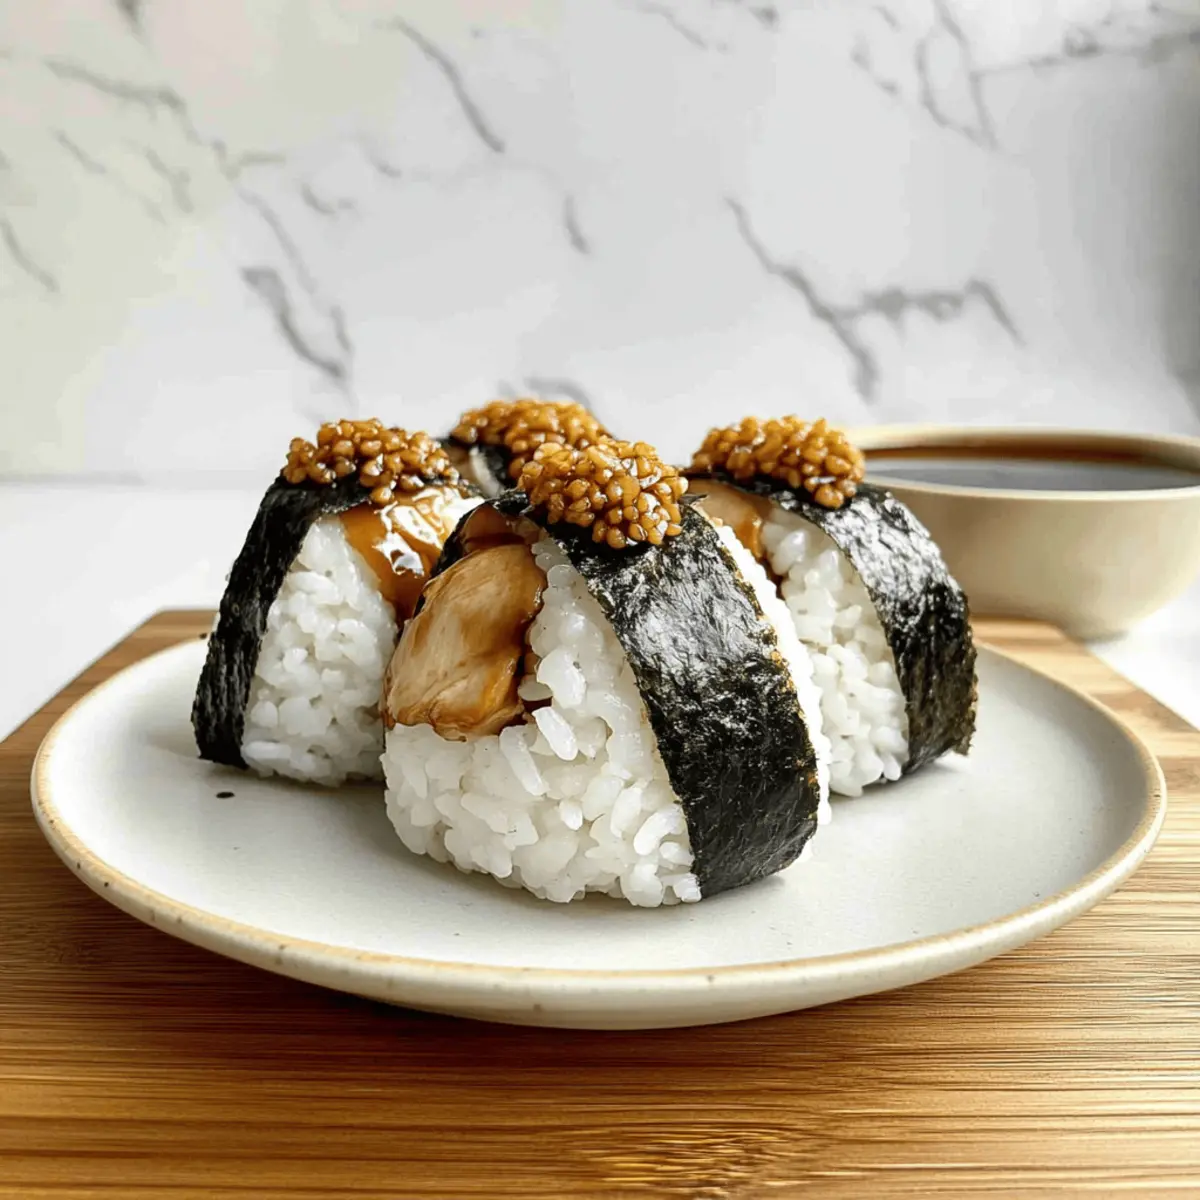
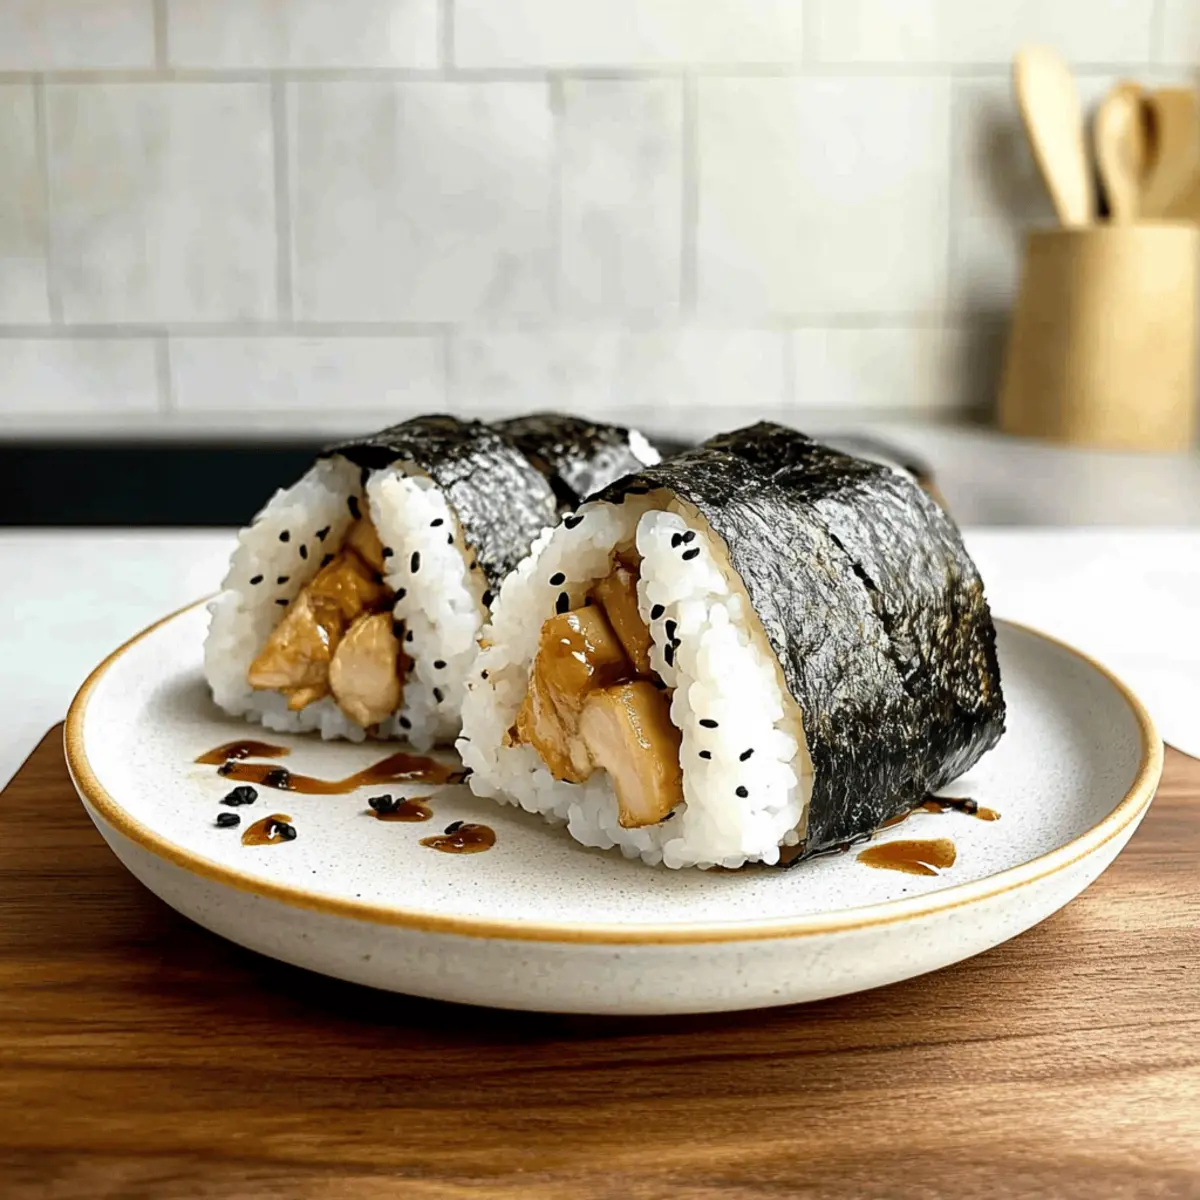
Wet your hands to prevent sticking, then take about ⅓ cup of the seasoned sushi rice and flatten it in your palm. Create a small well in the center and place 1 tablespoon of the teriyaki chicken filling into the well. Top with more rice, molding it gently but firmly into a triangle shape. Repeat this process until all the rice and chicken filling are used, creating delightful Chicken Onigiri.
Step 7: Wrap with Nori
Cut nori sheets into rectangles about 1-inch wide. Take each shaped Chicken Onigiri and press a strip of nori onto the bottom, allowing it to hold the rice triangle together. This not only adds flavor but also makes your Chicken Onigiri easy to handle. Arrange your onigiri on a plate, ready to serve as a fun, tasty snack or appetizer!
Expert Tips for Chicken Onigiri
Rinse the Rice: Thoroughly rinse sushi rice before cooking to remove excess starch, ensuring the perfect texture for your Chicken Onigiri.
Marinade Time: Allow the chicken to marinate for at least 30 minutes; this enhances flavor and tenderness in every bite.
Wet Hands: Always wet your hands while shaping onigiri to prevent rice from sticking, making the process cleaner and easier.
Check Cook Time: Ensure chicken reaches 165°F (75°C) for safe consumption and optimal flavor—no one enjoys dry chicken!
Use Fresh Nori: Wrap with fresh nori right before serving to keep it crisp; this will elevate your Chicken Onigiri experience!
Experiment: Don’t hesitate to try different fillings, like shrimp or tofu. Onigiri is versatile—your creativity is the only limit!
What to Serve with Chicken Onigiri
The delightful flavors and textures of these onigiri offer a fantastic opportunity to create a well-rounded meal experience that embraces both comfort and creativity.
-
Soy Sauce Dipping Bowl: A savory soy sauce dip enhances the umami flavors of the onigiri, balancing the sweetness of the teriyaki glaze.
-
Japanese Seaweed Salad: Light and refreshing, this salad adds a crisp texture and complements the rice’s stickiness with its tangy sesame dressing.
-
Pickled Ginger: A zesty side, pickled ginger cleanses the palate and offers a spicy kick that contrasts beautifully with the soft chicken and rice.
-
Miso Soup: Warm and soothing, miso soup adds a rich depth of flavor, making it a comforting pairing for your Chicken Onigiri.
-
Edamame: Steamed edamame brings a pop of protein and freshness to the table, appealing to those who enjoy a bit of crunch.
-
Chilled Green Tea: Refreshing and slightly bitter, chilled green tea serves as a perfect beverage, enhancing the overall dining experience.
Indulge in these tasty pairings to elevate your Chicken Onigiri and create a meal filled with joy and flavor!
How to Store and Freeze Chicken Onigiri
Fridge: Store leftover Chicken Onigiri in an airtight container for up to 2 days. Wrap them in plastic wrap to maintain moisture and freshness.
Freezer: For longer storage, freeze unwrapped onigiri on a baking sheet until firm, then transfer to a freezer bag for up to a month.
Reheating: Thaw onigiri in the fridge overnight before reheating. Steam them or microwave on low until warm, ensuring the rice remains moist.
Freshness Tip: Enjoying them fresh is best, but proper storage will keep your Chicken Onigiri delicious even days later!
Chicken Onigiri Variations & Substitutions
Feel free to get creative with your Chicken Onigiri and explore these tasty twists!
-
Dairy-Free: Use coconut aminos instead of soy sauce to create a soy-free teriyaki glaze without sacrificing flavor.
This swap not only caters to dairy-free diets but also adds a subtly sweet touch to the dish. -
Vegetarian: Replace chicken with tofu or cooked mushrooms, marinated just like the original.
Each bite will be packed with umami goodness, allowing for a hearty plant-based option that everyone can enjoy. -
Spicy: Add a teaspoon of sriracha or gochujang to your teriyaki sauce for a fiery kick.
The heat balances beautifully with the sweetness of the glaze, making your onigiri unique and exciting! -
Flavor Boost: Experiment with a miso glaze instead of teriyaki for a deeper, savory flavor profile.
This twist will elevate your onigiri to a new level, ideal for those who love rich, umami tastes. -
Crunchy Texture: Incorporate diced pickled vegetables like daikon or cucumber into the filling for added texture and zest.
This not only brings extra crunch but also a burst of freshness to each delectable bite. -
Seafood Twist: Use cooked shrimp or crab meat instead of chicken for a delightful seafood version.
The flavors pair perfectly with the rice, and you get a light yet satisfying option that feels truly special. -
Herb-Infused: Toss in freshly chopped herbs, such as cilantro or green onions, into the rice for a fragrant lift.
This will transform your onigiri into a vibrant dish, infused with the bright flavors of fresh herbs. -
Asian-Inspired Sides: Serve these onigiri with a side of Chimichurri Grilled Chicken or steamed edamame for a varied platter.
The combination creates an engaging eating experience that’s both colorful and delicious!
Make Ahead Options
These Chicken Onigiri are a fantastic option for meal prep, saving you time on busy days! You can prepare the sushi rice and marinate the chicken up to 24 hours in advance. Simply cook the rice according to the instructions and mix in salt and furikake (if using) while warm, then refrigerate it. Marinate the chicken by combining it with soy sauce, sake, baking soda, and cornstarch, and keep it covered in the fridge. When you’re ready to enjoy your Chicken Onigiri, stir-fry the marinated chicken, mix in the teriyaki sauce, and shape the onigiri with the prepped rice. This way, you’ll have delicious, satisfying snacks ready with minimal effort!
Chicken Onigiri Recipe FAQs
How do I select the right chicken for my onigiri?
Absolutely! For the best flavor and texture, I recommend using boneless, skinless chicken thighs or drumsticks, as they remain juicy and tender after cooking. Ground chicken is a versatile option too; just adjust cooking times if needed. Look for chicken pieces that are pink and firm, avoiding any with dark spots or a strange smell.
How should I store my leftover Chicken Onigiri?
Very! To store your delicious Chicken Onigiri, place them in an airtight container, and they can last up to 2 days in the refrigerator. It’s best to wrap them in plastic wrap to keep the moisture in, ensuring they don’t dry out. If you prefer, you can also layer them with parchment paper to prevent sticking.
Can I freeze Chicken Onigiri?
Certainly! To freeze your Chicken Onigiri, first, lay them out uncooked on a baking sheet and place them in the freezer for about an hour until they’re firm. Once they’ve hardened, transfer them to a freezer bag or airtight container and store for up to 3 months. When you’re ready to enjoy them again, just thaw them overnight in the fridge before reheating.
What if my chicken is dry after cooking?
No worries! If your chicken ends up dry, ensure you’re checking the cooking temperature doesn’t exceed 165°F (75°C), as overcooking can lead to a tough texture. For next time, marinate the chicken for at least 30 minutes to enhance flavor and moisture. Additionally, consider adding a bit more sake or oil while cooking to keep it juicy.
Are there any dietary considerations for the ingredients?
Absolutely! If you have any allergies or dietary restrictions, it’s essential to adjust the ingredients accordingly. For instance, if gluten is a concern, opt for gluten-free soy sauce when making teriyaki sauce. Always check the labels for pre-packaged items like mirin and furikake, as they can sometimes contain allergens. And remember, onigiri can be a fun canvas—feel free to swap in tofu or shrimp for a tasty alternative!
Savory Chicken Onigiri: Your Quick Snack Fix Today!
Ingredients
Equipment
Method
- Rinse sushi rice under cold water until clear. Cook in a rice cooker with appropriate water.
- Dice chicken and marinate with soy sauce, sake, baking soda, and cornstarch for 30 minutes.
- Whisk soy sauce, mirin, and brown sugar for the teriyaki sauce and set it aside.
- Heat oil in a skillet and stir-fry marinated chicken until cooked through.
- Add minced garlic to cooked chicken, sauté briefly, then stir in teriyaki sauce.
- Shape onigiri with sushi rice, adding chicken filling in the center and molding into triangles.
- Wrap onigiri with strips of nori and serve.
Leave a Reply