
As I sifted through a box of old family recipes, the faint scent of buttery cookies wafted from the pages, instantly transporting me back to cozy holiday gatherings. That’s right—today we’re diving into the world of Danish Butter Cookies, a treat that’s not just a simple delight, but also a chance to spread joy. With only seven easy ingredients, these cookies come together quickly, ideal for both seasoned bakers and those new to the cookie scene. Their crumbly texture and rich flavor make them perfectly giftable, ensuring that they stand out on any dessert table this season. Plus, they can be whipped up in no time, making them a go-to for last-minute holiday baking. Ready to fill your kitchen with the warm aroma of nostalgia? Let’s get started!
Why Are Danish Butter Cookies So Irresistible?
Melt-in-Your-Mouth: The delightful texture of these cookies practically dissolves on your tongue, offering a buttery bliss that’s hard to resist.
Simple Ingredients: With just seven basic components, you’ll whip these up without fuss, making them perfect for any skill level.
Great for Gifting: Their elegant appearance and rich flavor make them ideal for wrapping up and sharing with friends and family.
Quick Baking: These cookies come together in no time, allowing you to enjoy homemade goodness even on your busiest days.
Endless Variations: Feel free to customize them with zest or sprinkles to suit your taste or occasion. Serve alongside these Cheese Danish Path or Breakfast Butter Swim for an even sweeter spread!
Delicious Danish Butter Cookies Ingredients
For the Cookie Dough
- European Salted Butter – 1 cup (227g); its rich flavor ensures these Danish butter cookies have a melt-in-your-mouth quality.
- Granulated Sugar – ½ cup (100g); adds sweetness and helps achieve that perfect golden-brown color.
- Salt – ⅛ teaspoon; balances flavors and enhances the rich taste—essential if using unsalted butter.
- Egg Yolks – 2; they act as a binding agent, enriching the texture and flavor.
- Vanilla Extract – 2 teaspoons (10g); imparts a warm, fragrant essence, elevating the cookie experience.
- Whole Milk – 1 tablespoon (15g or more); softens the dough for easy piping, making it versatile for various decorations.
- All-Purpose Flour – 2 cups (220g); provides essential structure to these delightful cookies.
- Cake Flour – ½ cup (50g); incorporates a melt-in-mouth tenderness, but all-purpose flour can be used if necessary.
For Decoration
- Coarse Sugar – Optional; sprinkle on top for added sparkle and a delightful crunch, making your Danish butter cookies extra special.
Step‑by‑Step Instructions for Danish Butter Cookies
Step 1: Prep Your Space
Begin by clearing out space in your refrigerator to accommodate the shaped cookies, which will chill for 20 to 30 minutes. Preheat your oven to 350°F (175°C) while lining two baking sheets with parchment paper. This preparation sets the stage for baking perfect Danish butter cookies, ensuring they don’t stick and allowing for even baking.
Step 2: Cream Butter & Sugar
In a stand mixer fitted with a paddle attachment, add your softened European salted butter. Beat on medium speed until the butter is smooth and creamy, about 1-2 minutes. Gradually add in the granulated sugar and salt, continuing to mix until the mixture is fluffy and light in color, which should take about 3-5 minutes. This step is crucial for achieving a tender texture in your Danish butter cookies.
Step 3: Add Wet Ingredients
With the mixer running on low speed, carefully add the egg yolks, vanilla extract, and whole milk to the creamed butter mixture. Mix until everything is well combined and smooth, scraping down the sides of the bowl as needed, which should take around 1 minute. This creamy blend will ensure your cookies have a rich, buttery flavor.
Step 4: Combine Dry Ingredients
In a separate medium bowl, whisk together the all-purpose flour and cake flour to create a light, airy blend. Gradually add the dry flour mixture to the wet ingredients, mixing on low speed until just combined. If the dough feels too thick, incorporate a little extra milk to achieve a smoother consistency, about a tablespoon at a time, to prepare a lovely mixture for piping.
Step 5: Pipe Cookies
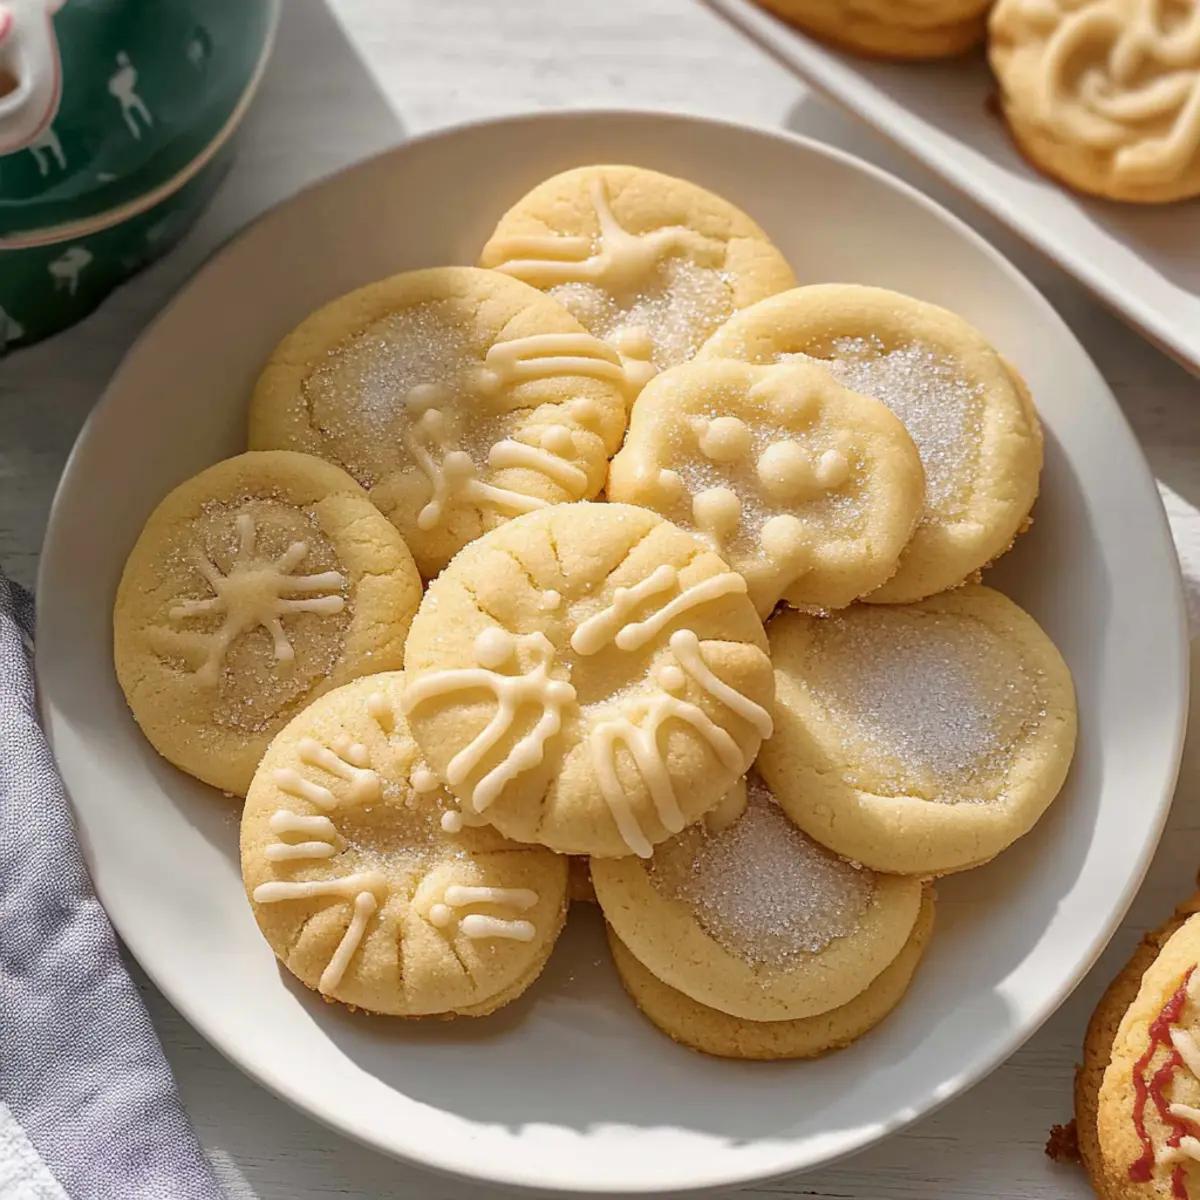
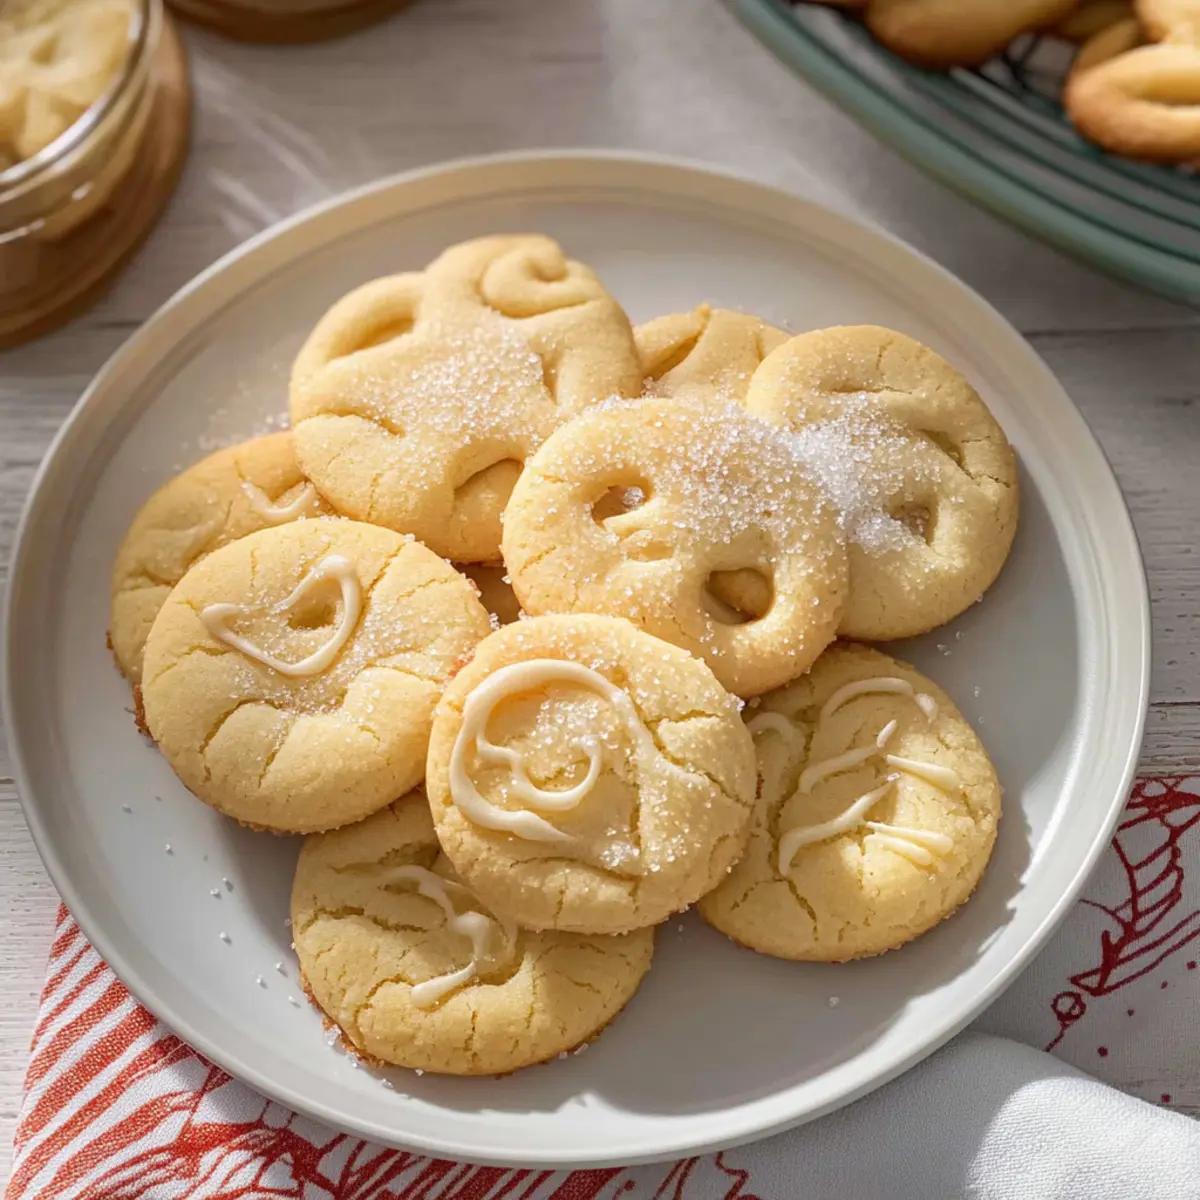
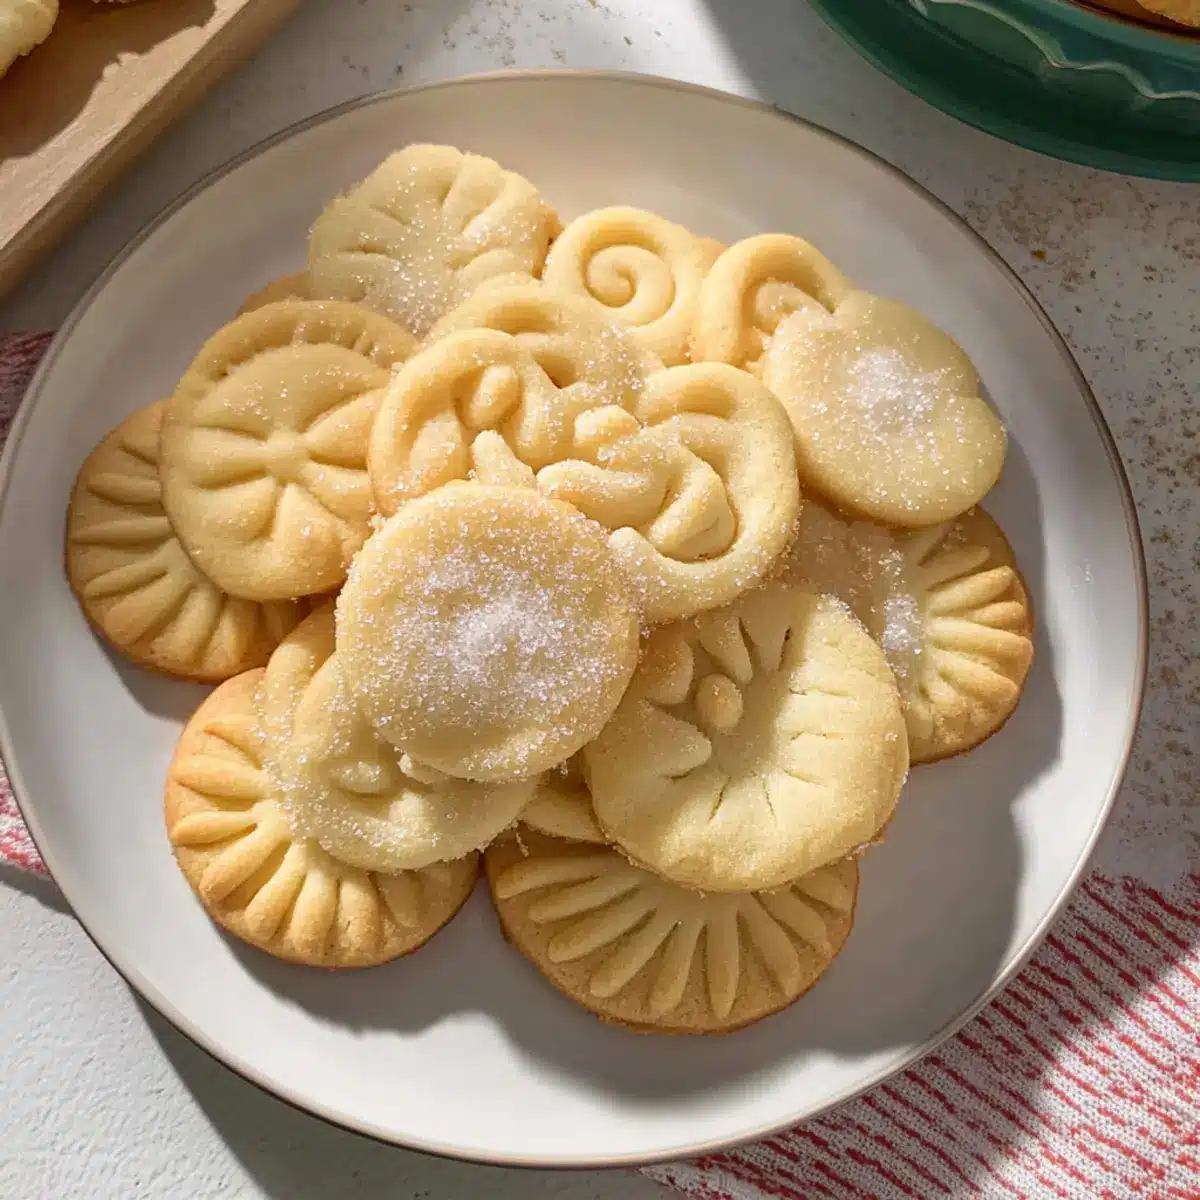
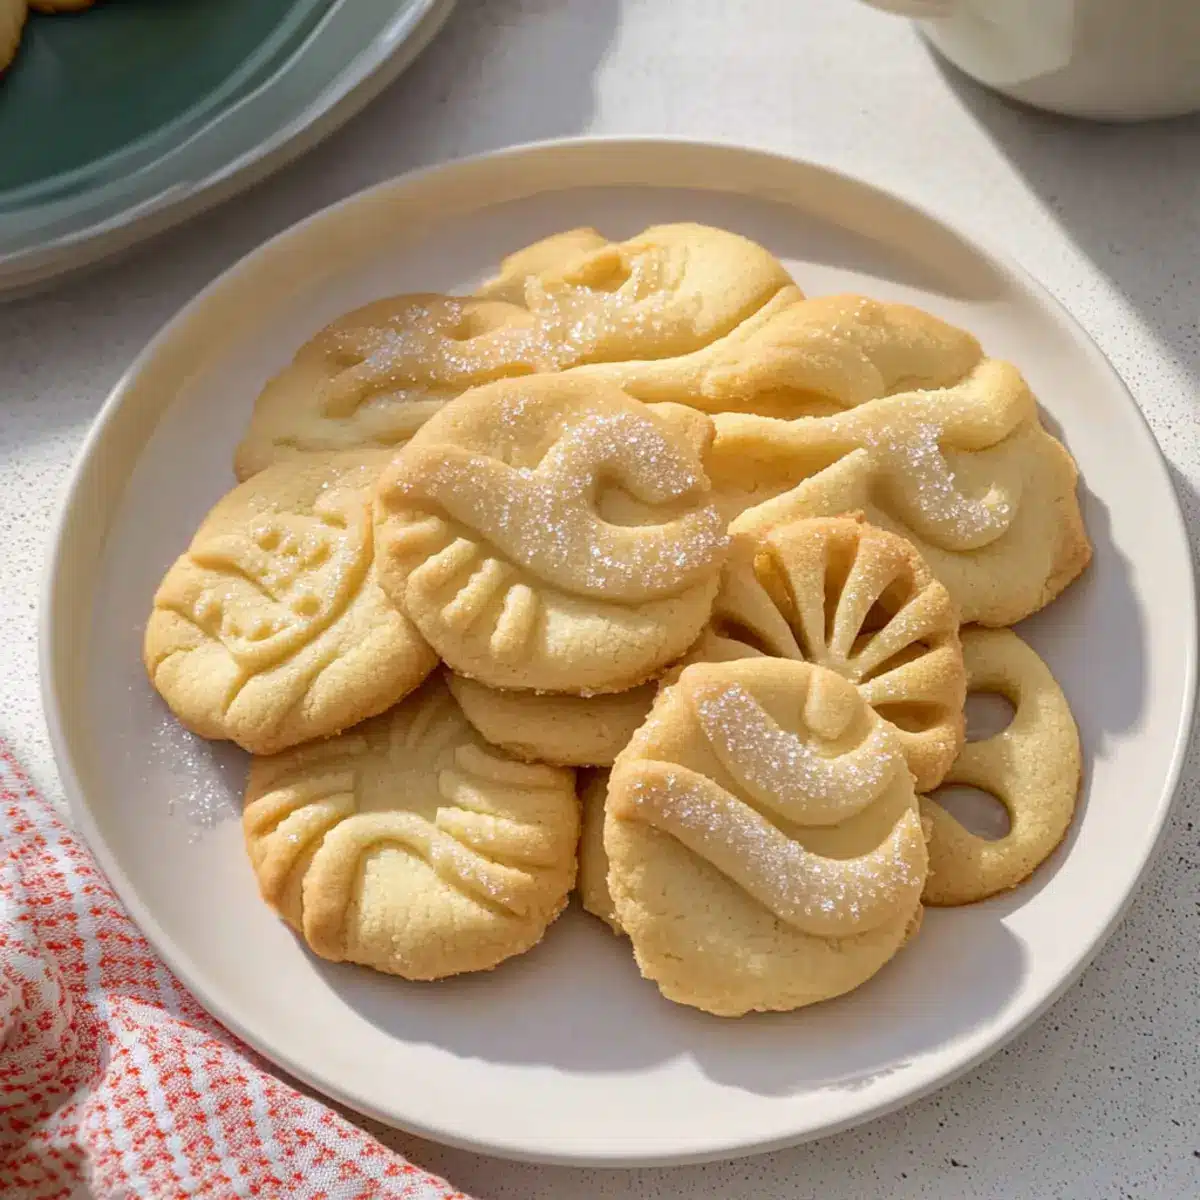
Transfer the cookie dough to a piping bag fitted with a star tip, which is essential for creating beautiful designs. On the prepared baking sheets, pipe 2-inch circles, ensuring to space them at least 2 inches apart to allow for spreading. If you like, sprinkle coarse sugar over the cookies for extra sparkle and texture. This visual touch adds charm to your delectable Danish butter cookies.
Step 6: Chill & Bake
Place the piped cookies in the refrigerator to chill for 20-30 minutes, which helps maintain their shape while baking. Once chilled, bake the cookies in your preheated oven for 10-15 minutes, or until the edges turn lightly golden. Keep an eye on them to prevent overbaking, as you desire that tender, melt-in-your-mouth texture that defines these Danish butter cookies.
Step 7: Cool and Enjoy
After baking, allow the cookies to cool on the baking sheets for about 5 minutes. Once slightly firm, transfer them to a wire rack to cool completely. This final cooling step is vital to maintain the delightful crumbly texture of the Danish butter cookies, ensuring they are just right for sharing or gifting.
Danish Butter Cookies Variations & Substitutions
Feel free to explore endless possibilities with these cookies, adding your unique touch and flavor to delight your taste buds!
-
Flavor Boost:
Add lemon zest or almond extract to the dough for a bright or nutty twist. Both elevate the traditional flavor to new heights. -
Chocolate Drizzle:
Melt dark chocolate and drizzle over cooled cookies for a decadent addition. This chocolatey layer enhances the richness and makes for a stunning presentation. -
Decorative Options:
Top piped cookies with colored sprinkles or chopped nuts before baking for added flair. These touches provide not only a pop of color but a delightful crunch! -
Spiced Up:
Introduce a dash of cinnamon or nutmeg for a cozy warmth that’s perfect for holiday gatherings. Spices can transform these cookies into a seasonal treat! -
Dairy-Free:
Substitute the butter with coconut oil for a dairy-free version. The slight coconut flavor will pair beautifully with the sweetness of the cookies. -
Gluten-Free:
Swap all-purpose flour with a gluten-free flour blend for a gluten-free twist. Ensure that the blend contains xanthan gum for proper texture. -
Jammed Up:
Indent the center of each cookie before baking and fill with your favorite jam or curd. This adds a lovely burst of flavor in every bite, reminiscent of classic thumbprint cookies. -
Freezing Convenience:
Shape the unbaked dough and freeze it for up to 2-3 months. This makes it easy to enjoy freshly baked cookies anytime without the hassle of preparing the dough.
You might also enjoy a wonderful contrast by pairing these cookies with a warm beverage like a cup of tea or a rich coffee. And for an additional sweet treat, check out our Garlic Butter Steak and Healthy Carrot Cookies recipes that are perfect for sharing!
What to Serve with Melt-in-Your-Mouth Danish Butter Cookies
Indulge in a complete holiday experience by pairing these delightful cookies with complementary dishes that bring warmth and joy to your table.
- Rich Hot Chocolate: A velvety cup of hot chocolate enhances the buttery richness of the cookies, creating a cozy pairing that warms the soul.
- Creamy Vanilla Ice Cream: The cool, creamy texture of vanilla ice cream contrasts beautifully with the melt-in-your-mouth cookies, making for a delightful dessert duo.
- Fresh Fruit Platter: A colorful assortment of seasonal fruits offers a refreshing burst of flavor, balancing the sweetness of Danish butter cookies elegantly.
- Coffee or Espresso: A cup of robust coffee or espresso brings out the buttery notes in the cookies, creating a perfect afternoon treat that feels indulgent.
- Spiced Chai Tea: The aromatic spices of chai tea meld wonderfully with the rich flavor of the cookies, setting a warm, inviting tone for gatherings.
The beauty of these pairings lies not only in their flavors but also in the memories they create around the table—perfect for sharing with loved ones.
How to Store and Freeze Danish Butter Cookies
- Room Temperature: Keep cookies in an airtight container for up to 5 days to maintain freshness and prevent any moisture from making them soggy.
- Fridge: For longer storage, you can refrigerate them in an airtight container for up to a week, though their texture may slightly change.
- Freezer: Freeze unbaked cookie dough in a tightly wrapped shape for up to 2-3 months. When ready to bake, go straight from the freezer to the oven, adjusting the baking time as needed.
- Reheating: If you prefer to enjoy your stored cookies warm, simply pop them in a preheated oven at 350°F (175°C) for about 5-7 minutes to revive that delightful freshness.
Expert Tips for Danish Butter Cookies
- Use Room Temperature Ingredients: Ensure butter and egg yolks are at room temperature to achieve a smooth, well-blended dough.
- Avoid Overmixing: Mix just until combined to prevent gluten development, which can lead to tougher cookies.
- Check Piping Consistency: If the dough is too thick to pipe, add a little extra milk to achieve the perfect texture for Danish butter cookies.
- Keep an Eye on Baking: Baking time varies by size; watch the cookies closely to avoid overbaking and maintain their melt-in-your-mouth quality.
- Chill Before Baking: Don’t skip the chilling step! It helps the cookies retain their shape while baking, ensuring they look as good as they taste.
Make Ahead Options
These Danish butter cookies are perfect for meal prep enthusiasts! You can prepare the cookie dough up to 24 hours in advance by mixing all the ingredients and covering the bowl tightly with plastic wrap. For even more convenience, pipe the dough into shapes and refrigerate the unbaked cookies for the same 24-hour period. When you’re ready to bake, simply preheat your oven and bake the chilled cookies directly—there’s no need to thaw them first, allowing for quick, last-minute baking. To keep the cookies just as delightful, ensure they are stored in an airtight container after cooling. Enjoy restaurant-quality results with minimal effort on busy days!
Danish Butter Cookies Recipe FAQs
How do I choose the best butter for Danish butter cookies?
Absolutely! For the richest flavor and melt-in-your-mouth texture, I recommend using European salted butter, as it has a higher fat content. If you only have unsalted butter, simply add a pinch of salt to your dough to maintain that delightful taste.
What’s the best way to store Danish butter cookies?
To keep your cookies fresh, store them in an airtight container at room temperature for up to 5 days. If you’re looking to prolong their shelf life, placing them in the refrigerator can extend that to about a week, though their texture might slightly change.
Can I freeze the dough for Danish butter cookies?
Very! To freeze the unbaked cookie dough, shape it into a log and wrap it tightly in plastic wrap. Store it in a freezer-safe bag for up to 2-3 months. When you’re ready to bake, remove it from the freezer and slice it and bake straight from the freezer, adjusting the baking time by a minute or two if necessary.
What should I do if the dough is too thick to pipe?
Good question! If your cookie dough is too thick for piping, simply add a tablespoon of whole milk at a time until it reaches a smooth, pipeable consistency. This will ensure that your Danish butter cookies come out beautifully shaped and delightful.
Can these cookies be made allergy-friendly?
Of course! To make these Danish butter cookies friendlier for those with dairy allergies, substitute the butter with a non-dairy butter alternative and use a suitable non-dairy milk. Always double-check labels and consider any additional allergies to ensure a safe treat for everyone!
How do I know when my Danish butter cookies are perfectly baked?
Watch those edges! Bake your cookies until the edges are lightly golden, which typically takes 10-15 minutes. The centers may look a bit pale, but they’ll firm up as they cool. The delightful, tender texture is key, so avoid overbaking. Enjoy those warm, melt-in-your-mouth sensations!
Delicious Danish Butter Cookies: Melt-in-Your-Mouth Magic
Ingredients
Equipment
Method
- Prep your space by clearing room in the refrigerator for cookies to chill and preheat your oven to 350°F (175°C). Line two baking sheets with parchment paper.
- Cream the soft European salted butter in a stand mixer at medium speed until smooth. Gradually add granulated sugar and salt, mixing until fluffy and light.
- With the mixer on low, add egg yolks, vanilla extract, and whole milk to the mixture, mixing until well combined and smooth.
- Whisk together all-purpose flour and cake flour in a separate bowl, then gradually mix into the wet ingredients until just combined.
- Transfer dough to a piping bag with a star tip, and pipe 2-inch circles on lined baking sheets, spacing them at least 2 inches apart.
- Chill the piped cookies in the refrigerator for 20-30 minutes, then bake in the preheated oven for 10-15 minutes until edges are lightly golden.
- Allow cookies to cool on baking sheets for 5 minutes, then transfer to a wire rack to cool completely.
Leave a Reply