
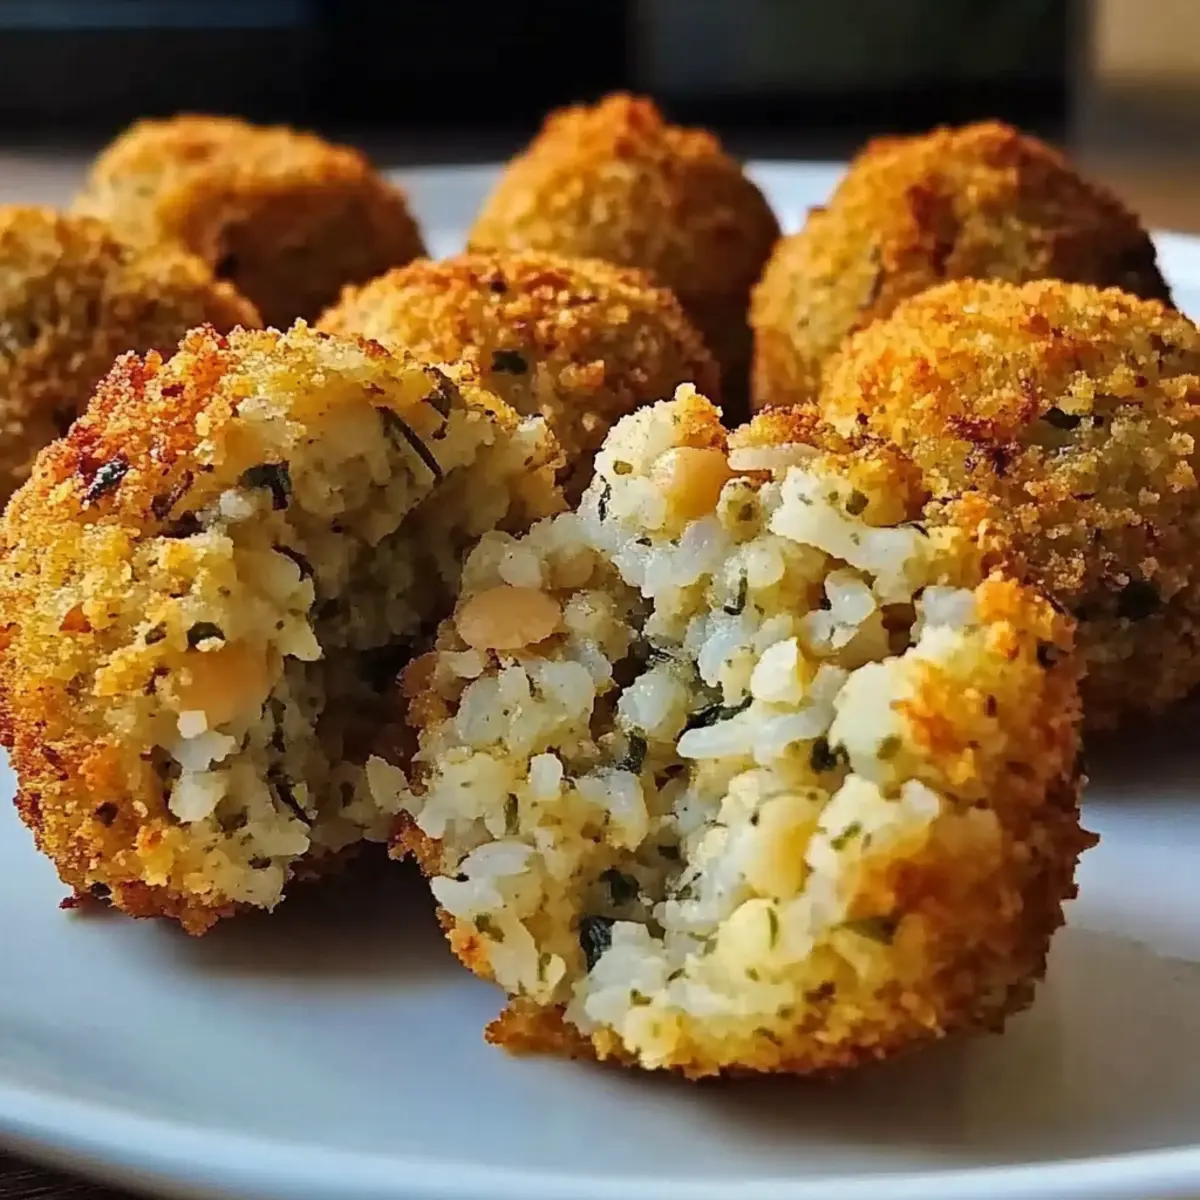
Walking through the kitchen, the warm, nutty aroma of chickpeas roasting in the oven made me pause; I knew something special was underway. That familiar scent signals a delightful journey of flavors, and today, we’re diving into the world of Baked Chickpea and Rice Balls. These crispy treasures not only provide a satisfying crunch but also deliver a soft, fluffy interior thanks to the perfect blend of rice and spices. They’re a fantastic solution for busy weeknights, allowing you to whip up a meal that’s both healthy and kid-friendly. Plus, with the added perk of being meal prep-friendly, they fit seamlessly into a bustling lifestyle. Curious about how to transform simple pantry staples into a crowd-pleasing dish? Let’s dive in!

Why You’ll Love These Baked Balls
Deliciously Versatile: These Baked Chickpea and Rice Balls invite endless creativity! You can easily substitute chickpeas with cannellini or black beans, making it a customizable dish for any palate.
Healthy and Nutritious: Packed with plant-based protein and fiber, they’re a guilt-free option that satisfies without weighing you down.
Kid-Friendly Delight: Even the pickiest eaters will gobble these up! Serve them with hummus or tzatziki, making mealtime fun and enjoyable.
Meal Prep Superstar: Whip up a batch over the weekend and store them for a quick weeknight meal. They reheat beautifully in the oven or air fryer, keeping that crispy texture.
Easy to Make: With simple ingredients and straightforward steps, these balls are perfect for both novice and experienced cooks looking to shake up dinner plans.
Baked Chickpea and Rice Balls Ingredients
• Here’s everything you need to create these tasty bites!
For the Chickpea Mixture
- Chickpeas – Ensure they are rinsed and dried well for the best creamy texture.
- Cooked Rice – Use short or medium-grain varieties to help the mixture stick together.
- Garlic – Fresh minced garlic adds a robust aroma and flavor to your baked balls.
For Coating and Flavor
- Panko Breadcrumbs – This creates a delightful crispy outer layer; feel free to substitute with regular breadcrumbs if needed.
- Parsley & Chives – Fresh herbs to brighten the dish; swap with cilantro or green onions for a flavorful twist.
- Onion Powder, Smoked Paprika, Salt, Black Pepper – These seasonings enhance the overall taste; adjust to your personal preference.
Binding and Texture
- Egg – Acts as the binding agent for the mixture; for a vegan option, use a flax egg instead.
Now that you have the Baked Chickpea and Rice Balls ingredients at hand, you’re all set to embark on a delightful cooking adventure!
Step‑by‑Step Instructions for Baked Chickpea and Rice Balls
Step 1: Preheat and Prepare
Begin your culinary journey by preheating your oven to 400°F (200°C). While the oven warms, line a baking sheet with parchment paper to prevent sticking and ensure a crispy exterior for your Baked Chickpea and Rice Balls. This initial preparation sets the stage for perfect baking as you dive into creating your flavorful mixture.
Step 2: Mash the Chickpeas
In a large mixing bowl, take your well-rinsed and dried chickpeas and mash them with a fork or potato masher until a mostly smooth consistency is achieved, leaving some texture for bite. This process should take about 3–5 minutes. It’s this creamy chickpea base that will elevate your Baked Chickpea and Rice Balls, giving them that hearty, satisfying feel.
Step 3: Combine Ingredients
Add the cooked rice, Panko breadcrumbs, minced garlic, chopped parsley, chives, onion powder, smoked paprika, salt, and black pepper to the mashed chickpeas. Gently fold the ingredients together using a spatula until just combined without overmixing. Aim for a coherent texture that still showcases the distinct flavors—this is where your Baked Chickpea and Rice Balls begin to take shape!
Step 4: Blend in the Egg
In a separate bowl, whisk the egg until it’s well combined. Gradually fold this egg into your chickpea mixture, ensuring even distribution without overworking the batter. This binding agent is key to holding your Baked Chickpea and Rice Balls together during baking and will help achieve that delightful fluffiness inside.
Step 5: Chill the Mixture
Cover the mixing bowl with plastic wrap and place it in the refrigerator for at least 30 minutes. Chilling the mixture helps it firm up, making the process of shaping your Baked Chickpea and Rice Balls easier and ensuring they maintain their form while baking. You’ll notice a remarkable transformation just from this simple step!
Step 6: Shape the Balls
Once chilled, remove the mixture from the refrigerator and scoop out portions about the size of golf balls (approximately 1.5 inches in diameter). Roll each portion between your palms to form smooth balls. The gentle rolling helps create that crisp outer texture you’ll enjoy with your Baked Chickpea and Rice Balls.
Step 7: Coat with Panko
Place the remaining Panko breadcrumbs in a shallow dish and roll each chickpea ball in the breadcrumbs until fully coated. This step adds an extra layer of crunch to the Baked Chickpea and Rice Balls that will contrast beautifully with their soft interior, ensuring a delightful bite every time.
Step 8: Bake Until Golden
Arrange the coated chickpea balls on the prepared baking sheet, leaving space between each one. Lightly brush or spray them with olive oil for added crispness. Bake in the preheated oven for 20-25 minutes, flipping halfway through, until they’re golden brown and crispy. The enticing aroma filling your kitchen will be a wonderful temptation!
Step 9: Cool and Serve
Once baked, let the Baked Chickpea and Rice Balls cool for a few minutes on a wire rack. This allows them to set properly. Serve them warm alongside your favorite dipping sauces, and watch as these delicious bites become an instant hit at your dinner table, perfect for both appetizers and main dishes alike!

What to Serve with Crispy Baked Chickpea and Rice Balls
Transform your delicious bites into a complete meal with these thoughtful pairings that enhance every flavor.
-
Creamy Hummus: This smooth, garlicky dip adds a delightful creaminess that complements the crunchy texture of the baked balls.
-
Tzatziki Sauce: A refreshing minty yogurt dip that adds a cool contrast and balances the savory spices in the chickpea and rice balls.
-
Fresh Salad Greens: A light arugula or spinach salad tossed with lemon vinaigrette adds a zesty touch, making for a refreshing side that uplifts the meal.
-
Roasted Vegetables: Seasonal roasted carrots and zucchini add a warm, earthy flavor base, providing a perfectly textural companion to each bite. The caramelization brings out their natural sweetness.
-
Quinoa Pilaf: This protein-rich side is a wholesome pairing that complements the chickpeas while providing a delightful nutty flavor.
-
Sliced Avocado: Silky avocado slices served on the side offer a creamy texture that beautifully unites different taste sensations with your chickpea balls.
-
Sweet Potato Wedges: Crispy, seasoned sweet potato wedges provide an excellent balance of sweetness and heartiness, making the meal feel indulgent yet healthy.
-
Chilled White Wine: A crisp, dry wine elevates the dining experience, enhancing the flavors of the chickpea and rice balls while providing a refreshing contrast.
-
Fruit Salad: For a light dessert, a vibrant fruit salad with seasonal fruits adds a sweet, refreshing conclusion, tangibly contrasting with the savory bites.
Create a wonderful dinner experience that everyone will love by mixing and matching these delightful offerings!
Make Ahead Options
These Baked Chickpea and Rice Balls are incredibly convenient for meal prep, allowing you to save time during your busy weeknights! You can prepare the chickpea mixture and shape the balls up to 24 hours in advance. Simply cover the shaped balls with plastic wrap and refrigerate them to maintain their freshness and prevent browning. When you’re ready to serve, just bake them directly from the fridge, brushing with olive oil, and they’ll come out just as delicious—crisp on the outside and fluffy within. This simple advance prep not only streamlines your cooking process but also ensures that you have a healthy, homemade meal ready in no time!
Baked Chickpea and Rice Balls Variations
Feel free to get creative with your Baked Chickpea and Rice Balls for a delightful twist on our original recipe!
-
Bean Swap: Substitute chickpeas with cannellini or black beans for a different flavor profile. Each bean brings its own wonderful taste, adding a unique flair to your dish.
-
Herb Change: Experiment with fresh herbs like cilantro, dill, or basil to match your favorite flavors. Each herb introduces a new layer of aroma and zest, making your balls even more enjoyable!
-
Spicy Kick: Add red pepper flakes or cayenne pepper for some heat. Adjust the spice level according to your family’s taste buds, transforming these bites into a thrilling culinary adventure.
-
Vegetable Boost: Mix in grated zucchini, carrots, or spinach for added nutrition. Just remember to remove excess moisture to maintain the perfect texture, creating a more wholesome treat!
-
Nutty Flavor: Incorporate a tablespoon of tahini or almond butter for a nutty richness. This variation may just inspire a delightful new favorite in your household!
-
Gluten-Free Option: Use gluten-free breadcrumbs instead of Panko for a gluten-free version. The texture will still be crisp, ensuring everyone can enjoy these scrumptious bites!
-
Cheesy Goodness: Mix in some grated cheese or nutritional yeast for a cheesy twist. The added creaminess will elevate the flavors and provide a satisfying savoriness to your Baked Chickpea and Rice Balls.
For serving, pair your variations with refreshing dips like hummus or tzatziki for a delightful experience. Whether for a meal or a snack, these customized Baked Chickpea and Rice Balls will surely steal the show!
Storage Tips for Baked Chickpea and Rice Balls
Fridge: Store your baked chickpea and rice balls in an airtight container in the refrigerator for up to 4-5 days. This helps maintain their flavor and texture throughout the week.
Freezer: For longer storage, freeze the baked balls in a single layer on a baking sheet, then transfer to a freezer-safe container for up to 3 months. This makes meal prep a breeze!
Reheating: To regain crispiness, reheating is key! Simply pop the frozen or refrigerated balls in the oven or air fryer until warmed through, ideally at 350°F (175°C) for about 10-15 minutes.
Wrap Well: If you plan to freeze them, make sure to individually wrap each ball in plastic wrap before placing them in a freezer bag. This additional step helps maintain freshness and prevents freezer burn while storing your delicious baked chickpea and rice balls.
Expert Tips for Baked Chickpea and Rice Balls
-
Chickpea Prep: Ensure chickpeas are well-dried post-rinsing to prevent a soggy mixture that hinders texture.
-
Chill Time is Key: Don’t skip the chilling phase! It’s essential for easier shaping and maintaining the structure of your Baked Chickpea and Rice Balls.
-
Adjust Consistency: If your mixture feels too wet, gradually incorporate more breadcrumbs. For a dry mixture, add a splash of water or an extra egg.
-
Vegetable Boost: Consider adding grated zucchini or carrots for extra nutrition but ensure these are squeezed to remove excess moisture before mixing.
-
Flavor Exploration: Get creative with spices and herbs! Try adding cumin or Italian seasoning to tweak the flavors of your Baked Chickpea and Rice Balls.
Baked Chickpea and Rice Balls Recipe FAQs
How do I select the right chickpeas?
Absolutely! When choosing chickpeas for your Baked Chickpea and Rice Balls, opt for dried or canned varieties that are firm, plump, and free from discoloration. If using canned chickpeas, make sure to rinse and thoroughly dry them. A good rule of thumb is to look for chickpeas without any dark spots and avoid those that appear shriveled or damaged for the best texture and flavor in your dish.
What’s the best way to store leftover Baked Chickpea and Rice Balls?
For sure! Once your Baked Chickpea and Rice Balls have cooled completely, place them in an airtight container in the refrigerator. They will stay fresh for up to 4-5 days. If you’re meal prepping, this makes it easy to grab a healthy option for lunch or dinner throughout the week!
Can I freeze Baked Chickpea and Rice Balls?
Yes, you can! To freeze your Baked Chickpea and Rice Balls, first allow them to cool completely. Then, lay them in a single layer on a baking sheet and freeze for about an hour until solid. After that, transfer them to a freezer-safe container or bag, separating layers with parchment paper to prevent sticking. They will keep well for up to 3 months. For quick meals, just reheat directly from the freezer!
What should I do if the mixture is too wet or dry?
Very good question! If your mixture feels too wet, simply add more breadcrumbs a tablespoon at a time until you achieve the desired consistency. On the other hand, if it’s too dry, you can add a splash of water or an extra egg to help bind it together. Always remember to mix gently to preserve that delightful fluffiness in your baked balls!
Are Baked Chickpea and Rice Balls suitable for gluten-free diets?
Absolutely! If you’re looking to keep these Baked Chickpea and Rice Balls gluten-free, just make sure to use gluten-free Panko breadcrumbs and check your seasoning options for gluten-based additives. They make for a delicious and nutritious option that everyone can enjoy, even those with dietary restrictions!
Can my pets share in the fun with these balls?
While the main ingredients in Baked Chickpea and Rice Balls are generally pet-friendly, always consult your veterinarian before sharing any human food with your furry friends! Chickpeas are safe in moderation, but make sure there are no added spices or ingredients that could be harmful to your pets, such as garlic or onion.

Crispy Baked Chickpea and Rice Balls for Happy Tummies
Ingredients
Equipment
Method
- Preheat your oven to 400°F (200°C) and line a baking sheet with parchment paper.
- Mash the rinsed chickpeas in a mixing bowl until mostly smooth, leaving some texture.
- Add the cooked rice, Panko breadcrumbs, minced garlic, chopped parsley, chives, onion powder, smoked paprika, salt, and black pepper to the chickpeas and fold together.
- In a separate bowl, whisk the egg and then fold it into the chickpea mixture.
- Cover the bowl with plastic wrap and chill in the refrigerator for at least 30 minutes.
- Scoop mixture into golf ball-sized portions and roll into balls.
- Roll the balls in Panko breadcrumbs until fully coated.
- Place the coated balls on the baking sheet, brush with olive oil, and bake for 20-25 minutes, flipping halfway through.
- Allow to cool for a few minutes on a wire rack before serving.
Leave a Reply