
As I scrolled through Easter decoration ideas, I stumbled upon a delightful scene of fluffy coconut treats that instantly sparked a wave of nostalgia. Meet my No-Bake Easter Bunny Coconut Tails! These adorable coconut desserts not only capture the whimsy of the holiday, but they’re also incredibly easy to whip up, making them a perfect solution for those seeking a sweet yet quick treat for their festive gatherings. The combination of a creamy center and a sweet coconut exterior creates a satisfying bite that will make your taste buds dance with joy. Plus, being gluten-free and easily adjustable for vegan diets means everyone can indulge! So, why not bring a little extra charm to your table this spring with these delightful creations? Ready to roll up your sleeves and get started on your own delightful bunny tails?
Why are these Coconut Tails a must-try?
Simplicity at its finest: These Easter Bunny Coconut Tails are no-bake, making them incredibly easy and quick to prepare, perfect for busy celebrators.
Delightful flavor: The combination of creamy condensed milk and sweet coconut results in a taste that’s both rich and satisfying.
Versatile options: Easily adjust the recipe for vegan diets, ensuring everyone can enjoy this festive treat.
Fun presentation: Shaping them into bunny tails adds a whimsical touch to your holiday spread, leaving your guests enchanted.
Crowd-pleaser: These treats will steal the show at any gathering—serve them alongside Breakfast Granola Cups for a delightful dessert experience.
Let this recipe become part of your spring celebrations and watch as smiles spread with every bite!
Easter Bunny Coconut Tails Ingredients
• Get ready for a delightful treat!
For the Coconut Mixture
- Sweetened Shredded Coconut – Provides structure and texture; opting for fine coconut will yield smoother truffles.
- Sweetened Condensed Milk – Acts as the essential binder and sweetener for these delicious Easter Bunny Coconut Tails; no substitutions advised.
- Vanilla Extract – Adds a warm flavor profile; can be swapped with almond extract for a unique twist.
- Salt – Balances out the sweetness, enhancing the overall flavor experience.
For the Coating
- White Candy Melts or White Chocolate – Provides a beautiful pastel finish for your fluffy treats; ensure to use oil-based or gel food coloring to avoid seizing.
Make sure you gather these delightful ingredients to craft your festive coconut wonders!
Step‑by‑Step Instructions for Easter Bunny Coconut Tails
Step 1: Prepare Filling
In a large mixing bowl, combine sweetened shredded coconut, sweetened condensed milk, vanilla extract, and a pinch of salt. Stir the mixture vigorously until it becomes thick and sticky, ensuring all ingredients are well blended. If the mixture appears too soft, gradually add more coconut until it reaches a manageable consistency that allows for rolling.
Step 2: Shape Truffles
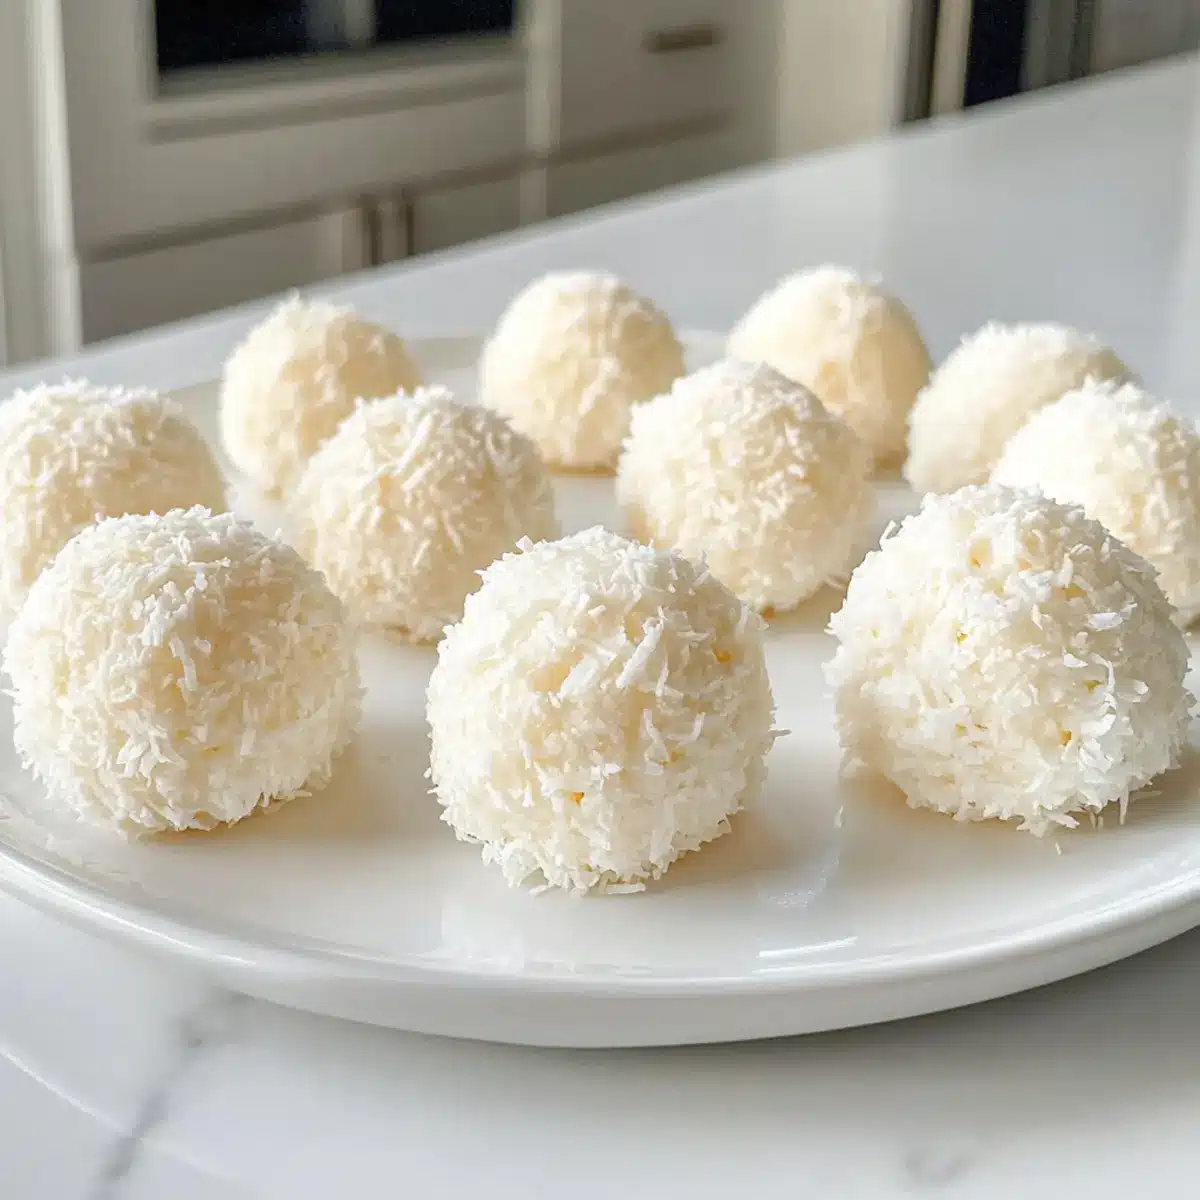
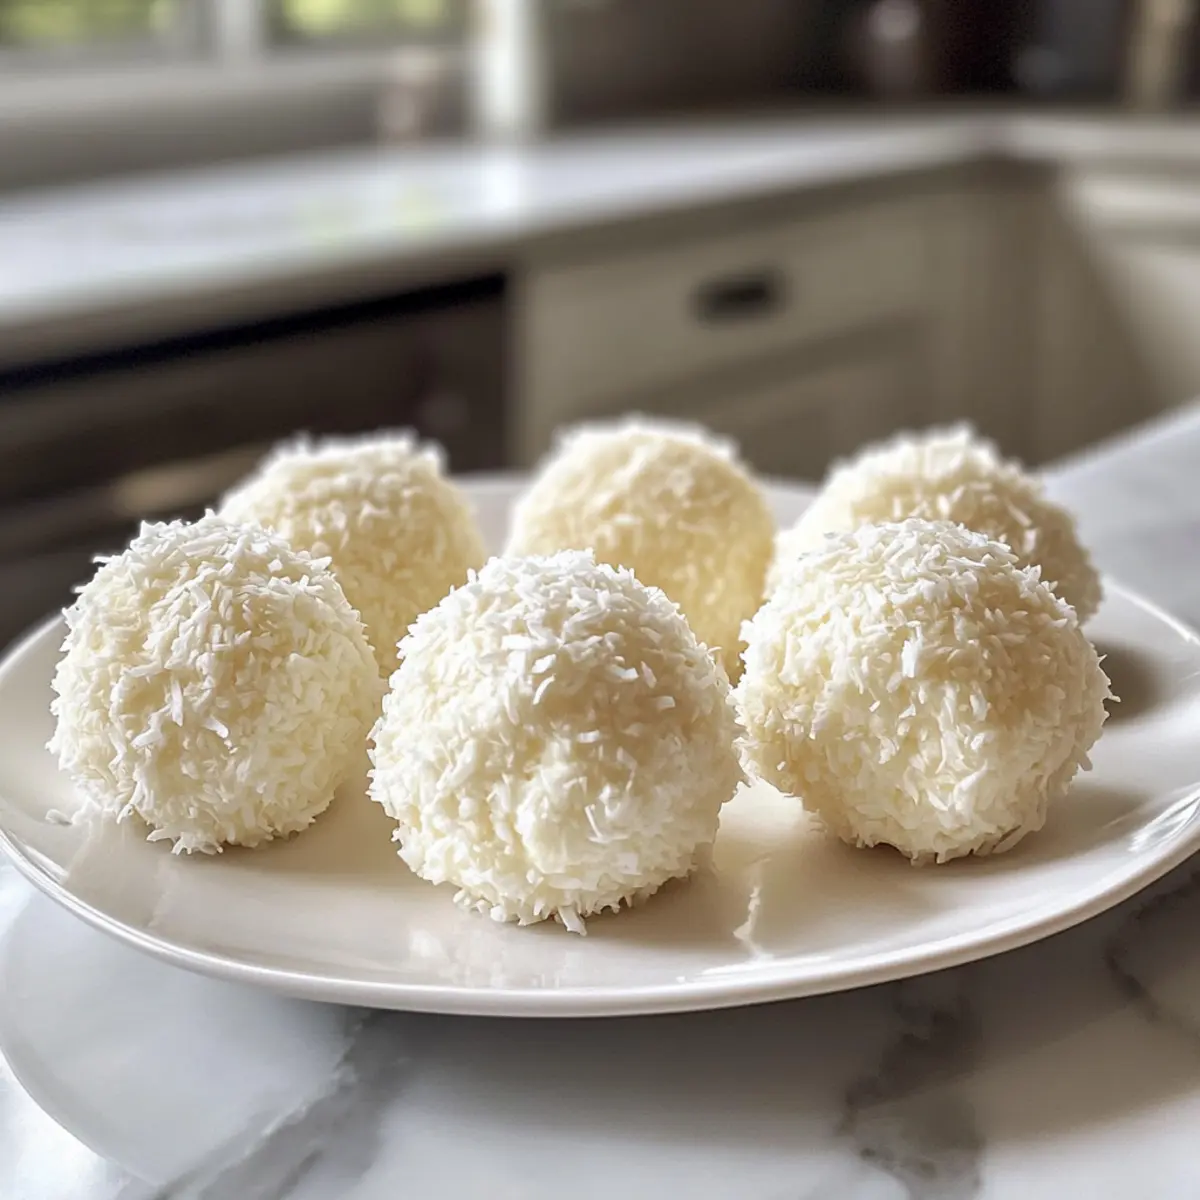
Once your coconut mixture is ready, scoop out tablespoon-sized portions and roll them into 1-inch balls using the palms of your hands for a smooth surface. Place these delightful coconut balls onto a parchment-lined baking sheet, leaving some space between each one to prevent sticking. They will start looking just like adorable little bunny tails!
Step 3: Chill
Refrigerate the shaped truffles for about 1 to 2 hours, allowing them to firm up and hold their shape nicely. You’ll know they are ready when they feel firm to the touch but still have a soft interior. This chilling step is crucial for creating a neat and smooth coating later on, so resist the temptation to skip it!
Step 4: Melt Coating
In a microwave-safe bowl, heat the white candy melts or white chocolate in short 30-second intervals, stirring between each until completely melted and smooth. Be careful not to overheat, as this can cause the chocolate to seize. If desired, divide the melted chocolate into portions and tint each with oil-based or gel food coloring for a festive touch.
Step 5: Dip Truffles
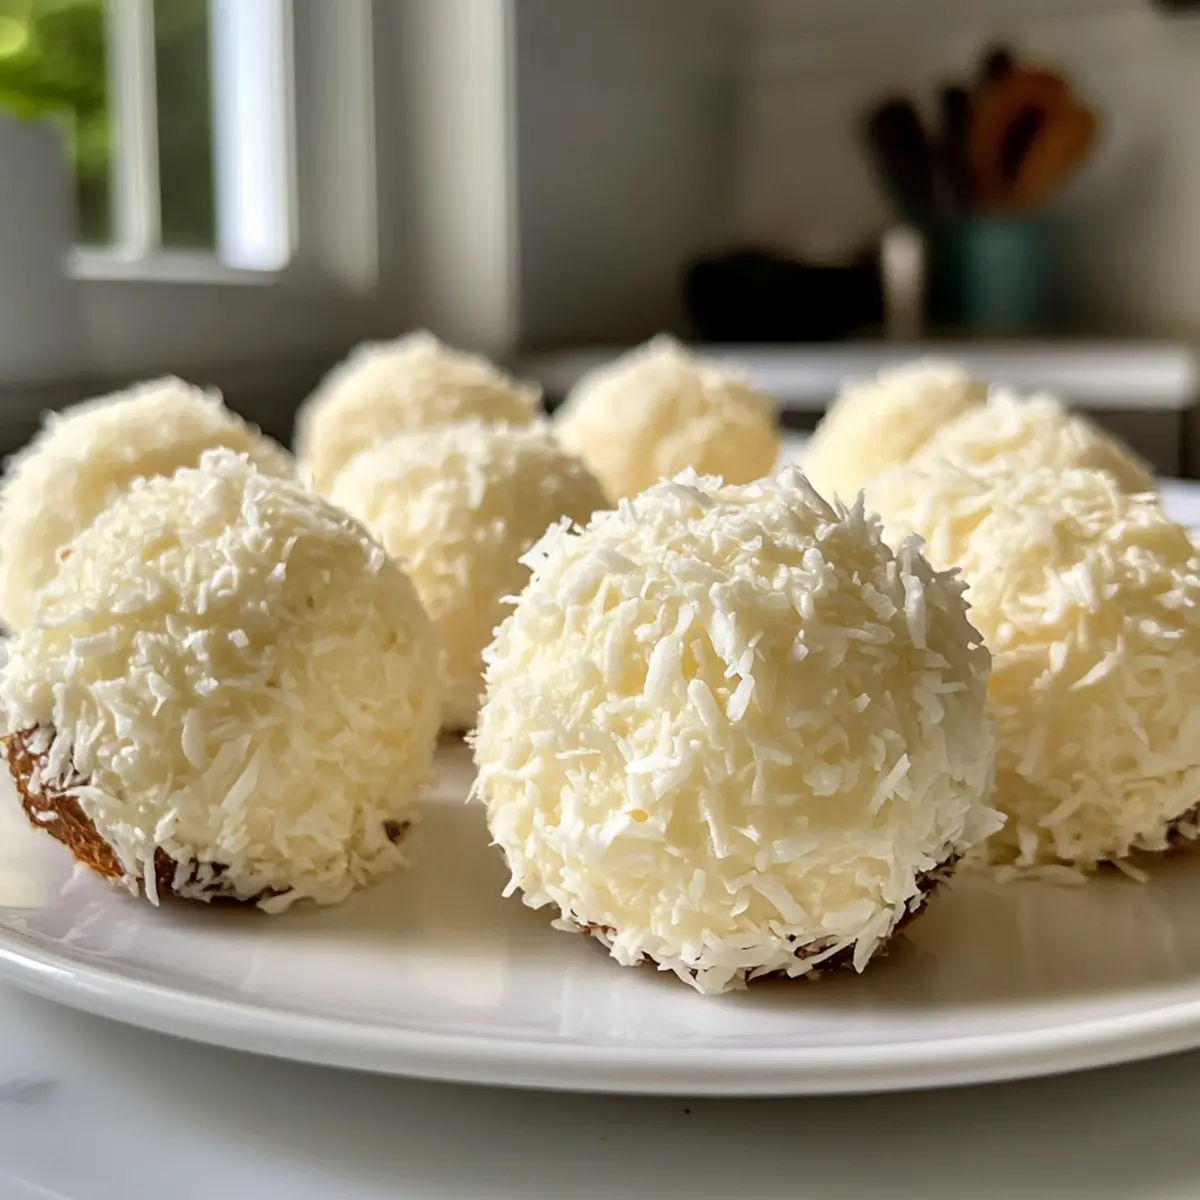
Once your coconut balls are firm and the coating is ready, take each chilled truffle and dip it into the melted chocolate. Make sure to coat all sides, tapping off any excess chocolate for an even finish. After dipping, place them back on the parchment-lined tray and sprinkle with additional shredded coconut while the coating is still wet, creating a charming coconut crust.
Step 6: Set and Store
Let the coated Easter Bunny Coconut Tails sit at room temperature to harden for about 30 minutes, or until the chocolate coating is set. Once they are firm, transfer the treats to an airtight container for storage. These delightful coconut snacks can be kept in the fridge for up to 5 days, offering a sweet bite that everyone will enjoy throughout the spring celebrations!
What to Serve with Easter Bunny Coconut Tails
Bring your spring festivities to life with delightful accompaniments that complement these charming coconut treats!
- Fresh Berries: A vibrant mix of strawberries, raspberries, and blueberries adds a refreshing tartness, enhancing the sweetness of the truffles.
- Lemonade Spritzers: The bubbly, citrusy notes provide a bright contrast, cleansing the palate while keeping the celebration lively.
- Mini Fruit Tarts: Their creamy filling and fruity toppings create an elegant pairing, making your dessert table both colorful and diverse.
- Chocolate Chip Cookies: A familiar favorite, the chewy texture pairs wonderfully with the soft, creamy centers of the Easter Bunny Coconut Tails.
- Coconut Ice Cream: Amplify the coconut experience with a creamy treat that balances the flavors and cools down your spring gathering.
- Spring Green Salad: Tossed with light vinaigrette, this fresh salad brings crispness and earthy flavors that lighten up the dessert’s richness.
- Decorated Cupcakes: Add whimsy to your table! Frosted in pastel colors, they complement the theme while offering a delightful variety of textures.
- Sparkling Punch: This fruity, effervescent drink is perfect for all ages, making it a fun, festive option that pairs beautifully with sweets.
Expert Tips for Easter Bunny Coconut Tails
• Chill Time is Key: Make sure to refrigerate the truffles for at least 1 to 2 hours. This step is crucial for a neat coating.
• Consistent Texture: If your coconut mixture feels too soft, gradually add sweetened shredded coconut until it’s easier to roll.
• Coloring Caution: Only use oil-based or gel food coloring when tinting the chocolate coating to prevent it from seizing.
• Presentation Matters: For a lovely display, consider using mini cupcake liners or arranging your Easter Bunny Coconut Tails on a pastel-themed cake stand.
• Batch Variations: Feel free to incorporate flavor variations, like adding mini chocolate chips or crushed graham crackers to the coconut mixture for extra texture.
Make Ahead Options
These No-Bake Easter Bunny Coconut Tails are absolutely perfect for meal prep, allowing you to enjoy a festive treat without the last-minute rush. You can easily prepare the coconut filling and shape the truffles up to 24 hours in advance. Simply refrigerate them on a parchment-lined baking sheet to maintain their shape and freshness. When you’re ready to serve, melt the coating and dip each truffle, letting them set at room temperature for about 30 minutes. By preparing ahead of time, you’ll create delicious Easter Bunny Coconut Tails that are just as delightful as if made fresh, giving you more time to enjoy the holiday with your loved ones!
Storage Tips for Easter Bunny Coconut Tails
Room Temperature: Keep Easter Bunny Coconut Tails at room temperature for up to 1 day if serving right away; they will be best enjoyed when fresh.
Fridge: Store leftovers in an airtight container in the fridge for up to 5 days, helping maintain the delightful texture and flavor of the treats.
Freezer: For longer storage, freeze the truffles in a single layer on a baking sheet, then transfer to a sealed container for up to 1 month.
Reheating: If enjoyed cold, there’s no need to reheat; simply allow to thaw in the fridge before serving if frozen for optimal texture.
Easter Bunny Coconut Tails Variations
Ready to get creative with your coconut treats? Here are some easy and fun variations to make your Easter Bunny Coconut Tails even more special!
-
Vegan-friendly: Substitute sweetened condensed milk with coconut cream and maple syrup for a delicious plant-based alternative. Everyone will love this creamy twist!
-
Chocolate Lovers: Stir mini chocolate chips into the coconut mixture for a burst of chocolate in each truffle. It adds indulgence and extra flair to these fluffy bites.
-
Flavor Boost: For a zesty twist, incorporate some lime or orange zest into the filling. This brightens the flavors, making your coconut tails uniquely refreshing.
-
Graham Cracker Crunch: Mix in crushed graham crackers for delightful texture before dipping. It introduces a wonderful crunch, reminiscent of a classic s’mores flavor!
-
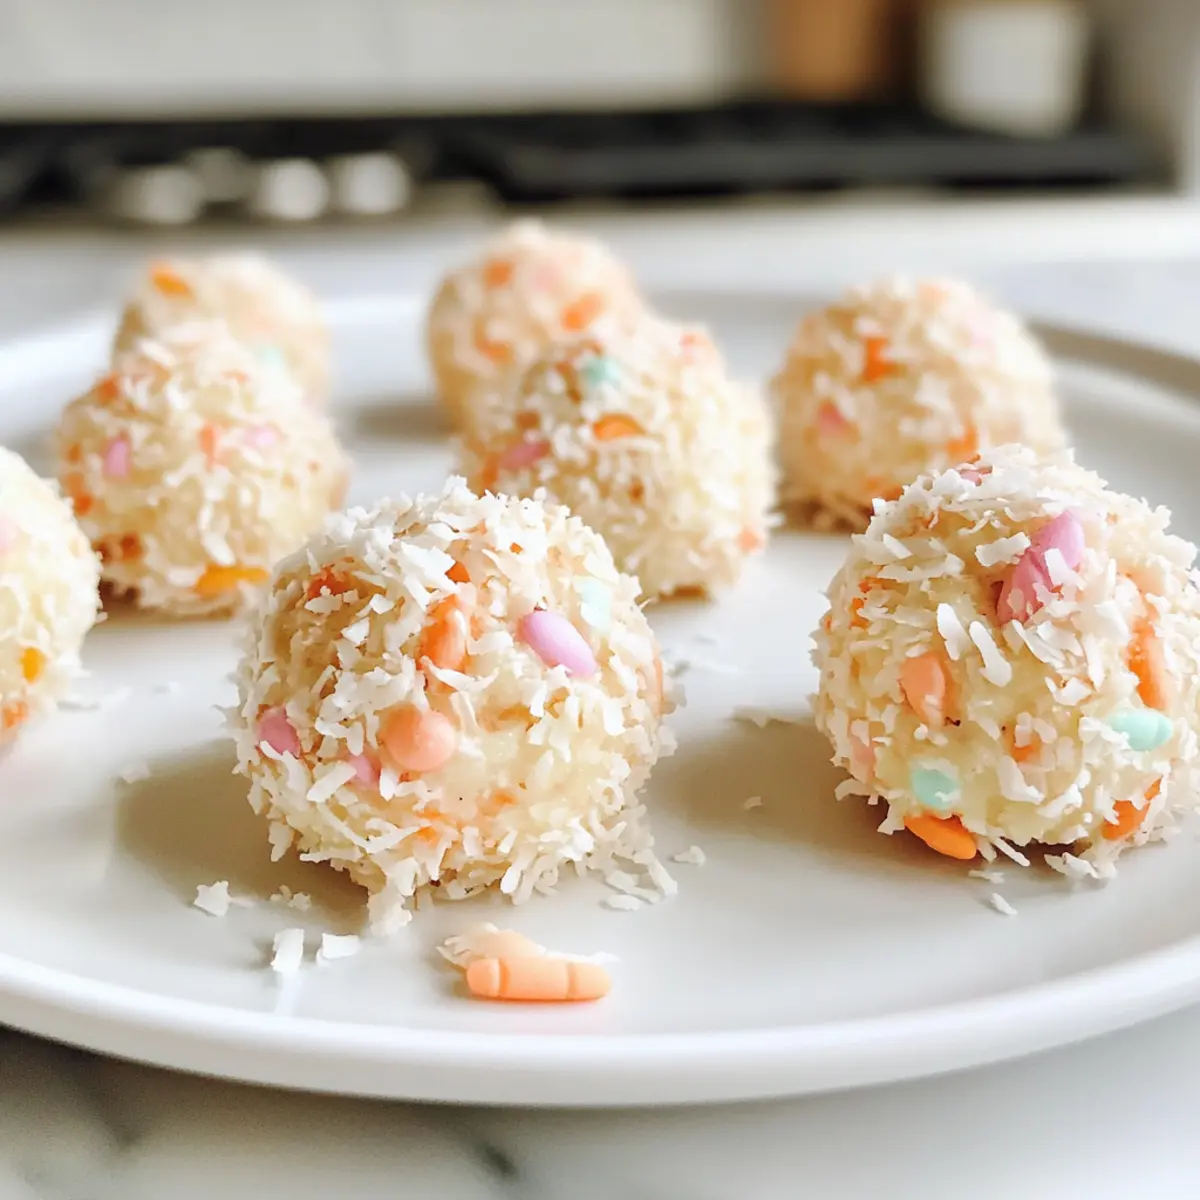
Colorful Coating: Experiment with vibrant pastel colors for your chocolate coating by using various gel food colorings. Create a rainbow of bunny tails for an eye-catching display!
-
Nutty Option: Incorporate finely chopped nuts, like almonds or walnuts, into the mixture for added richness and a delightful crunch.
-
Spicy Kick: Add a pinch of cayenne or chili powder to the coconut filling for a surprising heat that complements the sweetness. You’ll love the unexpected burst of flavor!
-
Decorative Touch: Top each dipped truffle with sprinkles or edible glitter before the coating sets for a festive and colorful finish that dazzles!
Feel free to mix and match these variations to create your own perfect batch! For further inspiration, check out my delightful Pineapple Coconut Dream or try pairing your treats with the lovely Breakfast Granola Cups for a complete festive spread.
Easter Bunny Coconut Tails Recipe FAQs
What type of shredded coconut should I use?
For the best texture, I recommend using sweetened fine shredded coconut, which creates smoother truffles. If you prefer a chewier texture, standard shredded coconut is fine, but it may yield a slightly coarser result.
How should I store my Easter Bunny Coconut Tails?
To keep your Easter Bunny Coconut Tails fresh, store them in an airtight container in the fridge for up to 5 days. If you plan on enjoying them later, you could also keep them at room temperature for one day as they’re best served fresh.
Can I freeze these treats?
Absolutely! To freeze, first place the truffles in a single layer on a baking sheet and freeze until firm. Then transfer them to an airtight container or a freezer-safe bag, where they can be stored for up to 1 month. When you’re ready to enjoy, simply allow them to thaw in the fridge to maintain texture.
What should I do if my coconut mixture is too soft?
If your mixture feels too soft and won’t hold shape, don’t worry! Gradually add more shredded coconut while mixing until the consistency is thick enough to form balls. This step ensures your truffles will have the right structure and won’t fall apart during shaping.
Can these be made vegan or dairy-free?
Yes, you can make Easter Bunny Coconut Tails vegan by using a dairy-free version of sweetened condensed milk, or by substituting with coconut cream and a sweetener of your choice, such as maple syrup. Just ensure that your chocolate coating is also dairy-free!
Are there any specific allergen considerations to keep in mind?
Since the main ingredients are coconut and milk-based, those with tree nut allergies (though coconut is technically a fruit) should approach this recipe cautiously. Always check product labels for any potential allergens, especially in pre-made toppings or chocolate.
Easter Bunny Coconut Tails: Delightful No-Bake Treats to Share
Ingredients
Equipment
Method
- In a large mixing bowl, combine sweetened shredded coconut, sweetened condensed milk, vanilla extract, and a pinch of salt. Stir vigorously until thick and sticky.
- Scoop out tablespoon-sized portions and roll into 1-inch balls. Place on a parchment-lined baking sheet.
- Refrigerate truffles for 1 to 2 hours until firm.
- In a microwave-safe bowl, heat the white candy melts in 30-second intervals until melted and smooth.
- Dip chilled truffles into melted chocolate, coating all sides. Sprinkle with additional shredded coconut.
- Let the coated tails sit at room temperature for 30 minutes to harden. Store in an airtight container.
Leave a Reply