
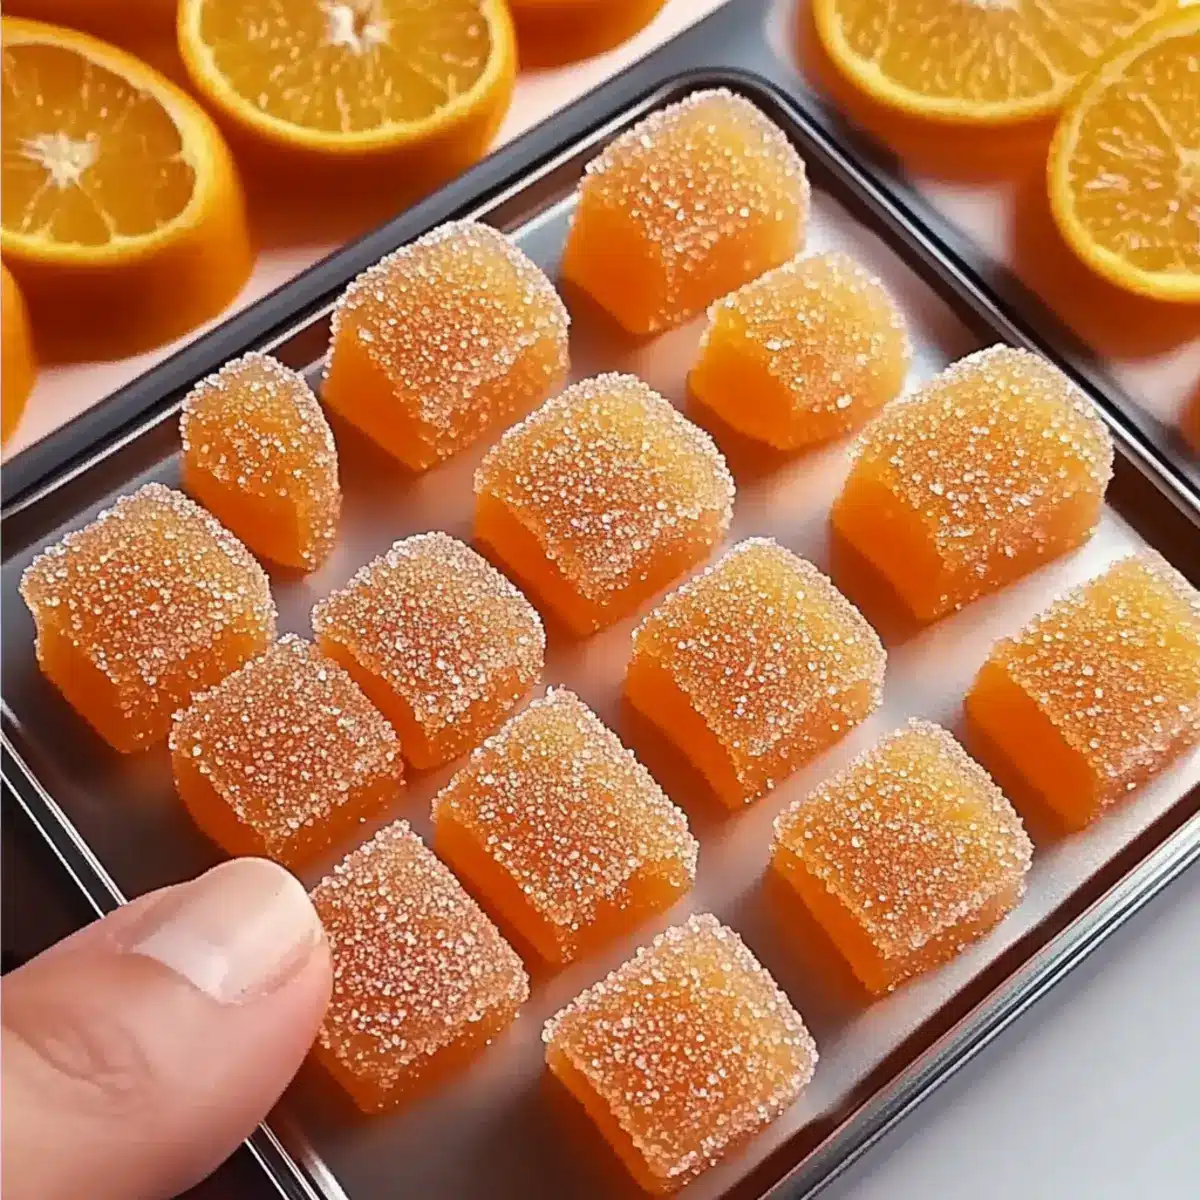
As I peeled the skin off the freshest oranges, a wave of nostalgia swept over me, transporting me back to carefree summer days filled with sunny smiles and sweet treats. It’s moments like these that inspire me to share my favorite recipe for Classic Homemade Orange Candy, a delightful fusion of sweetness and tang that’s sure to brighten any day. This easy-to-follow recipe not only offers a fun culinary adventure but also creates a nostalgic candy that evokes fond memories, making it perfect for gifts or simply indulging your sweet tooth. Plus, with its cheerful citrus flavor and the flexibility to customize it just the way you like, this homemade candy promises to be a show-stopper. Ready to dive into a world of vibrant flavors? Let’s get started!

Why Is Homemade Candy So Special?
Nostalgic Delight: Experience the joy of childhood with every chewy piece of this Classic Homemade Orange Candy.
Vibrant Citrus Flavor: The fresh orange juice and zest create a taste that’s delightful and refreshing, perfect for any occasion.
Customizable: Feel free to experiment with different citrus fruits or even colorful sugars to make it uniquely yours!
Easy Preparation: With simple steps, this recipe is accessible for both beginner and seasoned cooks. Enjoy making candy without the fuss!
Perfect for Gifting: Pack these vibrant treats in decorative bags for a thoughtful gift that will shine at any gathering—ideal alongside a light meal or herb tea.
Save Time: Homemade candy with a quick cooling time, making it an easy yet impressive treat for friends and family!
Try pairing it with a Chicken Caesar Sandwich for a delightful lunch or indulge in Chocolate Oat Cookies for a sweet triple treat!
Classic Homemade Orange Candy Ingredients
For the Candy Base
- Granulated Sugar – Essential for candy texture and sweetness; do not substitute with artificial sweeteners.
- Corn Syrup – Helps prevent crystallization, ensuring a smooth texture; honey or agave syrup can be alternatives but may change flavor and texture.
- Water – Dissolves sugar and helps create a syrup; use filtered water for the best taste.
- Unflavored Gelatin – Provides a chewy consistency; substitute with agar-agar for a vegan option (adjust amount as needed).
- Unsalted Butter – Adds richness and a glossy finish to the candy; you can use vegan butter for a dairy-free version.
For Flavoring
- Fresh Oranges – Core flavoring, and using fresh is key for optimal taste; avoid bottled juice as it lacks freshness.
- Orange Zest – Enhances the citrus flavor; make sure to use only the colored part of the peel to avoid bitterness.
These ingredients combine to create a vibrant and delightful Classic Homemade Orange Candy that is perfect for satisfying your sweet tooth or sharing with loved ones!
Step‑by‑Step Instructions for Classic Homemade Orange Candy
Step 1: Prepare the Oranges
Start by zesting fresh oranges, taking care to only use the colored part for the best flavor. Once you have a fragrant zest, juice the oranges until you have about 3/4 cup of juice. Set the zest and juice aside as these will form the vibrant flavor base for your Classic Homemade Orange Candy.
Step 2: Create the Syrup
In a medium saucepan over medium heat, combine the freshly squeezed orange juice, water, granulated sugar, and corn syrup. Stir the mixture gently until the sugar is completely dissolved. Bring it to a gentle simmer for around 10 minutes, stirring occasionally, until the mixture is slightly syrupy and glossy, signifying it’s ready for the next step.
Step 3: Bloom the Gelatin
In a small bowl, bloom the unflavored gelatin by sprinkling it over 1/4 cup of cold water. Allow it to sit for about 5 minutes until the gelatin absorbs the water and swells. Once bloomed, gently stir it into the simmering syrup, ensuring it mixes in fully and dissolves, creating a smooth consistency for your candy base.
Step 4: Add Butter and Zest
To the bubbling syrup mixture, add the unsalted butter and the reserved orange zest. Continue cooking the mixture for an additional 5 minutes, stirring frequently. Keep an eye on the texture: it should remain smooth, and the butter should fully melt, infusing the candy with a rich, glossy finish.
Step 5: Cool the Mixture
Once the syrup has reached a honey-like consistency, remove it from the heat. Allow the mixture to cool for 1-2 hours at room temperature, which enables it to thicken slightly. During this time, it will also develop the lovely citrus aroma that makes the Classic Homemade Orange Candy so inviting.
Step 6: Set the Candy
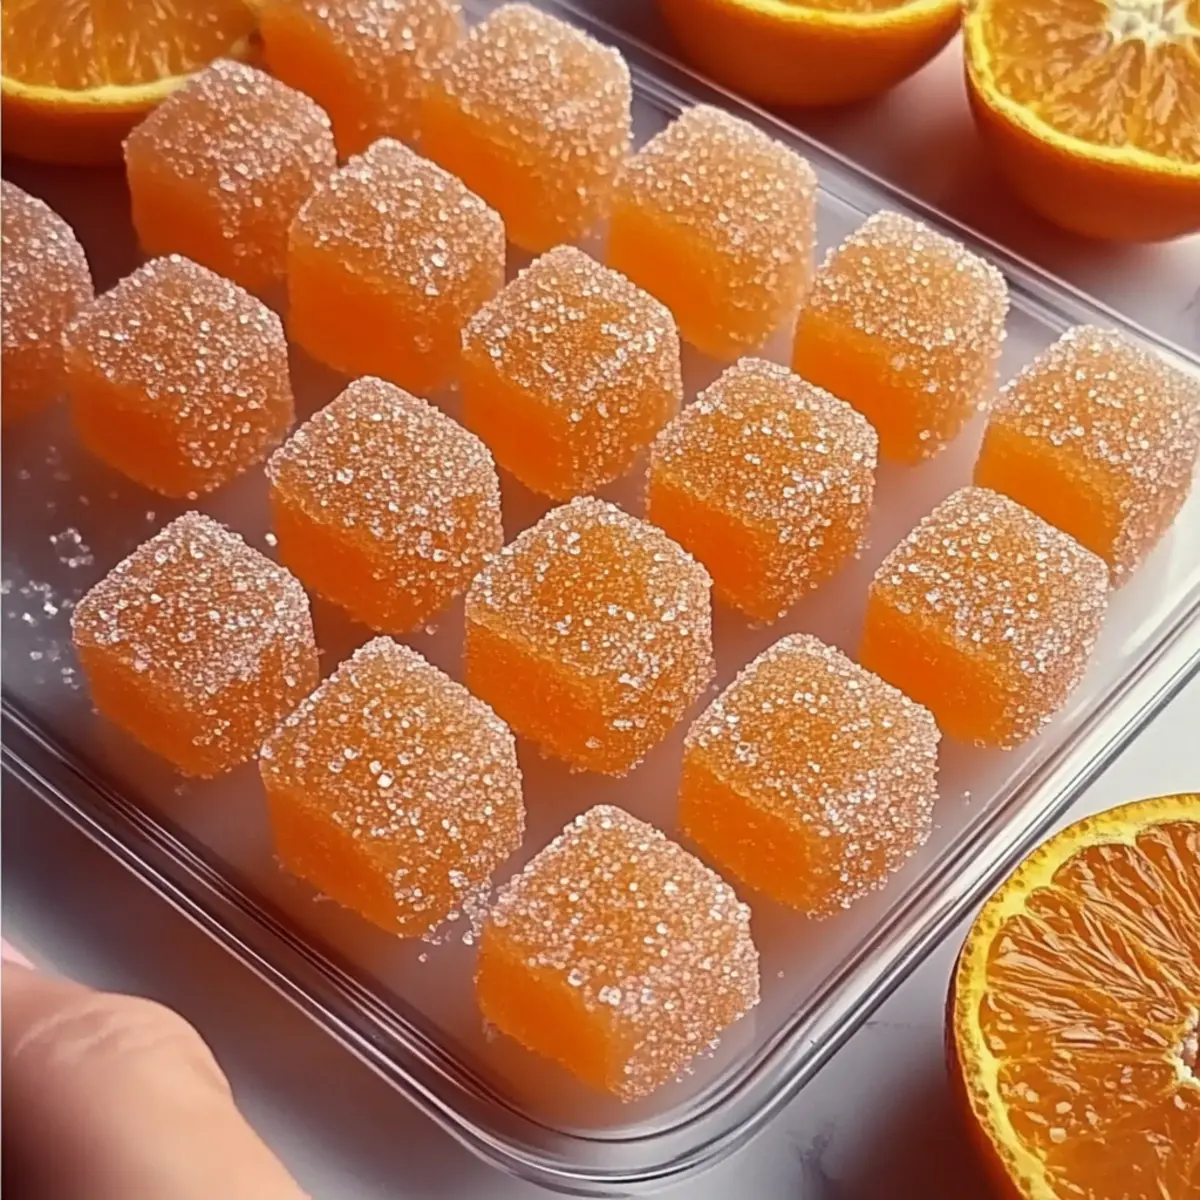
Prepare an 8×8-inch dish or silicone molds by lightly greasing them to prevent sticking. Carefully pour the cooled mixture into the dish or molds, spreading it evenly. Let it set at room temperature for another 1-2 hours before transferring it to the refrigerator, where it should chill for 4-6 hours, ideally overnight, to firm up completely.
Step 7: Cut and Serve
Once your Classic Homemade Orange Candy has set and is firm to the touch, it’s time for the final step. Remove it from the dish or molds, and cut it into bite-sized pieces. If desired, you can toss the candies in powdered sugar to prevent them from sticking together. Enjoy your delightful, chewy treats!

What to Serve with Classic Homemade Orange Candy
Elevate your snacking experience with delightful pairings that enhance the irresistible flavors of your vibrant treats.
- Creamy Yogurt Parfait: The tang of yogurt harmonizes beautifully with the sweet, citrusy candy, creating a refreshing dessert.
- Herbal Tea Blend: A warm cup of chamomile or mint tea complements the orange candy, offering a calming finish to your snack time.
- Fruit Salad Medley: A colorful mix of fruits like berries and melons adds a crunchy contrast, making for a bright, balanced dessert spread.
- Cheese Platter: Pair with creamy brie or tangy goat cheese for a sophisticated twist—this savory contrast elevates the sweetness of the candy.
Imagine indulging in the melt-in-your-mouth candy while sipping comforting tea or enjoying a cheerful fruit arrangement. This harmonious fusion creates a delightful experience that transports you back to sunlit afternoons, making every moment feel special!
- Chocolate Dipped Biscuits: The rich, smooth chocolate pairs perfectly, creating an indulgent treat that satisfies both sour and sweet cravings.
- Sparkling Lemonade: Crisp and fizzy, the refreshing notes of lemonade accent the citrus punch in your orange candy, enhancing its flavor profile.
- Vanilla Ice Cream: For an extravagant dessert, serve the candy atop a scoop of classic vanilla ice cream for a luscious fusion of flavors and textures.
Classic Homemade Orange Candy Variations
Feel free to explore these delightful twists on your Classic Homemade Orange Candy for a flavor adventure that captivates your taste buds!
-
Lemon Swap: Use fresh lemon juice instead of orange juice for a zesty, bright flavor that adds a refreshing twist.
-
Grapefruit Adventure: Incorporate grapefruit juice for a more tangy, slightly bitter profile that complements the sweetness of the sugar.
-
Herbal Essence: Add a hint of fresh mint or basil during cooking for an aromatic experience that brings a garden-fresh touch to your candy.
-
Spicy Kick: Incorporate a pinch of cayenne pepper to introduce a surprising heat that balances the sweetness beautifully. This unexpected pop of spice will tantalize your taste buds!
-
Sweet Packaging: Roll your finished candies in colorful sugar or edible glitter for a fun presentation, ideal for festivities or special occasions.
-
Fruit Medley: Combine different citrus juices like lime or tangerine to create a unique flavor combination that celebrates the joy of fruit.
-
Nutty Delight: Mix in finely chopped nuts or coconut flakes after cooking for a crunchy texture that brings satisfying bites to each piece.
-
Vanilla Infusion: Add a few drops of vanilla extract into the syrup for a warm, inviting flavor that enhances the overall taste. This classic addition creates a lovely harmony in the candy.
These variations can elevate your candy-making experience and provide a perfect opportunity to share delightful treats with family and friends. Try pairing these with a delicately flavored tea or alongside a fruit platter for the ultimate homemade candy enjoyment! If you’re in the mood for something savory, don’t forget to try it with a refreshing Chicken Caesar Sandwich or indulge your sweet tooth with Chocolate Oat Cookies for a perfect treat combination.
Expert Tips for Classic Homemade Orange Candy
- Fresh Ingredients Matter: Using fresh oranges instead of bottled juice ensures vibrant flavor. The zest is where the real citrus aroma hides!
- Watch for Consistency: Allow the syrup to thicken to a honey-like consistency for the perfect chewy texture. Don’t rush this step!
- Prevent Sticking: Lightly grease your molds or pans to avoid a sticky mess. No one wants to lose a piece of that delicious candy!
- Patience is Key: Be patient during the cooling process. A clear, glossy texture comes from letting the mixture set properly without rushing.
- Taste Test: Don’t hesitate to adjust sweetness by adding more sugar, but be careful not to overdo it! The balance enhances the classic homemade orange candy flavor.
How to Store and Freeze Classic Homemade Orange Candy
Room Temperature: Store the candy in an airtight container at cool room temperature for up to 1 week to maintain its delicious chewy texture.
Refrigerator: If you prefer a firmer texture, you can keep the candy in the fridge for up to 2 weeks. Just remember to keep it in an airtight container to avoid moisture.
Freezer: For longer storage, layer pieces between parchment paper in a single layer, then place in an airtight container. The candy can be frozen for up to 2 months.
Reheating: If the candy gets too cold or hard, allow it to sit at room temperature for a few minutes before enjoying. This will bring back its delightful chewiness and vibrant flavor!
Make Ahead Options
These Classic Homemade Orange Candy treats are perfect for meal prep enthusiasts! You can prepare the candy base (steps 1-5) up to 24 hours in advance. Simply follow the initial steps and allow the mixture to cool completely at room temperature before refrigerating it. Once chilled, pour the mixture into your greased dish or molds and let it set overnight for best results. When you’re ready to enjoy, just cut the firm candy into bite-sized pieces and toss them in powdered sugar to prevent sticking. This method not only saves you time but ensures your candies are just as delicious and fresh when it’s time to serve them.
Classic Homemade Orange Candy Recipe FAQs
How do I choose the best oranges for this recipe?
Absolutely! When selecting oranges, look for fruits that are firm and heavy for their size, which indicates juiciness. The skin should be smooth and bright, with no dark spots or blemishes. If possible, opt for organic oranges to get the best flavor without pesticides.
How should I store my homemade orange candy?
Store your Classic Homemade Orange Candy in an airtight container at cool room temperature for up to 1 week. If you prefer a chewier texture, the fridge will keep them fresh for up to 2 weeks. Just be sure to keep the container sealed to prevent moisture from affecting that delightful chewiness!
Can I freeze the candy for longer storage?
Very! To freeze your Classic Homemade Orange Candy, layer the pieces in a single layer separated by parchment paper within an airtight container. This allows for easier retrieval later, and you can freeze it for up to 2 months. When you want to enjoy the candy, let it sit at room temperature for a few minutes to regain that delightful chewy texture!
What should I do if my candy doesn’t set properly?
Don’t worry, this can happen! If your candy hasn’t set well, it’s often due to insufficient cooking time. For a second chance, reheat the mixture gently in a saucepan, ensuring it reaches the same honey-like consistency as before. Allow it to cool and set again, making sure you’re using a properly greased dish or molds.
Are there any dietary considerations I should be aware of?
Very much so! This recipe is vegetarian-friendly, especially when you use agar-agar instead of gelatin for a vegan option. If you’re making this candy for someone with allergies, be cautious with the unsalted butter; substitute it with vegan butter if needed. Always check the packaging of any ingredients to ensure they meet dietary restrictions.
Can I add other flavors or colors to this candy?
Absolutely! You can substitute lemon or grapefruit juice for a fresh twist. Additionally, adding extracts like vanilla or almond can create unique variations. For visual appeal, consider rolling the finished candies in colored sugar—it’s a fun way to customize your homemade treat!
Classic Homemade Orange Candy for a Sweet Nostalgic Treat
Ingredients
Equipment
Method
- Start by zesting fresh oranges, taking care to only use the colored part for the best flavor. Juice the oranges until you have about 3/4 cup of juice.
- In a medium saucepan over medium heat, combine the orange juice, water, sugar, and corn syrup. Stir until sugar dissolves. Bring to a gentle simmer for around 10 minutes.
- In a small bowl, bloom the gelatin by sprinkling it over 1/4 cup of cold water. Let it sit for about 5 minutes. Stir into the simmering syrup until fully dissolved.
- Add the butter and reserved orange zest to the syrup. Cook for an additional 5 minutes, stirring frequently until the mixture remains smooth.
- Remove from heat and cool for 1-2 hours at room temperature.
- Prepare an 8x8-inch dish or silicone molds by lightly greasing them. Pour the cooled mixture into the dish or molds and let it set for 1-2 hours before refrigerating for 4-6 hours.
- Once set, cut the candy into bite-sized pieces. Optionally toss in powdered sugar to prevent sticking.
Leave a Reply